Have you ever thought about how words appeared on a page before computers and desktop printers were available to the masses? I have always been interested in the beauty of typopgraphy and printing and I have always wanted to see how moveable type worked. In the last few years SBS Television has screened two documentaries about type called Typeface and Helvetica. Typeface is about the Hamiton Type foundary (now also a working museum) and Helvetica is a documentary about the creation and explosion of the font Helvetica into all facets of our society. ( I recently bought both documentaries from Amazon.com).
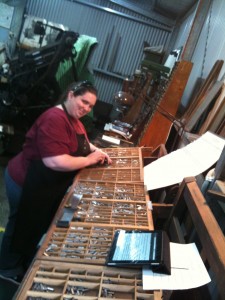
Very recently I experienced setting and printing type manually at the Penrith Museum of Printing. The museum is an amazing hands on place where as soon as you walk in you notice the smell of the ink, hear real working printing machines ande you can actually open the drawers and touch the type (I pulled out the Helvetica 24pt drawer). Not only did I get to set paragraphs of type, the workshop participants were given a demonstration of a linotype machine in action which not only sets full lines of type but puts all the individual letters back in the right places in the type drawers.
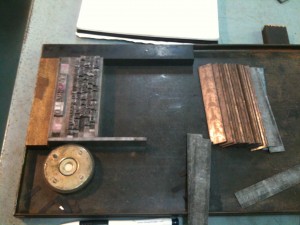
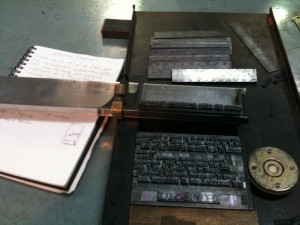
During the workshop we got to put every single letter and spaces between words using a printers setting stick and then transfer the lines to a galley (metal tray). Once the type was in the galley we placed spaces between lines using specific thicknesses of lead (where the term leading comes from). The main spacing in my two paragraphs was 12pt leads except between the two paragraphs and above my name where I used a 6pt lead.
The last stage was to lock the set type into a printing chase (heavy metal frame) using furniture (metal and wooden bars to fill in the space) and quoins (pronounced coins- expanding clamps to lock the work to the chase) and see what we had written when it was printed on a real printing press. See the videos below to see how type was locked into the chase.
It took me 4 hours to set my 2 paragraphs of type as we had to learn how to center type, left justify type and full justify type- which is the most challenging part. Workshop participants are encouraged to bring their own words to set and print or you can use the paragraphs on typography they give us. I was working with 36pt for the heading, 18pt for the body and the very fiddly 12pt type to set my name. The type we were working with is lead based but as long as we followed good hygiene practice by thoroughly washing our hands after touching the type- there is minimal risk.
The museum staff are all experienced typesetters and printers who retired from newspaper printworks or printers. They are full of great stories about how the printing industry was before the arrival of computers and workshop numbers are kept really small so that you can get very specialised assistance at every stage during the workshop.
I went home not only with my prints but I was also able to buy one of their surplus typecases (the wooden trays to keep type in) and guess what! The typecase was from Hamilton Type foundary- the factory/ museum I mentioned at the begining! The case needs to be cleaned up but since I bought a box of loose type a few weeks ago on ebay- I can sort it out into the case and use it with my computing class when we learn about desktop publishing.
In a few weeks I will be doing the museum’s poster printing workshop using their collection of wooden type. Stay tuned for details but here are some videos from the workshop and a trailer for the Typeface documentary…


