Going beyond parametric 3D modelling

I have been 3D modelling and 3D printing for many years, but the main program I use, Autodesk Inventor cannot model organic shapes. Inventor is a parametric modelling software so every shape is very precise which makes it fantastic for mechanical puppet parts. However, for the past three years I have wanted to learn how to digitally sculpt more organic, natural shapes such as horns, eyes, noses that are not perfectly symmetrical.

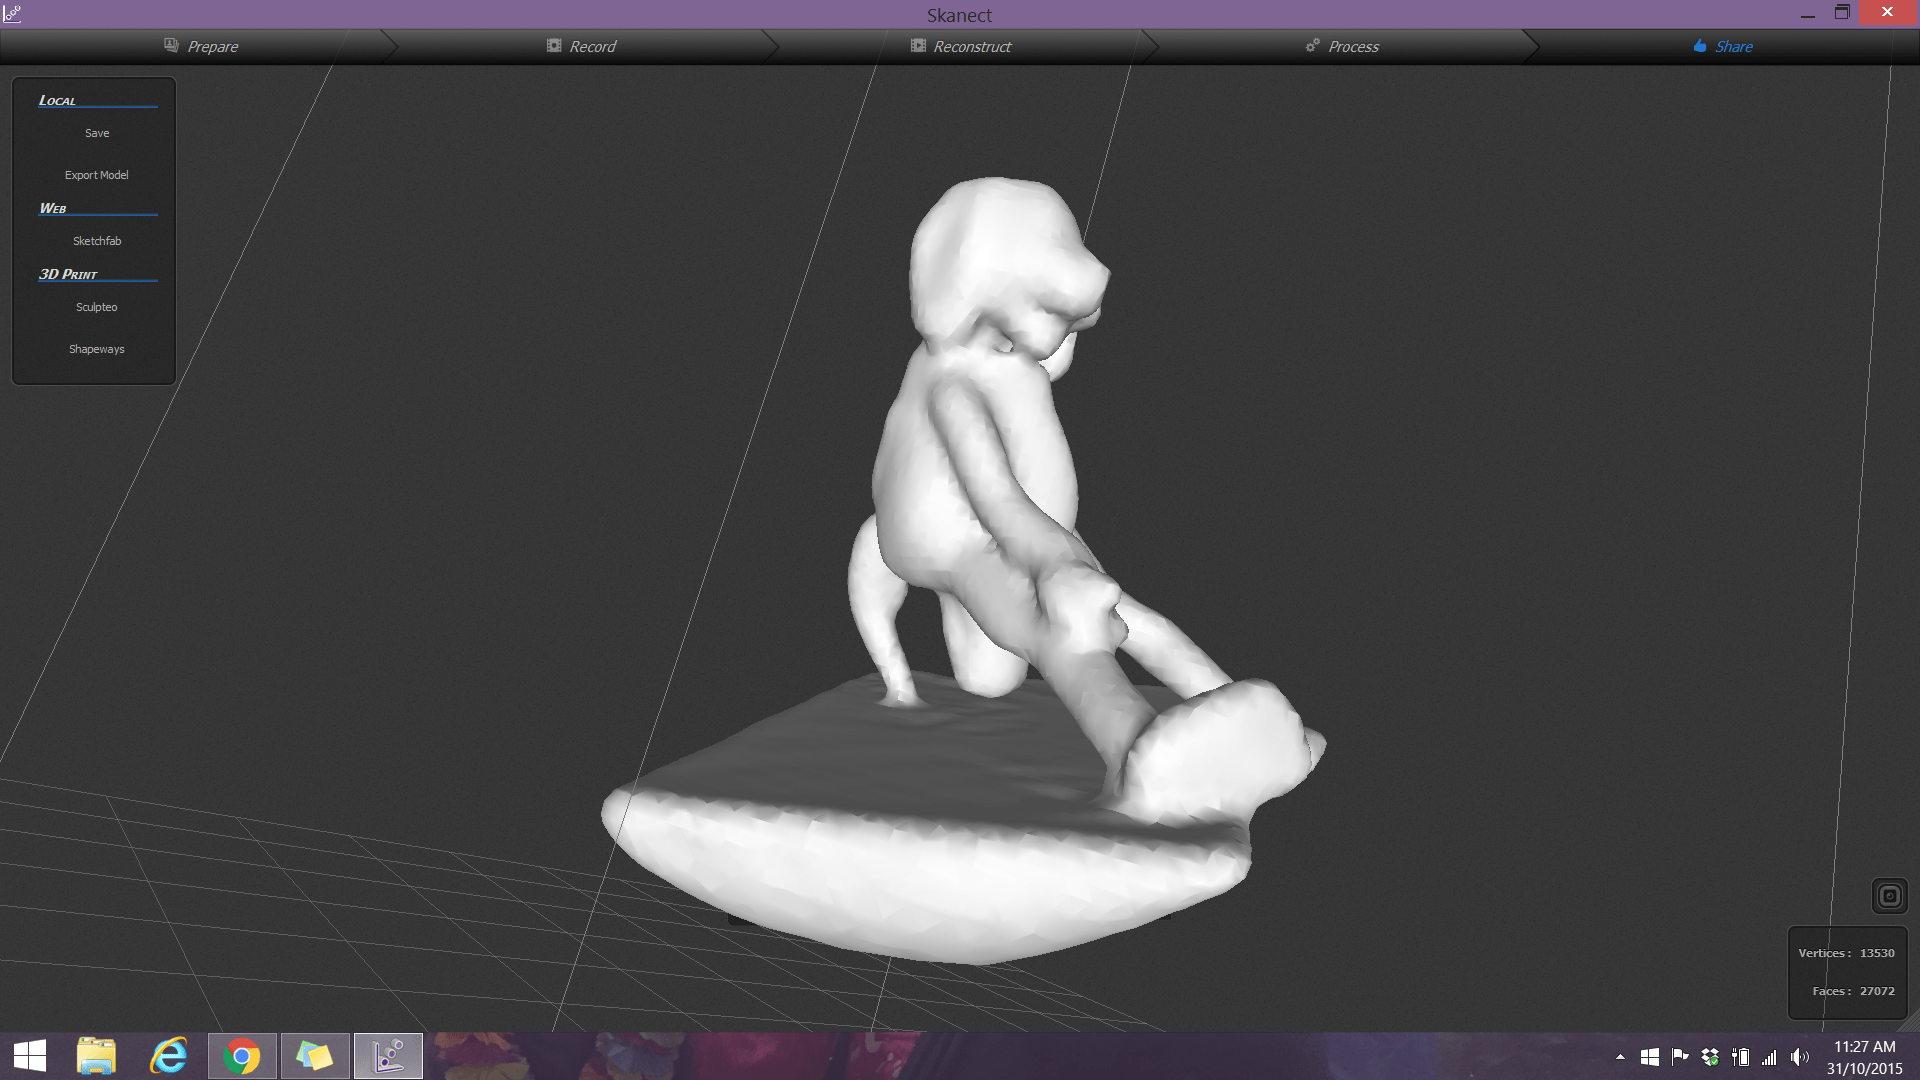
Part of my research has led me to 3D scanning and photogrammetry. Initally, back in 2015 I got to try a handheld 3D scanner that was connected to my laptop by cords called Skanect. The challenge was that there was limited software to edit the scan, and the software that came with the scanner was very difficult to manage.

First attempt at 3D scanning of one of my puppets using a handheld 3D scanner.

In early 2023, I was again exploring new tools for photogrammetry which is a form of 3D scanning using lots of individual photos, and a prop making channel I follow, gave a demonstration of a mobile app they used to make a space helmet. The demonstration they gave led me to trying the Polycam app for iPhone.

I tried the app and the paid version worked great for a small puppet part that I needed. The trick with this app is that you need to walk around the object, so it is important to place the item being scanned on a stool or stand that you can walk around.

My next step was to find a software package that I could edit the scan in. In 2021, I tried Z Brush, but I found that software package was very expensive and difficult to navigate as a first time user. It is also a software package that was not available at school- so if I learned the software, I could not share it with students. Since I have access to the Autodesk suite of products, fast forward to 2022, I started to explore Autodesk 3DS Max. Working through the training from Linkedin Learning, my experience was this software was more focused on building environments rather than characters.

Now in 2023, I have just attended a workshop called Digtal Tools for Analogue Makers taught by Philip Millar (@puppetryschool) at the Melbourne Festival of Puppetry on July 1, 2023. In the pre-workshop reading, Philip not only recommended Polycam as one of many 3D scanning tools, but also Blender as the modeling software. Blender is a free, open source program that is very similar to ZBrush in it’s capabilities, and it is available for the computers at school! I found an incredible YouTube video on how to use Blender with a drawing tablet to help me learn the program very quickly.

  • Early stage sculpting of a UV sphere in Blender

One of the most challenging steps was removing the background surface from the scan result without damaging the scanned part I required. Each polygon had to be individually deleted.

The resulting mesh was only the surface of the puppet nose- there was no thickness that would support a 3D print. I had to learn how to add the back by closing the mesh, then began a process of refining the mesh and smoothing the polygons. I completed the process by adding a rectangular prism to the mesh and aligning it to flatten the back. It meant I had to install an add on called Booltools.

I have curated a playlist of YouTube videos  and websites I found helpful in the past week as I have been trying ideas to achieve my goals.

I really struggled with orienting the mesh so that I could use the grab and smooth tools symmetrically. It is something I still have to learn more about.  In all, I am really excited by what I can now do with Blender.

Making the Alien Puppet- Time to start construction

Making the Alien Puppet- Time to start construction

Now that the fleece is all marked out, it’s time to start construction of the foam understructure of the puppet. I tried to follow the recommended foam layout, but I discovered that the recommended layout omitted 2 of the 4 foam hands, and if I used the recommended layout, all the foam pieces wouldn’t fit. I changed the layout and managed to fit all the pattern pieces on the foam provided.

top view of a sheet of foam with pattern pieces traced on it.
Working out the pattern rearrangement to fit all the pattern pieces.

My next process was to make the rigid mouth plate that goes into the puppet. For some unknown reason, my bandsaw is not working, so instead of using the provided plywood, I decided to switch to Sintra plastic sheets which is what I normally use for puppet mouth plates as Sintra can be cut with a blade.

It was when I started reading the instruction booklet for making the mouth plate for this kit, that I came to the conclusion that this kit is not for first time puppet makers. The instructions were vague on the relationship between the size and shape of the velour pattern, and the gap between the mouth plate pieces. The size of the velour pattern must be the same as the length of the mouth plate, but these are not covered in detail in the instructions.

The process I followed was-

  1. Lay the plates on top of the velour pattern piece to find where the gap is.
  2. Lay a piece of gaffer tape on top of the velour pattern piece sticky side up where that gap will be
  3. Lay each piece of the plate on top aligning the edges with the pattern piece and pressing it down onto the gaffer tape.
  4. Flip the assembly over and attach the second piece of gaffer tape ensuring that the tape wraps around the edges of the mouthplate gap.

Using this method allowed me to get the gap proportions right for this pattern since the dimensions are not outlined in the instructions.

Once the plate was assembled, I used my cordless Dremel to round off the top edges of the finger grips. I then sanded the mouth plates where the grips would be located and used contact cement to glue the grips down.

  • Plastic mouth plate pieces with gaffer tape around the pencil
    Materials for making the mouth plate. Lining pattern, plastic mouth plate shapes and gaffer tape.

Katherine

Making the Alien puppet- is there enough fabric?

Making the Alien puppet- is there enough fabric?

When I filmed the unboxing, I was concerned at the amount of Nylafleece™ that was sent with the kit. The piece of fleece was 1 yard x 1 yard (90x90cm). Given that I wanted to use the same fleece to make features such as ears, eyestalks, as well as allowing for the possibility of mistakes in cutting the pattern, it didn’t feel like enough fabric at first glance.

Even laying the pattern out according to the layout directions in the instruction booklet- the pattern got too close to the machine edge. I was able to adjust the layout so that I was comfortable with the distance of the pattern pieces from the machine edge, but there was very little fleece leftover for all the add ons I want to do with this character.

Blue nylafleece laid out with a pattern drawn on it.
Nylafleece with an attempt at laying out the pattern drawn on it.


After preparing the fleece pattern, I also took the opportunity to prepare the arm sleeve using the provided stretch satin, as well as the rod pockets in duck cloth. I normally use a dance fabric like lycra because it is more stretchy than the provided satin, and it slides onto the arm with ease. Laying out, and sewing these pieces was straight forward, but as soon as I cut the satin out, it started to fray really badly around the edges. I decided to oversew the raw edge using a zig zag stitch even though this was not in the instructions. The arm sleeve and rod pockets are the only parts of this puppet I intend to sew on the sewing machine. The rest of the puppet will be handsewn.

2 bean shaped rod pockets beside a close up view of a puppeteers arm sleeve
Oversewn arm sleeve and rod pockets.

Building my Alien puppet- designing the character

My design for this puppet is to build an Alien character as I don’t  have an alien in my puppet collection, plus I was trying to work out what to do with Ocean blue fleece. I also want to challenge myself with this puppet, by incorporating an eye mechanism that I have admired for years, as well as try to incorporate some foam patterning to build up the base shape.

In terms of character, this yet un-named alien is friendly, and is obsessed with things that smell nice like fresh baked cookies, flowers, perfume. On it’s planet- smell is the basis of their economy. So this character is looking for nice smells to take back to it’s planet for trade.

The mechanism is a closing eye- and to add to the challenge, I want to put it up on stalks above the head! I figured out the layers of the mechanism while watching the character of Polly in Muppets Treasure Island.  I am still trying to figure out if the trigger for the eye mech will be inside the head, or down on the arm rod for the puppet, but that is a decision for down the road.

Pencil sketch showing front and side views of my alien puppet
My design for the Alien puppet using the Hubbub puppet pattern

The rising trend of puppet kits- Opening the Monkey Boys Kit

The Coronavirus (Covid-19) Pandemic has encouraged everyone to find alternative ways to be creative. This is no different in the puppet world. Since it is not currently safe to hold a workshop to teach how to build a puppet, there is a rising trend of well known puppet-makers teaming with suppliers to send out puppet making kits that contain everything someone needs to make a foam hand puppet. During November 2020, two US based puppet company’s released puppet kits- Puppet Pelts, and Monkey Boys Productions.

The Puppet Pelts kit- known as the Puppet Makers Workshop contains everything required to build a hand and rod puppet including contact cement, which meant it cannot be shipped overseas. Here is a picture from their website of what is in the box-

Listing of the supplies in the box

List of supplies in the Puppet Pelts kit

The other company is Monkey Boys Productions based in Pennsylvania USA. They released 4 kits called Flick, Splat, Hubbub and Yawp. The difference between the two kits was that the Monkey Boys kits contain everything except 6 items- scissors, glue, fabric marker, chalk, sewing machine, and wire for arm rods. This meant that the kit could be shipped to me in Australia. Another difference is that the Monkey Boys kit does not come with a 5 session video workshop, but it does come with an instruction book, and video tutorials where required.

You can see and order the kits from the Monkey Boys online store

I ordered the Hubbub kit because I liked the interesting head shape, and as a puppet making teacher, I am interested in how puppet kits are put together so that people who don’t have access to the best quality supplies, can access them. I filmed an unboxing of the kit to record what you get in the Monkey Boys Pro Puppet Kit known as Hubbub.

I intend to share this puppet making journey here on my blog as I turn the Monkey Boys Kit into an Alien character.

Katherine

Going Beyond the Sock 2019 Day 10-12

Day 10, Monday 10 June 2019

Today was a really special day. A friend of mine who is a cast member of the Jim Henson Company’s show Puppet Up, invited me to join a tour he was running of the Jim Henson Company lot in LA. The main courtyard is very relaxing and beautiful. It has an air of an European village with outdoor tables, planter boxes of flowers, and close buildings. The studio was built by Charlie Chaplin in 1918, and there are references to Charlie Chaplin everywhere, including the statue of Kermit the Frog standing on the top of the gate dressed as Charlie Chaplin’s signature character- the Little Tramp.

We visited the reception area where I got to hold a real Emmy award, the Barn where the Creature Shop used to be housed, the Henson Screening room, and the Charlie Chaplin Soundstage where the tour group was given a demonstration of monitor puppetry. After the tour group left, I was given the opportunity to have a go at the monitor puppetry on the soundstage, using a REAL Henson made puppet! I am very grateful to my friend for allowing me to tag along on the tour and to have a go at the monitor puppetry!

  • With Lucy Green at the Company bench

Day 11, Tuesday 11 June 2019

Today’s adventure was taking the Warner Bros Studio Deluxe tour. Starting at 10am, the tour started in the Deluxe screening room which had very nice pastries and beverages for the guests. Arranged next to the wall were costumes from the main characters of the TV show Friends. After a brief video about the studio, and meeting our tour guide Thom, we boarded our own tram and started driving through the studio starting with the backlot jungle area. Highlight for me in this area was the now empty lagoon as it was the location where Kermit the Frog sang the Rainbow Connection at the beginning of the original Muppet Movie 40 years ago.

After moving from the jungle area, the tour moved to the Midwest Street and again, it was a place that had special significance for me as a puppet maker and fan of the Muppets. It was the shooting location for the song Life’s a Happy Song from the movie The Muppets (2011).

  • Lagoon where Rainbow Connection was filmed in the original Muppet Movie.

One of my favourite Warner Bros TV shows was the West Wing and it was filmed at the LA Warner Bros Studio! I got to see Stage 29 where the main set was located, but during the tour of the property warehouse, I got to sit at the President’s desk from the show, as well as find various pieces of set decorating and props from the show!

  • Sitting at the President's desk from West Wing

I highly recommend the Warner Bros Deluxe tour- you get to see much more than the regular tour, as well as touch things, go inside more buildings, and there is the delicious lunch in the Warner Bros Commissary Fine Dining Room. I do recommend bringing small snacks for the morning and afternoon break as there is no opportunity to purchase snacks while on the tour.

Day 12- Wednesday 12 June 2019

Today was my travel day home to Australia. Fortunately, the wifi in the hotel meant I could wait in the Lobby until the taxi picked me up in the late afternoon to take me to the airport. After treating myself to new noise cancelling headphones, I enjoyed a light meal in the One World Alliance Lounge. Once I boarded my QANTAS Business Class flight, I fell asleep virtually immediately, and slept for about 6 hours straight.

It has been a magical holiday- I am so grateful to my puppet friends in the USA for the kindness and generosity they shared with me that made it magical.

Going Beyond the Sock in 2019 Day 7-9

Day 7, Friday June 7 2019

The building session was once again the first session of the day. Our major goal was to completely finish assembling all the fur sections and ideally have our puppets sitting on stands. Once I had the fur sections ready for machine sewing, the group moved onto making the hand assemblies, cutting out the stiffened felt ear shapes, and selecting the fleece for the eyelids. I chose a cream/ tan fleece for my dog’s eyelids as Australian Cattle dogs typically have a tan coloured spot on their face right above their eyes. I did acheive my goal of graduating to a puppet stand before the end of the building session.

Puppet dog ready for grooming tomorrow!
One assembled puppet dog ready for grooming on it’s stand.

Highlight of the morning session was during the break. My performing teacher found me in the corridor, and showed me that the interview we had both given the reporter the day before, had been published online! It was really exciting to appear in the same article as my dear teacher, and I had been waiting the previous day for the newspaper photographer to come and take my picture, but the photographer had taken a lovely picture of me while I was performing with my friend from North Queensland, Ros Campbell from Wild Puppets. Here is the article.

The physical newspaper that my interview appeared in.

The performing session for the advanced group was really interesting as the group got to experiment with using intense emotions and the whole depth of the frame. This was followed by a very challenging activity of creating our own scene where the audience has to work out who, what, when, where, why from what the characters are performing on the screen. My highlight of the session was being able to return to an exercise I had last tried in 2015- working with blank scripts. I didn’t quite find the character development I was looking for where after multiple run throughs with feedback, I had gotten to the point where I was a character, but it was wonderful to come back to this exercise after 4 years.

The evening was spent working with my performance partner Ros working on the script for the big show, and finishing making the ears. I wish I had brought my bag of sewing cottons with me from Australia. It was tricky catching up on homework, without sufficient supplies back at the hotel.

Day 8, Saturday June 8 2019

Today is the last day of Beyond the Sock 2019. It is also known as mega Saturday as the puppets have to be finished, performances honed, and the whole thing ends with the big show that night. My goal for the day was to have my puppet finished by lunchtime so I could use it in the afternoon studio session. The big excitement of the whole week was learning how to trim furry puppets using a device called a Flowbee. The Flowbee is a device connected to a vacuum cleaner that trims hair and fur to a consistent length. The vacuum helps manage the trimmings. I have heard about the use of Flowbee’s in puppet making for many years, but I had never used one myself personally.

The rest of the session was a sprint to finish all parts of the puppet. I still had to add the ears, the arms, the tongue, add the eyelids, eyeliner and pupils of the eyes, and then the trickiest part, installing the eyes on the puppet so that the character appears. I did achieve my goal, my puppet dog Jill, was the first one out of the build room, and being performed with that afternoon.

The performance session was time to work on rehearsing the sketches for that night, as well as continuing to perform and playback the 5 minute scenes we had been practising all week. Playback and feedback is always the most anxiety inducing part of the sessions for me. I can see all my mistakes, and even though the feedback is always given kindly, I always feel uncomfortable. The unfortunate part about playback this year, was that we never really got to go back and redo the scene to implement the notes and see if there was any improvement.

Every year, at the end of the big show, is the whole group performance. This year, our song was an adaption of a popular song that was rewritten to focus on different kinds of dogs. Various attendees got to have a line in the song, and the whole group joined in with the chorus. What was new for me, was that the whole group was brought together in the morning to pre-record the vocals. This meant that the advanced group lost 30 minutes of build time. Prerecording the song, did take some of the stress out of the final night, all we had to remember was the choreography, even though there was some confusion as to the number of bounces and right lefts. The performance night was fun as always. Most attendees had a song, poem, or spoken word piece. I got to perform with fellow Australian Ros Campbell on her own piece about translating Aussie Slang into a form of words that the Americans could understand.

  • Inserting the doll joint backings into the arms.

Day 9, Sunday June 9 2019

Today was my travel day from Texas to Los Angeles. The plane was amazing! For the first time in my life, I got to turn left as I boarded the plane, instead of turning right. The new American Airlines plane Business class was superb! It was almost like having my own suite! So many cubby holes to store things, a giant screen to watch things on, couldn’t see another passenger! It was like a dream!

Business class on American Airlines newest planes


Going Beyond the Sock in 2019 Day 4-6

Day 4, Tuesday June 4 2019

Today was the first day of the Beyond the Sock course. The day started with a briefing and a tour of the University of North Texas Radio, TV, Film and Performing Arts Building. We got to see the set in the TV studio, and it 2 years ago, the set told me instantly what the puppet was, but the strange purple and blue tones did not help with the guessing game of what is the puppet we are making?

After the tour, we went to lunch at our favourite BTS lunch spot- Crooked Crust.

BTS group lunch at Crooked Crust

After lunch, back at the design studio, all was revealed- the 2019 BTS puppets was going to be Dogs! We had a session on what makes a successful character. It is important to consider that can the character be read by just looking at the puppet. We also had a discussion on successful character design vs marketable character design.

Design sketch of Jill the Australian Cattle Dog

Next came the exciting part, designing my character. Each attendee had the opportunity to take a lucky dip and select a card with a letter on it. That was our main fur colour. After some trading with other attendees, I managed to get a fur that inspired my character design- an Australian Cattle Dog. The rest of the afternoon was dedicated to cutting out the cardstock puppet pattern, and refining our designs.

A Friend in Need 1903

While we were working, the mystery of the set design was explained. It was a representation of the famous painting “A Friend in Need” 1903 by American artist C.M. Collidge. Over the next few days, set dressing will be added to complete the picture.

Day 5, Wednesday June 5 2019

The attendee group was divided in two first thing in the morning. For the first time, the groups were divided by experience- a group of first time attendees, and I was placed in the multiple time attendee group. The first time attendees went across to the student union for their first performance lesson, and the experienced group went to puppet building first. The first step was to cut out the fur for the paws so that they could be sewn together by the sewing assistants. Once the paws were taken away, the next step was to cut the foam of the head. In building the foam head, there was a unusual twisting motion that had to happen to allow the muzzle to sit correctly to the head.

  • Ingredients to make a dog puppets.

After lunch, the two groups swapped locations. The advanced group went up to the student union for the first performance workshop. It was a wonderful experience for me, because after 3 previous attempts at Beyond the Sock, many of the elementary puppetry moves came back to me naturally! I was given the feedback that my skills were solid, especially walking onto camera, talking and walking off. I am still finding here/ there exercise tricky, but we were also given new exercises to start extending our skillset.

Day 6, Thursday June 6 2019

As soon as we arrived at the university, the advanced group went straight to the building room to start work on cutting out all the separate sections of fur. The head of my puppet was made up of 16 separate pieces. I spent most of the morning session sewing the pieces together. During the session, a reporter from the local paper came through the room with the director of the program. The reporter asked me questions about my experience over my four years at Beyond the Sock and how I have used the experience in my puppetry and teaching practice. The interview did slow my work down, and I had a particularly challenging build with the sheer number of fur pieces I had to put together, but I enjoyed talking about my work with the reporter.

  • 3D printed mouth plate grip designed by Project Puppet.

In the afternoon performing session, the advanced group had the opportunity to learn how to puppeteer live hand puppets, and the concept of performing a right hand for a main puppeteer. I had the good fortune to right hand for my teacher. The exercise involved passing a roll of tape between each of the three characters. It was very challenging because I could not see a monitor, and my teacher is significantly taller than me. Many of the people in the advanced group, including myself all pulled up sore in the upper arm after the right handing exercise.

We had a casual get together in the hotel that night after dinner. I spent the evening sewing more of the pieces of the head fur together so that I could catch up to the rest of the group with my work.


Going Beyond the Sock in 2019 Day 1-3

Well, once again the puppets and I are travelling to the USA to attend Beyond the Sock Puppetry workshop in Texas USA, but first, we are making a little stop in Atlanta, Georgia. We left Sydney on Friday, May 31 on an Airbus A380. I travelled in QANTAS Business Class, and the puppets had their own party down in the hold just like Kermit, Fozzie and Gonzo in the Great Muppet Caper movie.

Muppets in the hold of the plane back to USA in the Great Muppet Caper

Day 1- Saturday, June 1, 2019

I spent today at the Center for Puppetry Arts in Atlanta USA. Since the Center was between puppet shows in their theatres, the Center was holding a Jim Henson Fantasy Film weekend focusing on the Dark Crystal (1982), and Labyrinth (1986). My day started at the Make a Puppet table, where I got to make a Fizgig paper hand puppet, followed by a Dark Crystal Shard hunt around the Dark Crystal exhibition and atrium, a tour of the Jim Henson collection permanent exhibition, and assisting with a Labyrinth jigsaw puzzle.

  • Lucy and Miss Hannaford outside the Centre for Puppetry Arts

Puppet highlights included seeing Topthorn- the black horse puppet from Warhorse. It was the closest I have ever gotten to the horse puppets.

In the evening, I attended a workshop called Creature Features with Professor Mark from Cartoonyville. we learnt about different kinds of materials that can be used for puppet eyes, where interesting puppet teeth can be found.

Day 2- Sunday, June 2, 2019

Today I felt very tired with the jet lag, so I spent the morning resting. In the afternoon, I had the opportunity to visit one of my puppetry teachers BJ Guyer. I have been learning with him through his classes with the Stan Winston School of Character Arts since 2014. It was so special to sit with him and talk about puppets for a few hours.

Day 3- Monday, June 3, 2019

Very early start today- had to be at the airport for my flight to Texas at 6am, so it was necessary to get up at 3am. The best thing about where I stay in Atlanta Midtown is that it is only 2 blocks from the MARTA train to the airport. The flight left on time, and arrived early in Dallas Fort Worth! I met with my good friend Pam who is a building assistant and Beyond the Sock, and we chatted while we waited for another attendee to arrive, so we could travel to the hotel together.

Later in the day, I went with a group of attendees on a shopping expedition to the local craft stores, which are within 10 minutes walk of the hotel. I was even able to purchase a book I have been waiting a long time for- Adam Savage’s “Every tool’s a Hammer”. Tomorrow, Beyond the Sock begins…

Adventures in STEM- making robotic progress with Ardunio

Arduino is not only a fabulous circuit board, but it is also it’s own language with its own grammar and syntax rules. Using the Arduino basics course from Stan Winston School of Character Arts, I was able to program my Arduino Uno board to do some very simple functions.

Such as:

Programming a buzzer to make sound,

https://www.instagram.com/p/Bc2wpS1DkmI/

Programming a servo to move,

https://www.instagram.com/p/Bc2zdigDI8r/

Making my first code!

https://www.instagram.com/p/Bc5f4qmjA_9/

Which has all lead towards me assembling my first actual robot!

https://www.facebook.com/katherine.hannaford.9/videos/817606211744671/

I am calling my robot Rosie after the robot in the Jetsons. There are not enough female robots in popular culture and my long term goal is to eventually have Rosie talking like Rosie from the Jetsons! My Rosie is a 2 wheel drive platform from Jaycar, with an ultra-sonic sensor on the front so that she avoids obstacles. Assembling just the platform was tricky as the instructions were hard to find and not linked in the assembly instructions for the whole robot!

The first modification I want to make to the robot is to add a switch so I can turn her on or off. At the moment, I can only turn her off my removing a battery from the battery holder. I also want to experiment with the robot on different surfaces. I was noticing during the first drive that, the wheels got stuck on the thick nylon carpet in my house. I want to compare how Rosie runs on low pile carpet, tiles, and concrete.

What I haven’t been able to achieve yet is to take the Uno board and several other components and write custom code for it yet. So far, I am relying on code that is available in the Arduino Library or on project sheets. My next experiment for Rosie is to add a line trace module to Rosie’s base chassis and see if she can follow a line. My next experiment in coding is to see if I can combine a button press input to a potentiometer and make a joystick work.

Miss H


Skip to toolbar