Making the Alien Puppet- Time to start construction

Making the Alien Puppet- Time to start construction

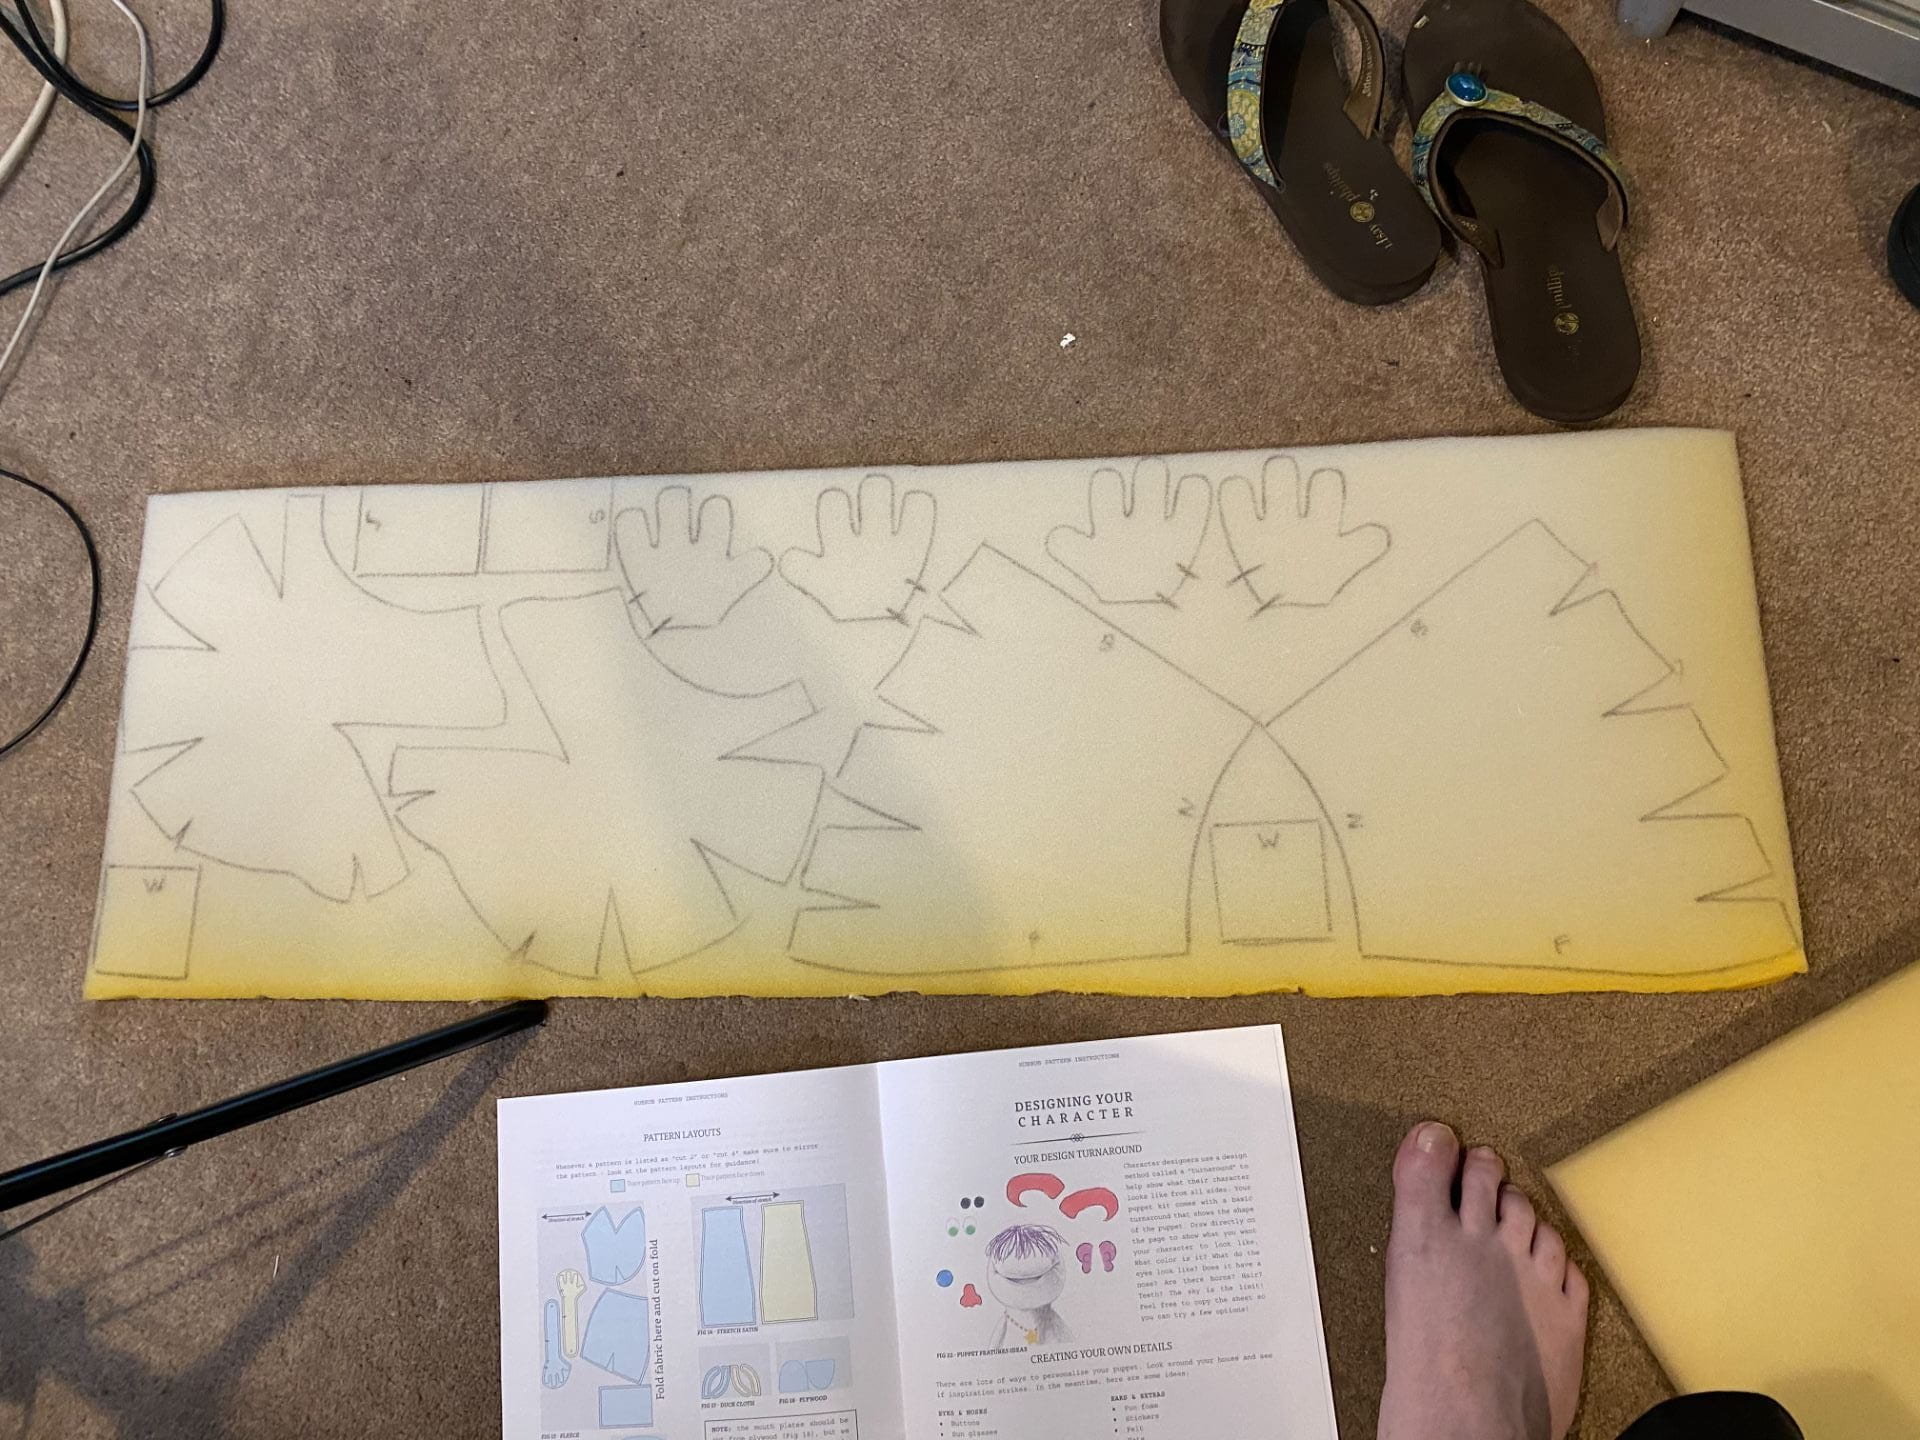
Now that the fleece is all marked out, it’s time to start construction of the foam understructure of the puppet. I tried to follow the recommended foam layout, but I discovered that the recommended layout omitted 2 of the 4 foam hands, and if I used the recommended layout, all the foam pieces wouldn’t fit. I changed the layout and managed to fit all the pattern pieces on the foam provided.

top view of a sheet of foam with pattern pieces traced on it.
Working out the pattern rearrangement to fit all the pattern pieces.

My next process was to make the rigid mouth plate that goes into the puppet. For some unknown reason, my bandsaw is not working, so instead of using the provided plywood, I decided to switch to Sintra plastic sheets which is what I normally use for puppet mouth plates as Sintra can be cut with a blade.

It was when I started reading the instruction booklet for making the mouth plate for this kit, that I came to the conclusion that this kit is not for first time puppet makers. The instructions were vague on the relationship between the size and shape of the velour pattern, and the gap between the mouth plate pieces. The size of the velour pattern must be the same as the length of the mouth plate, but these are not covered in detail in the instructions.

The process I followed was-

  1. Lay the plates on top of the velour pattern piece to find where the gap is.
  2. Lay a piece of gaffer tape on top of the velour pattern piece sticky side up where that gap will be
  3. Lay each piece of the plate on top aligning the edges with the pattern piece and pressing it down onto the gaffer tape.
  4. Flip the assembly over and attach the second piece of gaffer tape ensuring that the tape wraps around the edges of the mouthplate gap.

Using this method allowed me to get the gap proportions right for this pattern since the dimensions are not outlined in the instructions.

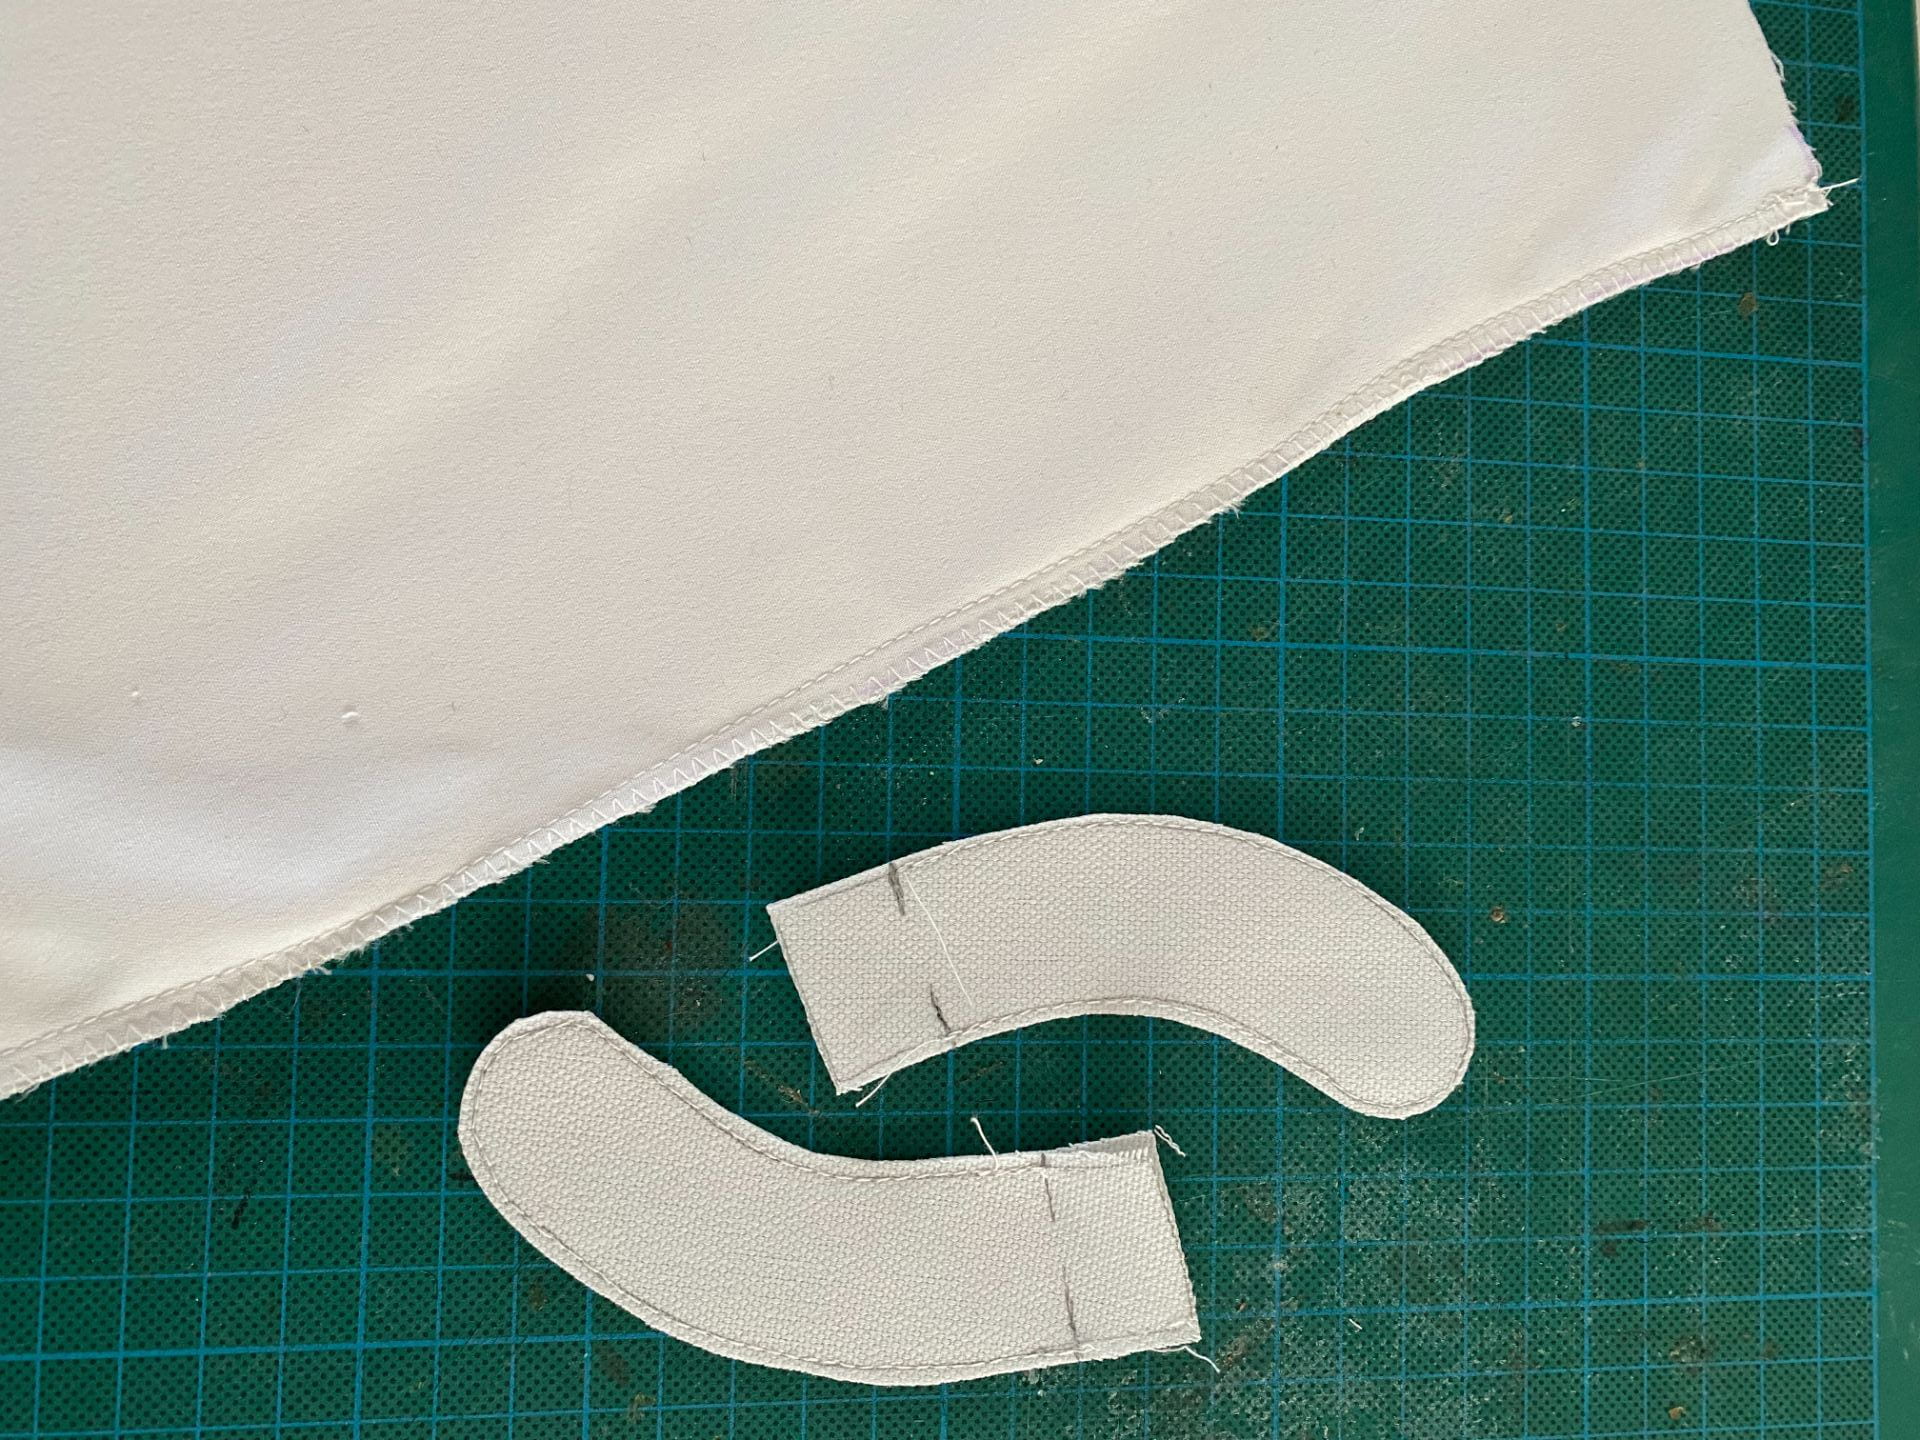
Once the plate was assembled, I used my cordless Dremel to round off the top edges of the finger grips. I then sanded the mouth plates where the grips would be located and used contact cement to glue the grips down.

  • Plastic mouth plate pieces with gaffer tape around the pencil
    Materials for making the mouth plate. Lining pattern, plastic mouth plate shapes and gaffer tape.

Katherine

Making the Alien puppet- is there enough fabric?

Making the Alien puppet- is there enough fabric?

When I filmed the unboxing, I was concerned at the amount of Nylafleece™ that was sent with the kit. The piece of fleece was 1 yard x 1 yard (90x90cm). Given that I wanted to use the same fleece to make features such as ears, eyestalks, as well as allowing for the possibility of mistakes in cutting the pattern, it didn’t feel like enough fabric at first glance.

Even laying the pattern out according to the layout directions in the instruction booklet- the pattern got too close to the machine edge. I was able to adjust the layout so that I was comfortable with the distance of the pattern pieces from the machine edge, but there was very little fleece leftover for all the add ons I want to do with this character.

Blue nylafleece laid out with a pattern drawn on it.
Nylafleece with an attempt at laying out the pattern drawn on it.


After preparing the fleece pattern, I also took the opportunity to prepare the arm sleeve using the provided stretch satin, as well as the rod pockets in duck cloth. I normally use a dance fabric like lycra because it is more stretchy than the provided satin, and it slides onto the arm with ease. Laying out, and sewing these pieces was straight forward, but as soon as I cut the satin out, it started to fray really badly around the edges. I decided to oversew the raw edge using a zig zag stitch even though this was not in the instructions. The arm sleeve and rod pockets are the only parts of this puppet I intend to sew on the sewing machine. The rest of the puppet will be handsewn.

2 bean shaped rod pockets beside a close up view of a puppeteers arm sleeve
Oversewn arm sleeve and rod pockets.

Building my Alien puppet- designing the character

My design for this puppet is to build an Alien character as I don’t  have an alien in my puppet collection, plus I was trying to work out what to do with Ocean blue fleece. I also want to challenge myself with this puppet, by incorporating an eye mechanism that I have admired for years, as well as try to incorporate some foam patterning to build up the base shape.

In terms of character, this yet un-named alien is friendly, and is obsessed with things that smell nice like fresh baked cookies, flowers, perfume. On it’s planet- smell is the basis of their economy. So this character is looking for nice smells to take back to it’s planet for trade.

The mechanism is a closing eye- and to add to the challenge, I want to put it up on stalks above the head! I figured out the layers of the mechanism while watching the character of Polly in Muppets Treasure Island.  I am still trying to figure out if the trigger for the eye mech will be inside the head, or down on the arm rod for the puppet, but that is a decision for down the road.

Pencil sketch showing front and side views of my alien puppet
My design for the Alien puppet using the Hubbub puppet pattern

The rising trend of puppet kits- Opening the Monkey Boys Kit

The Coronavirus (Covid-19) Pandemic has encouraged everyone to find alternative ways to be creative. This is no different in the puppet world. Since it is not currently safe to hold a workshop to teach how to build a puppet, there is a rising trend of well known puppet-makers teaming with suppliers to send out puppet making kits that contain everything someone needs to make a foam hand puppet. During November 2020, two US based puppet company’s released puppet kits- Puppet Pelts, and Monkey Boys Productions.

The Puppet Pelts kit- known as the Puppet Makers Workshop contains everything required to build a hand and rod puppet including contact cement, which meant it cannot be shipped overseas. Here is a picture from their website of what is in the box-

Listing of the supplies in the box

List of supplies in the Puppet Pelts kit

The other company is Monkey Boys Productions based in Pennsylvania USA. They released 4 kits called Flick, Splat, Hubbub and Yawp. The difference between the two kits was that the Monkey Boys kits contain everything except 6 items- scissors, glue, fabric marker, chalk, sewing machine, and wire for arm rods. This meant that the kit could be shipped to me in Australia. Another difference is that the Monkey Boys kit does not come with a 5 session video workshop, but it does come with an instruction book, and video tutorials where required.

You can see and order the kits from the Monkey Boys online store

I ordered the Hubbub kit because I liked the interesting head shape, and as a puppet making teacher, I am interested in how puppet kits are put together so that people who don’t have access to the best quality supplies, can access them. I filmed an unboxing of the kit to record what you get in the Monkey Boys Pro Puppet Kit known as Hubbub.

I intend to share this puppet making journey here on my blog as I turn the Monkey Boys Kit into an Alien character.

Katherine

Skip to toolbar