Encountering puppets from my childhood- The Karakuri Dolls at Questacon

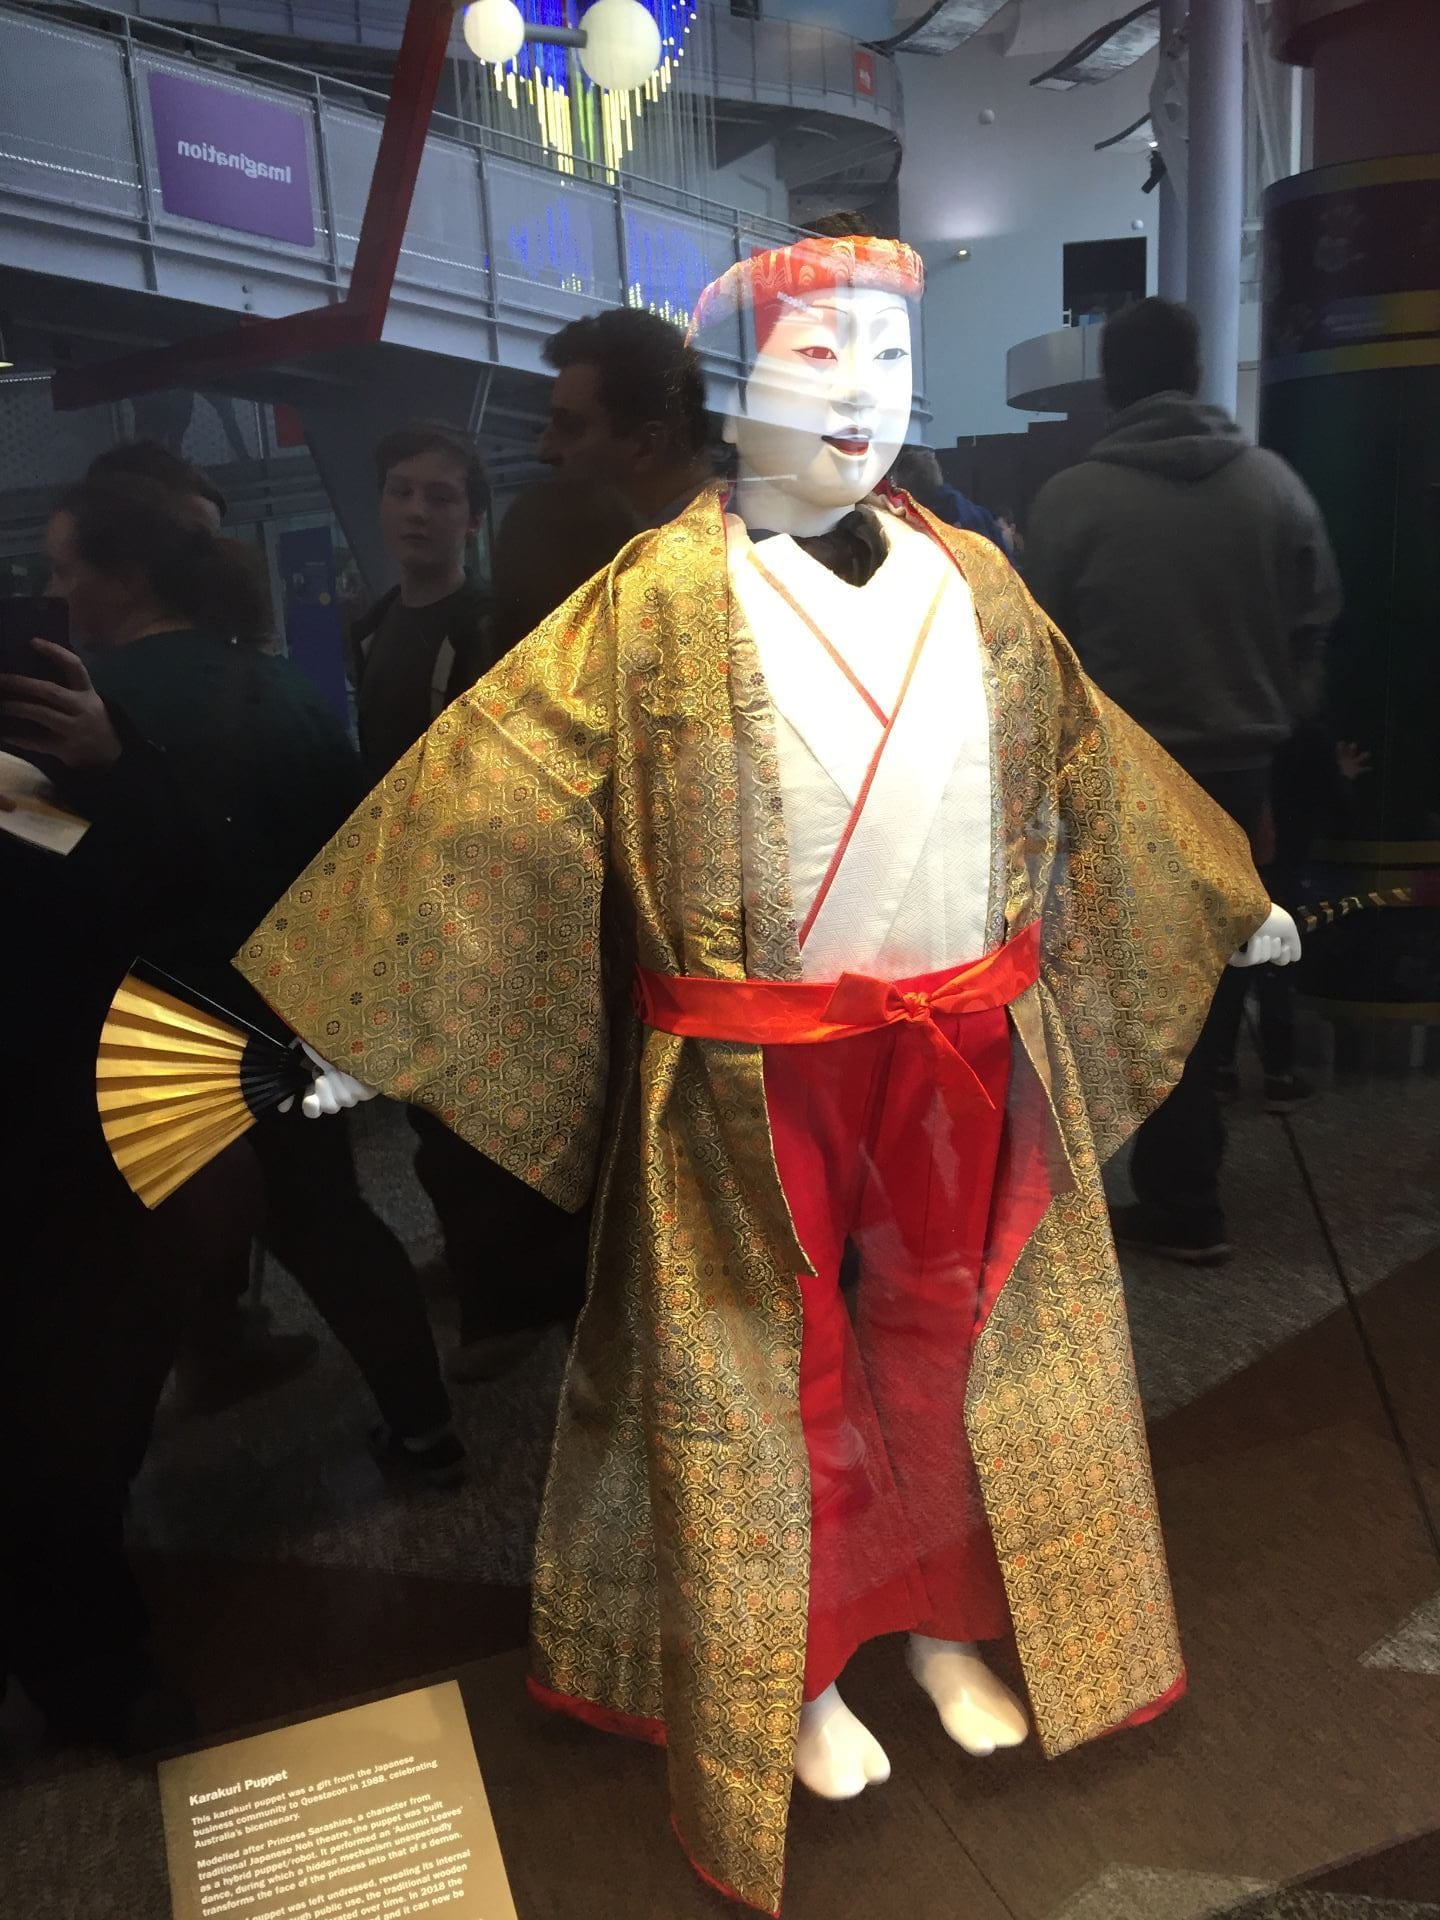
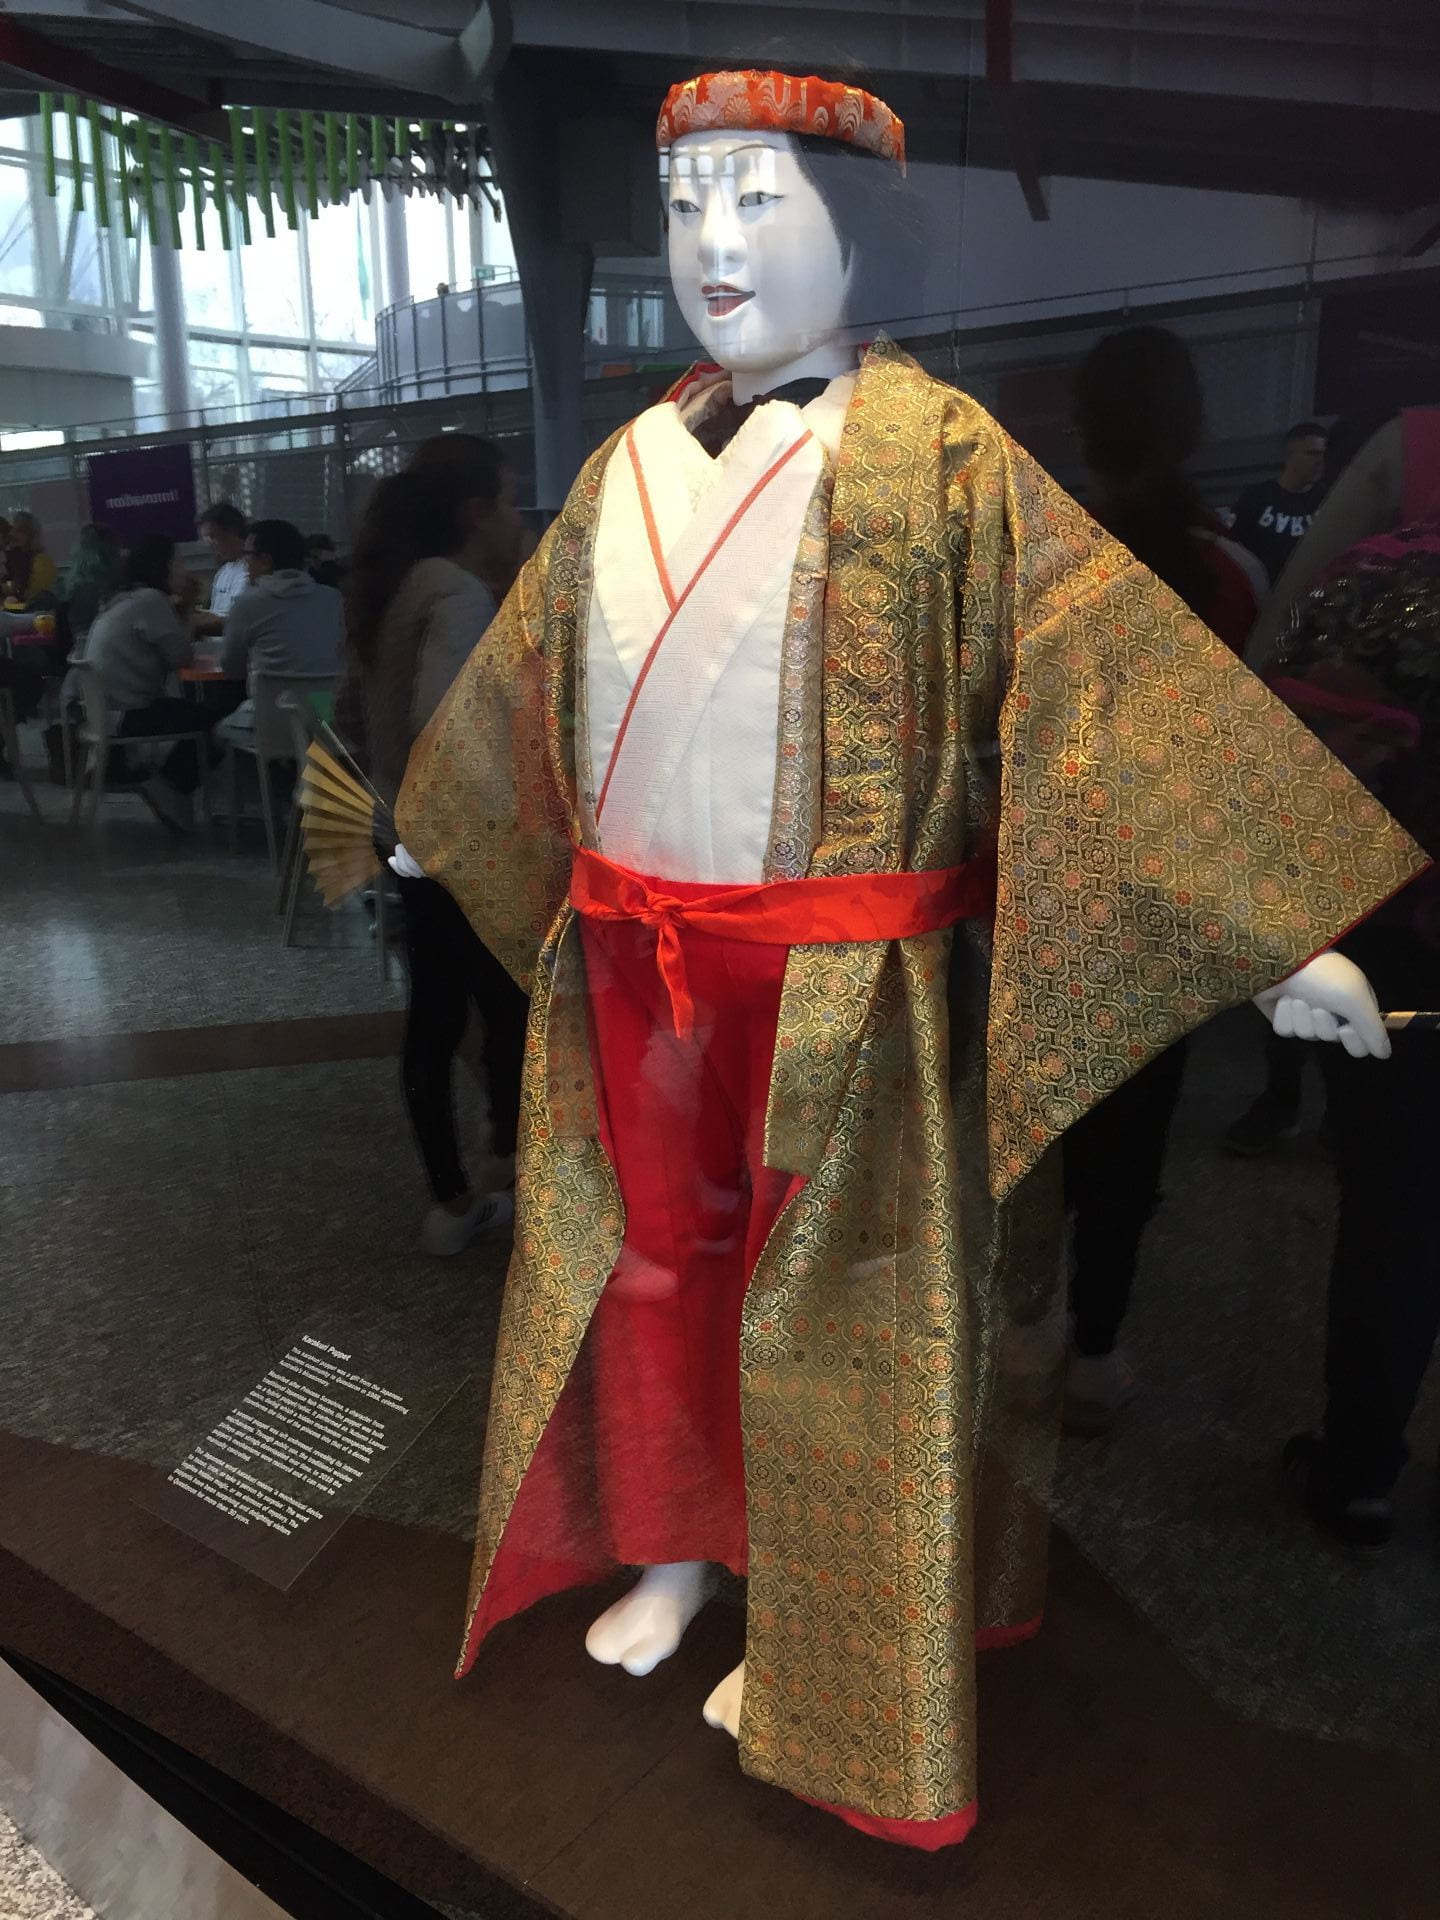
As a child, one of the puppets that I encountered, and it left a significant impression on me, was the Karakuri dolls on display in the foyer of Questacon- the National Science and Technology Centre in Canberra, Australia. The Karakuri dolls were a bicentennial gift from Japan to Australia in 1988. Two identical dolls were given- one with a full costume, and a second without the costume so that visitors to the centre could see how the doll works. I loved pressing the button and watching the uncostumed doll dance and transform into the demon character. I remember the traditional Japanese music was very hypnotising.

Since seeing the dolls perform as a child, seeing the costumed one again during my visit to Questacon in July was very nostalgic. The dolls have performed so often for visitors, that they both required extensive restoration. Sadly, the Karakuri doll on display is currently not moving, but it was wonderful to encounter a significant puppet from my childhood.

Restored Karakuri doll on display
Restored Karakuri on display.


References

https://www.questacon.edu.au/science-communication/international-engagement/questacon-and-japan/highlights-of-cooperation/2007

https://www.questacon.edu.au/science-communication/international-engagement/questacon-and-japan/gifts-from-japan

http://www.karakuri.info/shobei/index.html

Adventures in STEM- making robotic progress with Ardunio

Arduino is not only a fabulous circuit board, but it is also it’s own language with its own grammar and syntax rules. Using the Arduino basics course from Stan Winston School of Character Arts, I was able to program my Arduino Uno board to do some very simple functions.

Such as:

Programming a buzzer to make sound,

https://www.instagram.com/p/Bc2wpS1DkmI/

Programming a servo to move,

https://www.instagram.com/p/Bc2zdigDI8r/

Making my first code!

https://www.instagram.com/p/Bc5f4qmjA_9/

Which has all lead towards me assembling my first actual robot!

https://www.facebook.com/katherine.hannaford.9/videos/817606211744671/

I am calling my robot Rosie after the robot in the Jetsons. There are not enough female robots in popular culture and my long term goal is to eventually have Rosie talking like Rosie from the Jetsons! My Rosie is a 2 wheel drive platform from Jaycar, with an ultra-sonic sensor on the front so that she avoids obstacles. Assembling just the platform was tricky as the instructions were hard to find and not linked in the assembly instructions for the whole robot!

The first modification I want to make to the robot is to add a switch so I can turn her on or off. At the moment, I can only turn her off my removing a battery from the battery holder. I also want to experiment with the robot on different surfaces. I was noticing during the first drive that, the wheels got stuck on the thick nylon carpet in my house. I want to compare how Rosie runs on low pile carpet, tiles, and concrete.

What I haven’t been able to achieve yet is to take the Uno board and several other components and write custom code for it yet. So far, I am relying on code that is available in the Arduino Library or on project sheets. My next experiment for Rosie is to add a line trace module to Rosie’s base chassis and see if she can follow a line. My next experiment in coding is to see if I can combine a button press input to a potentiometer and make a joystick work.

Miss H


Adventures in STEM- Learning to play with Arduino

In 2018, I will be teaching stand alone STEM classes instead of puppetry. First thing I want to say is I don’t like the acronym STEM which stands for Science Technology Engineering and Mathematics. I prefer STEAM with the A standing for the Arts. Creativity is a very important component when solving real world problems, and in STEAM, creativity is included under A for Arts. For the purposes of this blog, I will refer to the new course as STEAM. So, if you prefer to leave the A out, that’s fine, but I will be all inclusive and call it STEAM.

I have never taught STEAM as a subject before. I have taught many students and colleagues a great deal about using technology to solve problems in teaching and learning but not within the framework of STEAM. I have also used a great many principals of STEAM within my puppet building, through project based learning, iterations and 3D printing. I will be teaching stage 4, which so far, has no program or resources that I am aware of, that can guide my preparation over summer. My school does have access to the amazing iSTEM Syllabus and online resources but the course I am teaching cannot overlap that sensational course.

So what am I doing to prepare myself for an unknown course?

  • I am creating a STEAM pinterest board of activities and classroom organisation which might help me in the year ahead.
  • I bought an Arduino starter kit from Jaycar Electronics to start learning how to code my own robots. The best part is I can apply this learning to my puppetry to make my first animatronics move using coding!!!!!!


Plastic box containing multiple small electronic components
My Arduino Learning kit with everything to create my first robots!

I am using the Stan Winston School of Character Arts course on Arduino Programming Basics to help me understand the potential that is within this kit.

I have completed my first little project of making an on-board LED light turn on and off by pressing a button! Here are the instructions from Arduino’s website!

https://www.instagram.com/p/Bc1QyqTjTgg/

Onto my next project!

Miss H

An adventure in 3D Printing and Animatronics Part 3

I am now much more comfortable using 123D Design and I have finished designing the remaining components. I also learned another important word in animatronics, E-Bar. In animatronics, the E-bar holds all the main servos that control the puppet’s eyes and the actual eyes are suspended from the bars of the E using screws. This mechanism actually has a second platform directly above the E-Bar for additional servos. The servos on the E-bar control the eyeblink part of the mechanism while the servos on the upper platform control the up/down and side to side movement of the actual eyeball.

A really helpful part of the forum for this particular project over at Stan Winston School of Character Arts, is that the teacher, David Covarrubuas, uploaded a 3D model of the recommended servo for students of the class to use for free! Since I was able to buy that particular servo, it has made designing the E-bar and the upper platform so much easier!

3D designed pulley for the 3D printed animatronic eyes project.
E-bar and servo for animatronic eyes
E-bar and servo for 3D printed animatronic eyes

Now that I have finished the core design and I am ready to print the parts, it is time to consider how I could support students in the Library in designing their own 3D models. While I have been using 123D Design, the Industrial Arts faculty teaches and uses another piece of software called Creo. My feeling is that if I bring 3D printing into the Library, I should install Creo onto the Library computers so not only the Industrial Arts classes can come to the Library and use familiar software, but students who have taken Industrial Arts classes at any time during their school years have some familiarity with the software.

Time to fire up the 3D printer! Can’t wait!

-Miss H


An adventure in 3D Printing and Animatronics Part 2

As I use the 123D Design software more, I am starting to understand the quirks of the software but I have also found an excellent series of youtube videos from a public library that explain how the current version of the software works.

I have also learnt an important word in animatronics- Swash Plate. The swash plate is the connector between the control cables and the part being moved. So in the animatronic eyes, the swash plate will snap into the interior of the eyeball and because the control cables are tied to the four holes, the plate will pull the eyeball around according to the cables that are being pulled by the servos. I do really like how this design is drawn with all the part sketches in orientation to each other. It means I can see where there are parts that might get in the way of other parts when the whole project is assembled.

Sketching and revolving the Swash Plate, Eyeball and Eyelid.


I am looking forward to designing the E-Bar bracket next. In the meantime, I am trying to negotiate the loan of a 3D printer from the Industrial Arts Faculty at my school so I can print my mechanism!

– Miss H

An adventure in 3D Printing and Animatronics Part 1

As a puppet maker and someone who likes to know how things work, I have always wanted to learn how to make animatronic mechanisms like those found in the great movie creatures like T-Rex from Jurassic Park or creatures from Jim Henson’s Creature Shop. For many years I have also wanted to try 3D printing as there are many public libraries and school libraries that have created maker spaces for their patrons that include 3D printers. Before I invest school money in a 3D printer for the library, I wanted to know how to design, how to print, how to look after the printer and to make a list of what to be aware of when students are near the printer in terms of safety.

Since last year I have been completing online puppet making courses with the Stan Winston School of Character Arts and in many of my social media feeds, this course has been advertised:

I could not resist such a wonderful opportunity to combine my interest in learning how to make puppet mechanisms along with my curiosity about 3D printing!

The course is 5 hours long but the thing I really enjoy about the way these kinds of courses are presented, is that the content is on demand and always available. I can also pause sections or even repeat segments as necessary.

I have completed the first few exercises in drawing the eyeball in the 3D software 123D Design. The part that is really slowing my progress down is that since the course was published, the software has been updated so much that it does not resemble the software being demonstrated in the video at all! With the help of many youtube and google searches, I am starting to feel more confident in using the software. Another thing I am finding useful while watching the lesson and making my design simultaneously, is using 2 monitors one showing the video from the Stan Winston Site and the other with my design in progress.

20150815-084854.jpg

Skip to toolbar