I was very privileged to have the New South Wales Teachers Federation come to my school to interview me and my students about the puppetry class I teach to Year 8 students this year.
I teach the class once a week how to make and perform puppets, and for homework, the students research different puppet traditions from around the world.
I am so proud of the video the Teachers Federation made about my class, that I just had to share it here on my blog.
Here is a link to the fantastic article about my class that was published in the state-wide journal Education.
The timetable for today’s workshops is the same as the last 2 days which made knowing where to be and what to do much easier! During the morning session puppet making workshop, Miss Hannaford learnt a new way of attaching arm rods to the hands of the puppet. This method involving gluing the metal arm rod onto a piece of plastic called Sintra, then gluing the plastic between the 2 foam pieces of the hand. The rest of the workshop was devoted to sewing all the pieces of fur together to finish the skin of the monkey! There are many pieces of fur so some of the students chose to send the sewing to the other room where there were volunteers with sewing machines but Miss Hannaford chose to bring the pieces back to the hotel and put them together by hand stitching for homework.
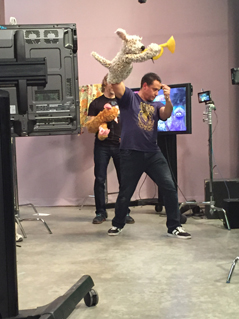
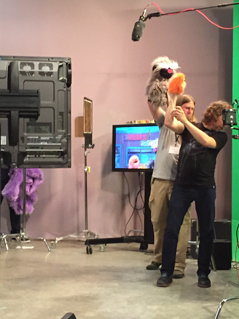
After lunch with all the other students, it was time for the performance workshop!
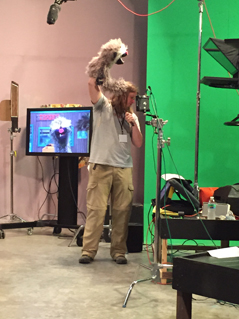
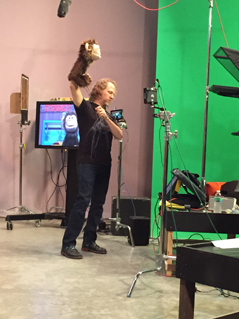
Today’s lesson focussed on using the Camera’s depth of field. This meant that the puppet started at the very back corner of the set and walked diagonally across the screen. The trickiest part was that the puppeteer has to not only stop moving when the puppet is at the middle and make the puppet look at the camera and say hi before walking off the screen at the last possible moment but the further away from the camera the puppet is the more the puppeteer has to bend their body out of the camera shot!
After a few more small group exercises in telling stories and making the puppets look at the puppet who is talking, it was time to start rehearsing the final show! Each student is asked to create their own short performance of less than 3 minutes as well as participate in a group song which has all the workshop attendees plus the instructors in it! The song chosen for 2015 was “We’ve got a dream” from the movie Tangled. 20 puppeteers and puppets had to squish into a very small space to learn to move together. The good part is that no one had to sing! All the puppets were lipsyncing to the song! The homework from the performance class was to learn the puppet choreography and the words of the song! So once Miss Hannaford and the other attendees got back to the hotel, everyone had so much homework that they organised their own dinner and went back to their rooms to finish their homework.
Day 7: Saturday, 23 May 2015
Today was the last day of Beyond the Sock 2015! Miss Hannaford finished all her homework but she was worried that she didn’t quite have the choreography of the song quite right. The timetable was the same as the last few days, so in the morning, Miss Hannaford nearly finished building her Monkey puppet by inserting the foam head into the skin and she nearly finished creating the eyes when she had to stop for lunch. No one was allowed to stay inside the workshop room on their own because of all the dangerous equipment around!
After lunch was the performance workshop where the focus of today’s lesson was learning to read scripts taped beside the monitors but to read the script and perform the puppet as a character. Students were paired together but each pair was given a different script to perform. The goal of the exercise was to be bold in terms of character choices as the script that Miss Hannaford and her pair named Will was given could be interpreted in many different ways! After all the groups performed their scripts, it was time to rehearse the group song a few more times!
The performance workshop ended at 4pm because everyone had to run back to the build workshop to finish their monkey puppets! All Miss Hannaford had to do was attach the nose and eyes to her puppet. What really interested Miss Hannaford was that the nose shape of her puppet was printed using a 3D printer and that while she was at the performance class, the volunteers in the build workshop had glued on a safety stem from a doll joint so she could attach the nose to the puppet and it won’t come off! Once the puppet was finished, Miss Hannaford had to take her puppet to a photo shoot back in the theatre and race back to the performance studio so she could rehearse her performance piece and the group song with her new monkey puppet called Matilda!
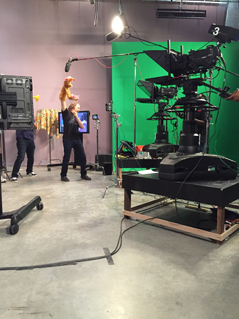
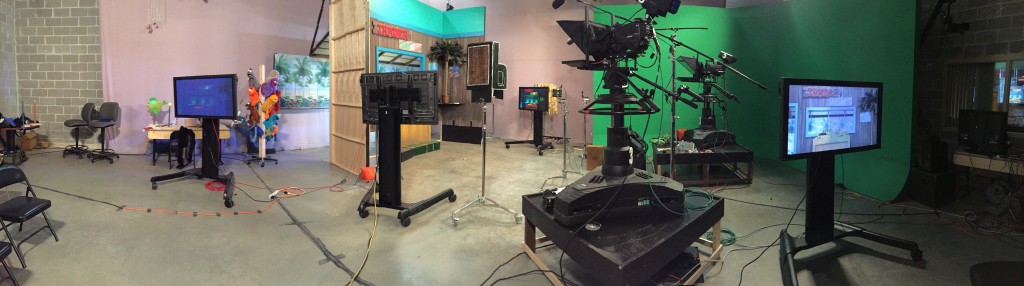
At 7pm, the audience for the show started to arrive. The audience was made up of friends and family of the attendees; Professors, Lecturers and students from the University; and people off the street who had heard that there was a free puppet show! Everyone did their little performances that included songs, scenes and jokes. The two performance teachers Noel McNeal and Peter Linz used puppets to act as hosts for the show by introducing each act but they also helped the workshop attendees perform their characters by moving arm rods or bits of scenery! You can see a panorama photo of the TV studio and set we got to perform in at the bottom of all the pictures! You can even see the 2 real tv cameras that recorded the performance!
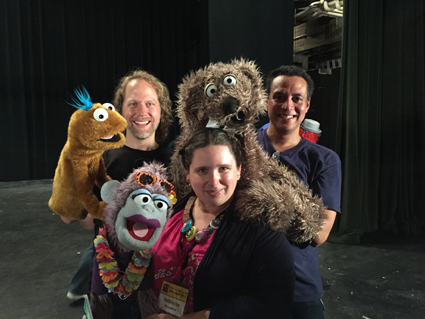
The show was really funny and the group song was a huge success! At the end of the show, it was time to take the big group photo and for everyone to say goodbye. Miss Hannaford’s highlight was to have a picture taken with the teachers Peter and Noel but she also got a hug from both of them! I was really proud of Miss Hannaford for being brave and performing in front of a TV camera and studio audience!
Tomorrow we fly home to Australia. I can see how tired Miss Hannaford is after such an exciting week so I expect that she will sleep most of the way home. I had a wonderful holiday with Miss Hannaford!
Well there is a reason why I have not written here in a while…. I have been building lots of commissioned puppets! Some I can’t share here yet- but I can share the journey of one puppet that has an extra special place in my heart. I have blogged, tweeted and facebooked about a wonderful puppet shop I have been visiting for over a year now called Loutky Puppets. Recently the creative genius behind Loutky Puppets, Wez Champion asked me to collaborate on building a foam puppet for the new Gaki Puppet Series. Gaki is Japanese for Devil and the puppet series focuses on the Tasmanian Devil using rare Australian Timbers carved and burnt in the Japanese Kokeshi doll style.
I jumped at the chance to build this puppet as Wez is a great collaborator and puppet designer in that he provides gentle direction but lets me have creative freedom! While I don’t yet have an official photo of the Gaki Puppet who we call Cerny, (Czech word for Black) I have been the guest build blogger and you can see how I built the puppet.
I hope in the future that I can collaborate with Wez to develop more new puppets. It is such a wonderful creative process that I have been privileged to experience twice now. The Cerny puppet will now be up for sale- so while I will miss him as he is crafted with care and love, I hope his life’s journey as a puppet will mean that he will be ‘treasured forever’.
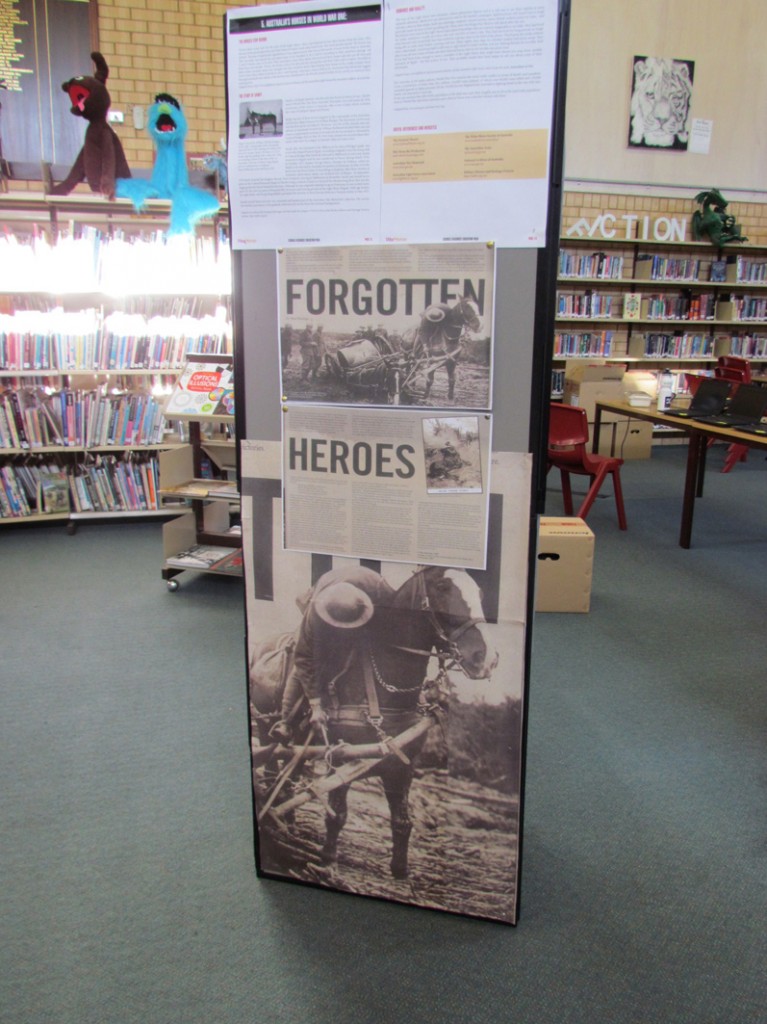
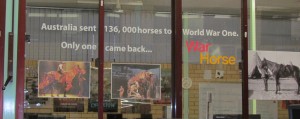
Over the last few months, War Horse, the incredible stage production from the National Theatre based on the book by Micheal Morpurgo has been playing here in Sydney at the Lyric Theatre. I was fortunate to see the Sydney production 3 times and fell in love with the incredible puppets made by the Handspring Puppet Company in South Africa. I was deeply moved by the notion that very few of the animals used in war especially the horses did not return from the war and many were left behind. Out of more than 136, 000 Australian Horses sent to the first world war, only one horse returned- Sandy the horse of Major General Bridges who died in Gallipoli and requested that his horse be returned to Australia.
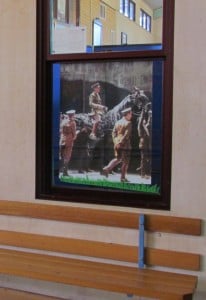
Image of a War Horse stuck in the mud of World War 1.Images from the play of War Horse.
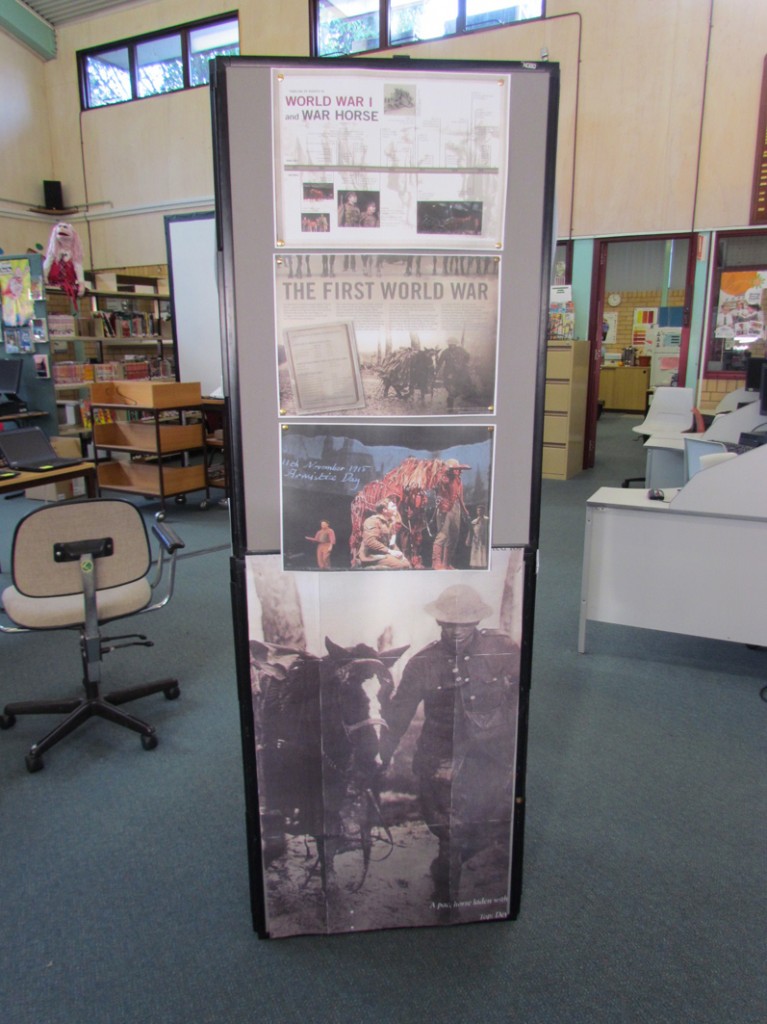
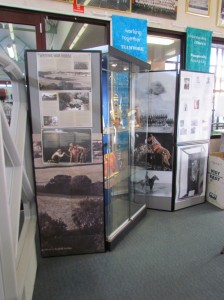
Using the play of War Horse as a foundation, and the education pack from the learning program for the play as well as my Goose puppet from the National Theatre of Great Britain, I created the display for term 2. The display focused on information about the Australian Light Horse Regiment as well as how the original story and play were developed. This way the display linked into the History, English, Creative Arts and Design and Technology curricula. I also used the vision from the Handspring TED talk about War Horse as well as the vision from the Making War Horse documentary and the Michael Parkinson Masterclass program that featured Micheal Morpurgo on the Library TV screen. This way students could see and hear elements of the play and appreciate the artistry of the beautiful puppets.
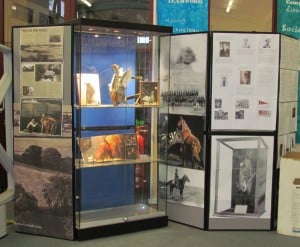
General view of the display wall at the front of the library including the display cabinet.
Photograph of the vinyl lettering to teach students about the 136000 horses sent to World War 1 and only 1 returned.
Photograph of Topthorn from War Horse.
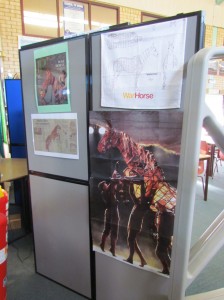
Image of the puppet of Joey from War Horse including the plans of how the horses are constructed.
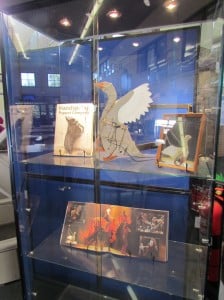
Contents of the display cabinet containing the Goose Puppet, Handspring puppet book and the program from the play
Side view of the display cabinet with information about the writing of War Horse as a story.
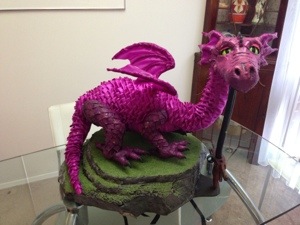
It has been a very long time since my last post but since my last post, my Dragon is now FINISHED!! Her name is Ayra- a name suggested to me by a young talented artist Abira Harvey.
Meet Ayra the Dragon!
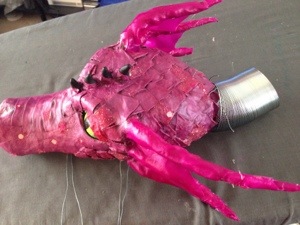
The scales on her neck , body and tail are done using Prairie Triangles and every single one of them is hand sewn onto her body. I had to custom make the fabric skin that is sewn onto her paper mâché body (under the scales). The trick with custom making the body skin is that you cover the body in a plastic shopping bag then wrap it with packing tape all over. You then cut the plastic off along the spine and belly and cut darts into the plastic to make a flat template. This is the link I used http://www.instructables.com/id/Make-a-sewing-pattern-from-a-packing-tape-mould/
Fitting the fabric “skin” around the Papier Mache bodyFitting the wing structure onto the body. The wings are made from lengths of wire covered in paper and hardened fabric.
The mechanisms in her head do everything I planned except I was not able to get her eyes to open wider. So her mouth opens and closes using a trigger on the handle and her eyes blink using a separate trigger on the side of the handle. Her handle was carved from Rosewood by the amazing puppet carver Wez Champion and the control rod is a length of PVC pipe that has been coated in a black rubber called plastidip. The legs are made using the techniques I linked to in the previous post.
Making the feet using telephone book paper and masking tape. The knuckles on the joints have not yet been added to the foot on the right
Front legs of the dragon showing how the legs were cut open to remove the plasticene. They have not yet had the fimo claws added to the toes. The pvc pipe is the bone of the leg to allow the movement mechanism so that her legs can ‘walk’.The almost finished front leg- just needs the top section put back on and the scales added down the leg. You can see how the leg pivots through the pvc ‘bone’ and the black fimo claws.
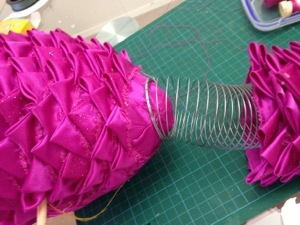
Her neck works by attaching a slinky between the head and body. This not only allows for fantastic movement but the slinky also supports the fabric of the neck so that it does not collapse.
Attaching the Slinky to the bodyAttaching the slinky to the head before I attached the neck fabric.
Because of the length of the control rod and handle, it was necessary to make a base for Ayra to sit on. I decided to make her a foam ‘rock’. The rock is made of 5 layers of 1 inch foam glued together then carved to make a rock texture. The whole rock was coated in multiple layers of pva glue and in some places tissue paper to give a smoother weathered look. The whole rock was then painted with acrylic paints and I used green flocking to simulate grass and moss.
Planning the layers of the rock using 1 inch upholstery foam.Carving the foam to look like a ‘rock’.Coating the rock in multiple layers of pva glue and tissue paper.Painting the “rock” using acrylic paints.Adding the green moss using Summer flowers flocking.The top layer of ‘grass’ (green summer flowers flocking) to make the rock nice and comfy for Ayra
Overall Ayra has been a wonderful and sometimes frustrating learning experience. I have never built anything like her before but I really want to build more paper mâché puppets with or without mechanisms. She took 5 months to build but in that time, she has really extended my puppet making skills.
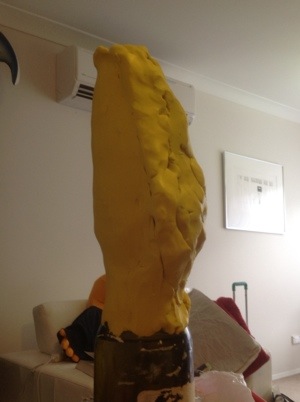
I was reflecting on how long it has been since I last sculpted a puppet using plasticene and I am astonished that it has been 5 years since I sculpted my first dragon puppet Augthar. It was nice to work again in plasticene and hand made paper- a really nice change from all the work I do in building puppets from foam and fabric. You can see by the images that I roughed out the shape of the head first and then got stuck into details like the eyes and nostrils. The white eyes are a ping pong ball cut in half and pushed into the plasticene with the eyelids added later. In order to stop the papier mache from sticking to the ping pong balls the first layer of paper in that area was just moistened with water- no glue.
The paper I have used is the paper I made years ago from recycled coloured office paper. I have applied 4 layers of paper in this version of the head and the glue is waterded down PVA glue since the handmade paper is extremely absorbant the glue goes right through the paper giving a strong yet flexible result.
I have been building puppets now for 8 years and most of my practice has focused on building hand puppets out of foam in what is called “Muppet Style”. I am now incorporating simple puppet mechanisms such as eyeblinks but I now want to challenge myself to build more sophisticated puppet mechanism similar to what is used in the Zazu puppet in the musical version of the Lion King.
So I have started building a new dragon puppet. Ultimately, I want the mouth to open and close via a trigger on the handle of the puppet as well as incorporate an eye blink that not only closes but also opens wide for when the puppet is surprised.
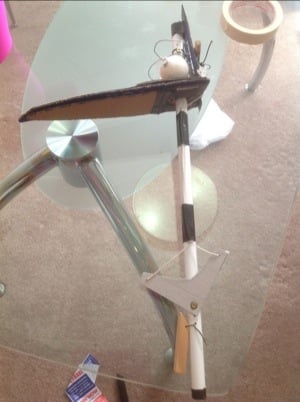
So far I have built a 3D maquette of the mechanism and I have started building the head out of plasticine. My visits to Loutky and talking with Wez, the creative spark of Loutky has really helped me understand how mechanisms work inside the head of a puppet.
A friend recently invited me to afternoon tea at a new Teahouse in Epping called Loutky. Loutky is Czech for Puppet and the whole concept of the Teahouse is to encourage the visitor to experience the world of puppetry either by watching a puppet show or by choosing a book to read from the extensive library while enjoying a lovely selection of tea or coffee.
Since my first visit, I have visited many times and I like to take the puppet I am working on and just sit and enjoy the relaxed atmosphere. I have also watched Wez the owner/ creative genius of Loutky carve the most exquisite puppets for their resident shows or special commissions. Wez has kindly helped me develop the mechanical concepts for my next puppet and he has invited me to collaborate with him to build the puppets for the first show in 2013. This will be the first time that I have had a hand in building puppets for a real show.