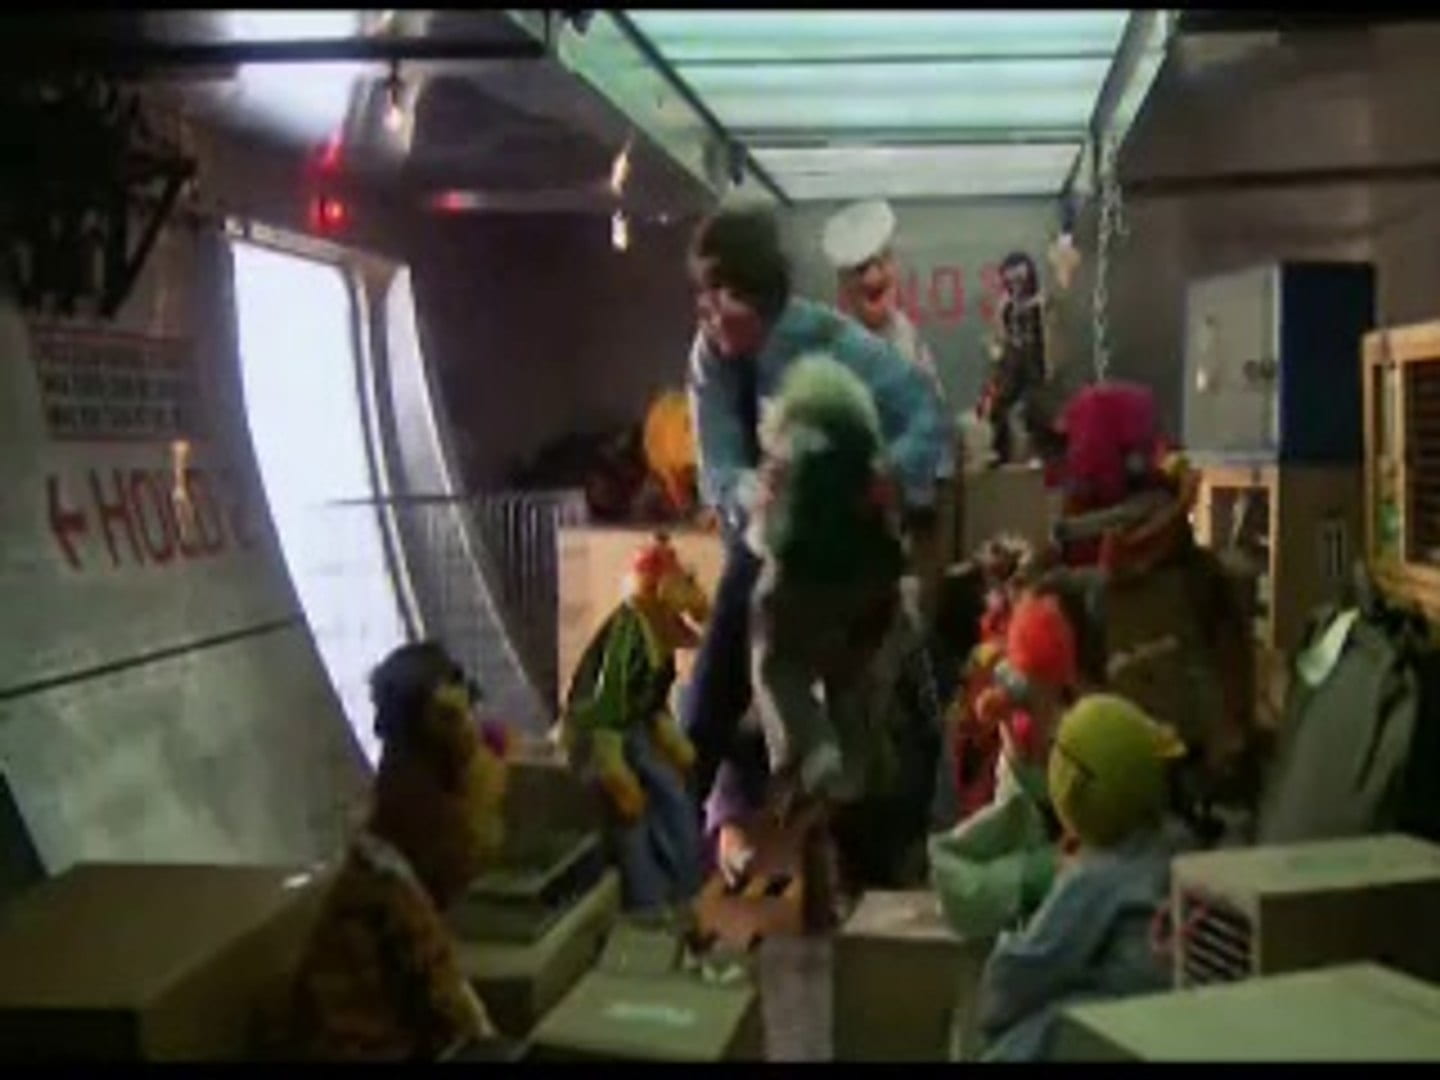
Well, once again the puppets and I are travelling to the USA to attend Beyond the Sock Puppetry workshop in Texas USA, but first, we are making a little stop in Atlanta, Georgia. We left Sydney on Friday, May 31 on an Airbus A380. I travelled in QANTAS Business Class, and the puppets had their own party down in the hold just like Kermit, Fozzie and Gonzo in the Great Muppet Caper movie.
Muppets in the hold of the plane back to USA in the Great Muppet Caper
Day 1- Saturday, June 1, 2019
I spent today at the Center for Puppetry Arts in Atlanta USA. Since the Center was between puppet shows in their theatres, the Center was holding a Jim Henson Fantasy Film weekend focusing on the Dark Crystal (1982), and Labyrinth (1986). My day started at the Make a Puppet table, where I got to make a Fizgig paper hand puppet, followed by a Dark Crystal Shard hunt around the Dark Crystal exhibition and atrium, a tour of the Jim Henson collection permanent exhibition, and assisting with a Labyrinth jigsaw puzzle.
Lucy and Miss Hannaford outside the Centre for Puppetry Arts
Fizgig hand puppet at the Make a puppet workshop
Prize for winning the Labyrinth Trivia Challenge
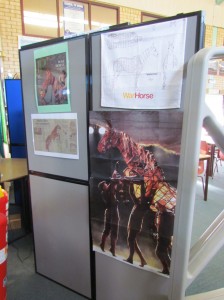
Foreleg of Topthorn puppet from War Horse
Foreleg of Topthorn Warhorse puppet
Foreleg of Topthorn Warhorse puppet
Miss Hannaford with Topthorn Warhorse Puppet
Control mechanism for Chamberlain Skeksis puppet
Fully restored Mystic puppet from the Dark Crystal
Augthra puppet from the Dark Crystal.
Moai puppet from Muppet Treasure Island
Moai puppet from Muppet Treasure Island
Practising monitor puppetry with Lucy at the Centre for Puppetry Arts
Rover Joe from Muppet Musicians from Bremen
Leroy from Muppet Musicians from Bremen
Splurge from Hey Cinderella (1965)
Puppet highlights included seeing Topthorn- the black horse puppet from Warhorse. It was the closest I have ever gotten to the horse puppets.
In the evening, I attended a workshop called Creature Features with Professor Mark from Cartoonyville. we learnt about different kinds of materials that can be used for puppet eyes, where interesting puppet teeth can be found.
Day 2- Sunday, June 2, 2019
Today I felt very tired with the jet lag, so I spent the morning resting. In the afternoon, I had the opportunity to visit one of my puppetry teachers BJ Guyer. I have been learning with him through his classes with the Stan Winston School of Character Arts since 2014. It was so special to sit with him and talk about puppets for a few hours.
Day 3- Monday, June 3, 2019
Very early start today- had to be at the airport for my flight to Texas at 6am, so it was necessary to get up at 3am. The best thing about where I stay in Atlanta Midtown is that it is only 2 blocks from the MARTA train to the airport. The flight left on time, and arrived early in Dallas Fort Worth! I met with my good friend Pam who is a building assistant and Beyond the Sock, and we chatted while we waited for another attendee to arrive, so we could travel to the hotel together.
Later in the day, I went with a group of attendees on a shopping expedition to the local craft stores, which are within 10 minutes walk of the hotel. I was even able to purchase a book I have been waiting a long time for- Adam Savage’s “Every tool’s a Hammer”. Tomorrow, Beyond the Sock begins…
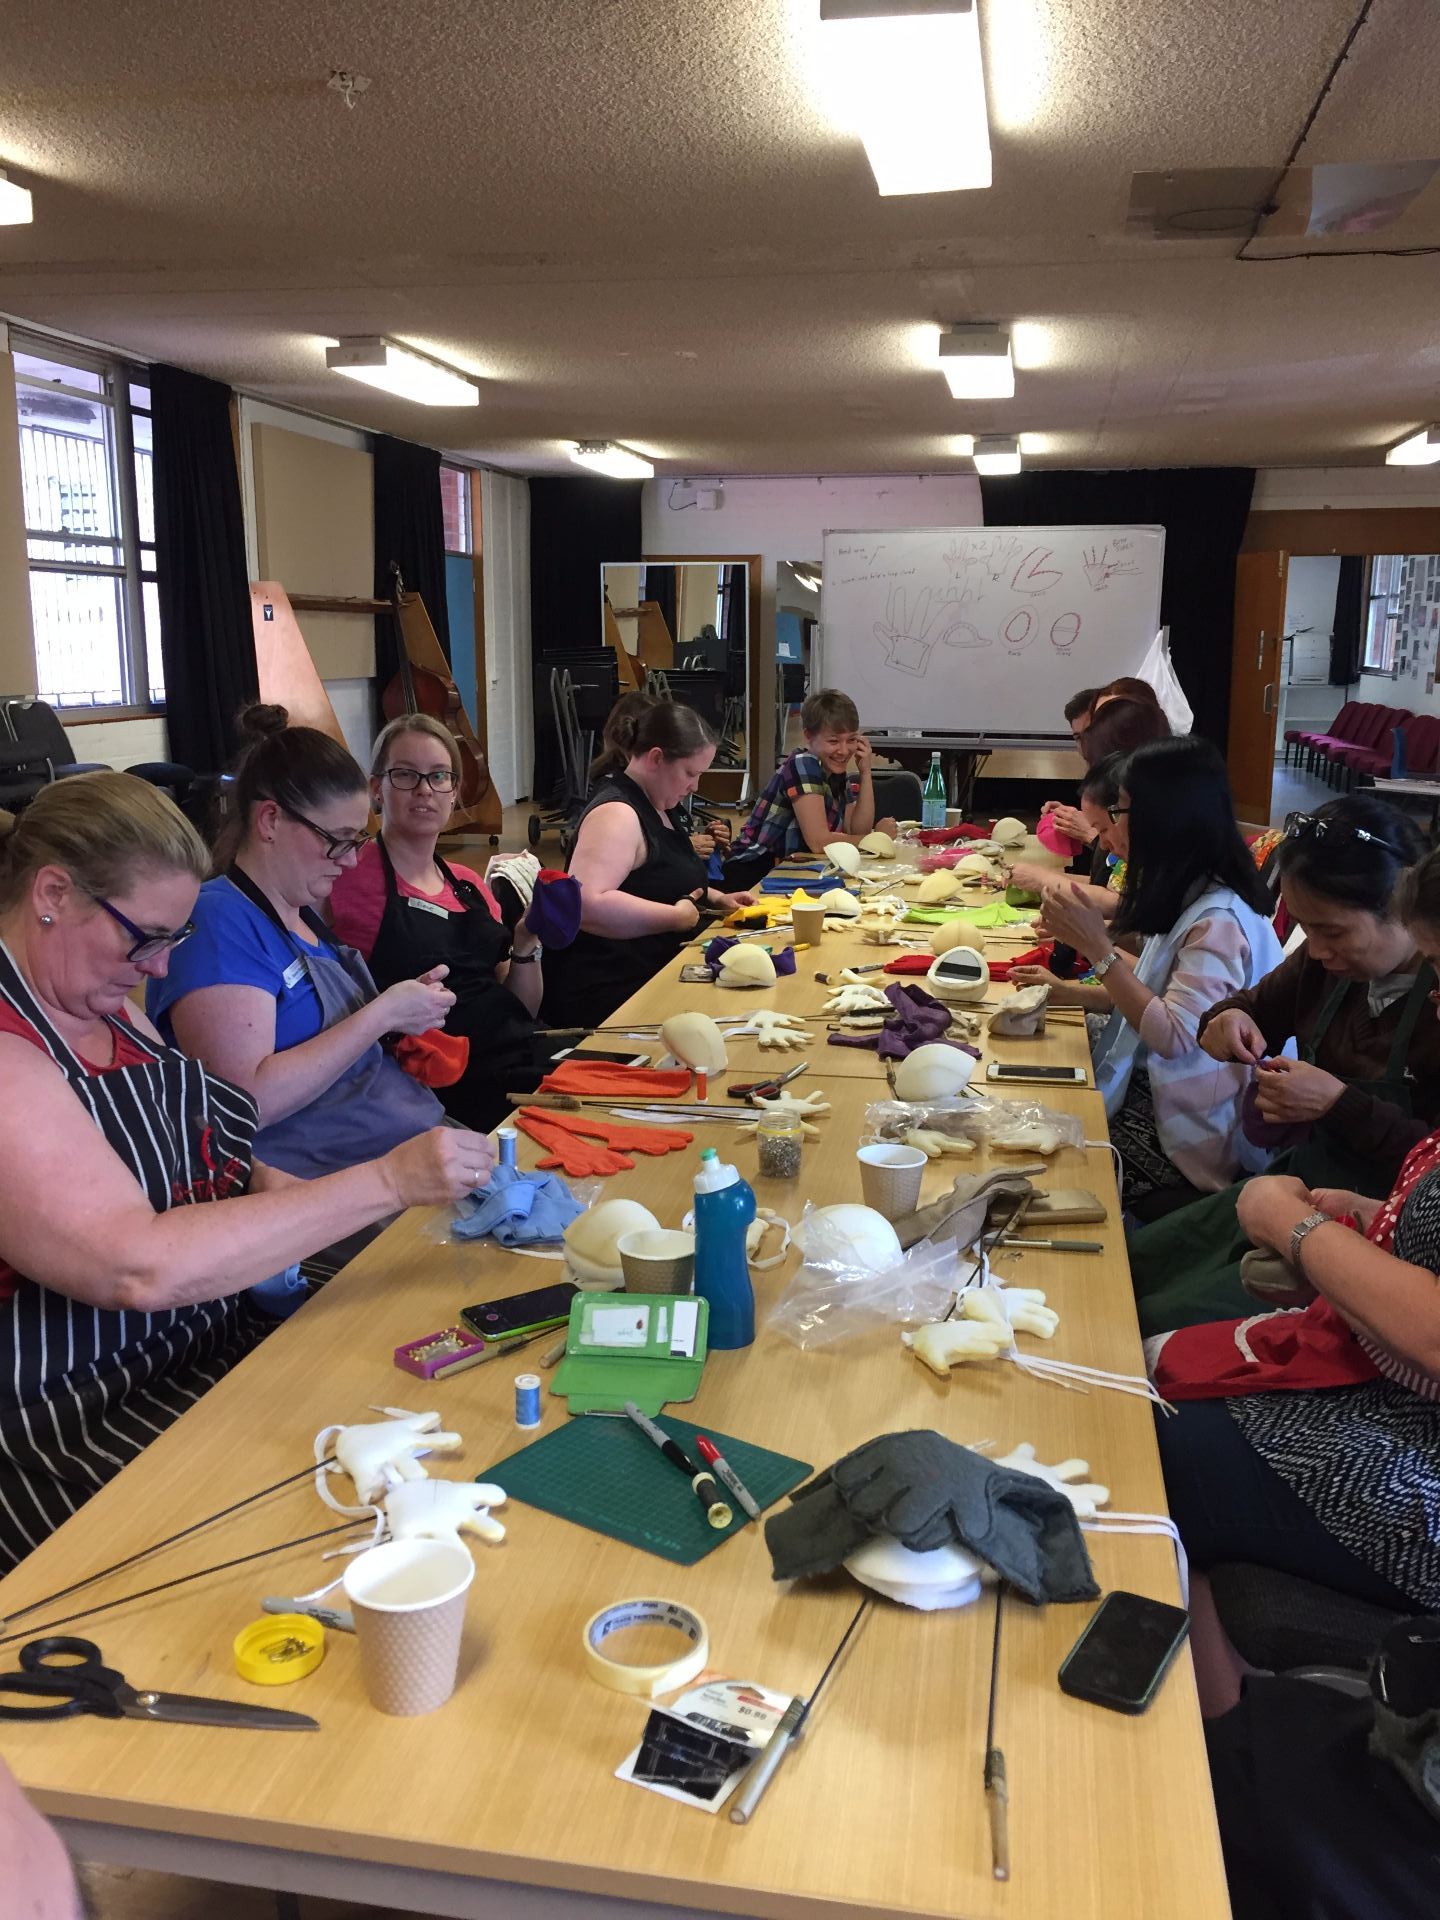
Over 2 days, I had the opportunity to co-lead a Puppetry workshop for Drama Teachers at the Arts Unit NSW. The aim of the workshop was to give Drama Teachers from Primary, Seconday and Special Education settings the opportunity to make a mouth puppet (aka “Muppet” Style) and experience different strategies of teaching puppet performance in the classroom. The Arts Unit is part of the New South Wales Department of Education, and they promote and support all of the Creative and Performing Arts in NSW Public Schools. For me, this was an opportunity to show leadership skills, share how I use Puppetry daily in my school library, as well as showcase my school’s Puppetry class.
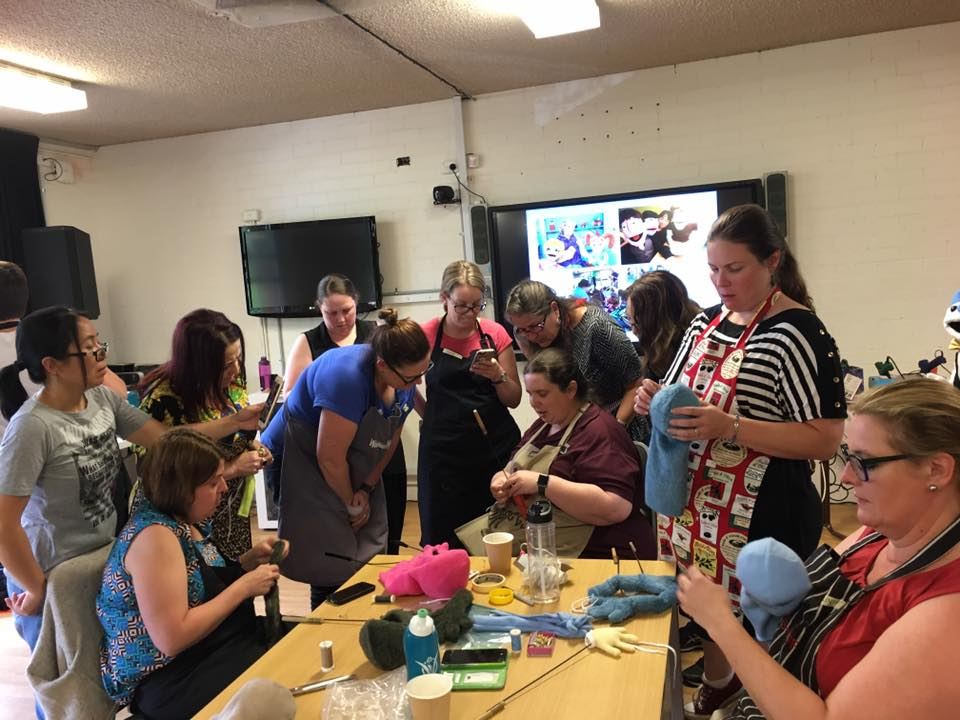
There were 15 participants in the workshop from a wide range of primary schools, high schools and special education settings. My role in the workshop was to teach the puppet building part of the workshop, and share the learning I have been doing in monitor puppetry over the last 3 years at Beyond the Sock. One really interesting thing I noticed about how 21st Century Teachers take notes. I cannpot recall any of the teachers taking written notes. Most of the teachers wanted to film my explanations on their phone or tablet. I had to remember to allow a few moments for the teachers to get into a good position to film the explanation.
What went well:
All the participants had fun! We could not get them to go home at the end of the first day, and the participants arrived at the workshop early on day 2. All the puppets were unique and special!
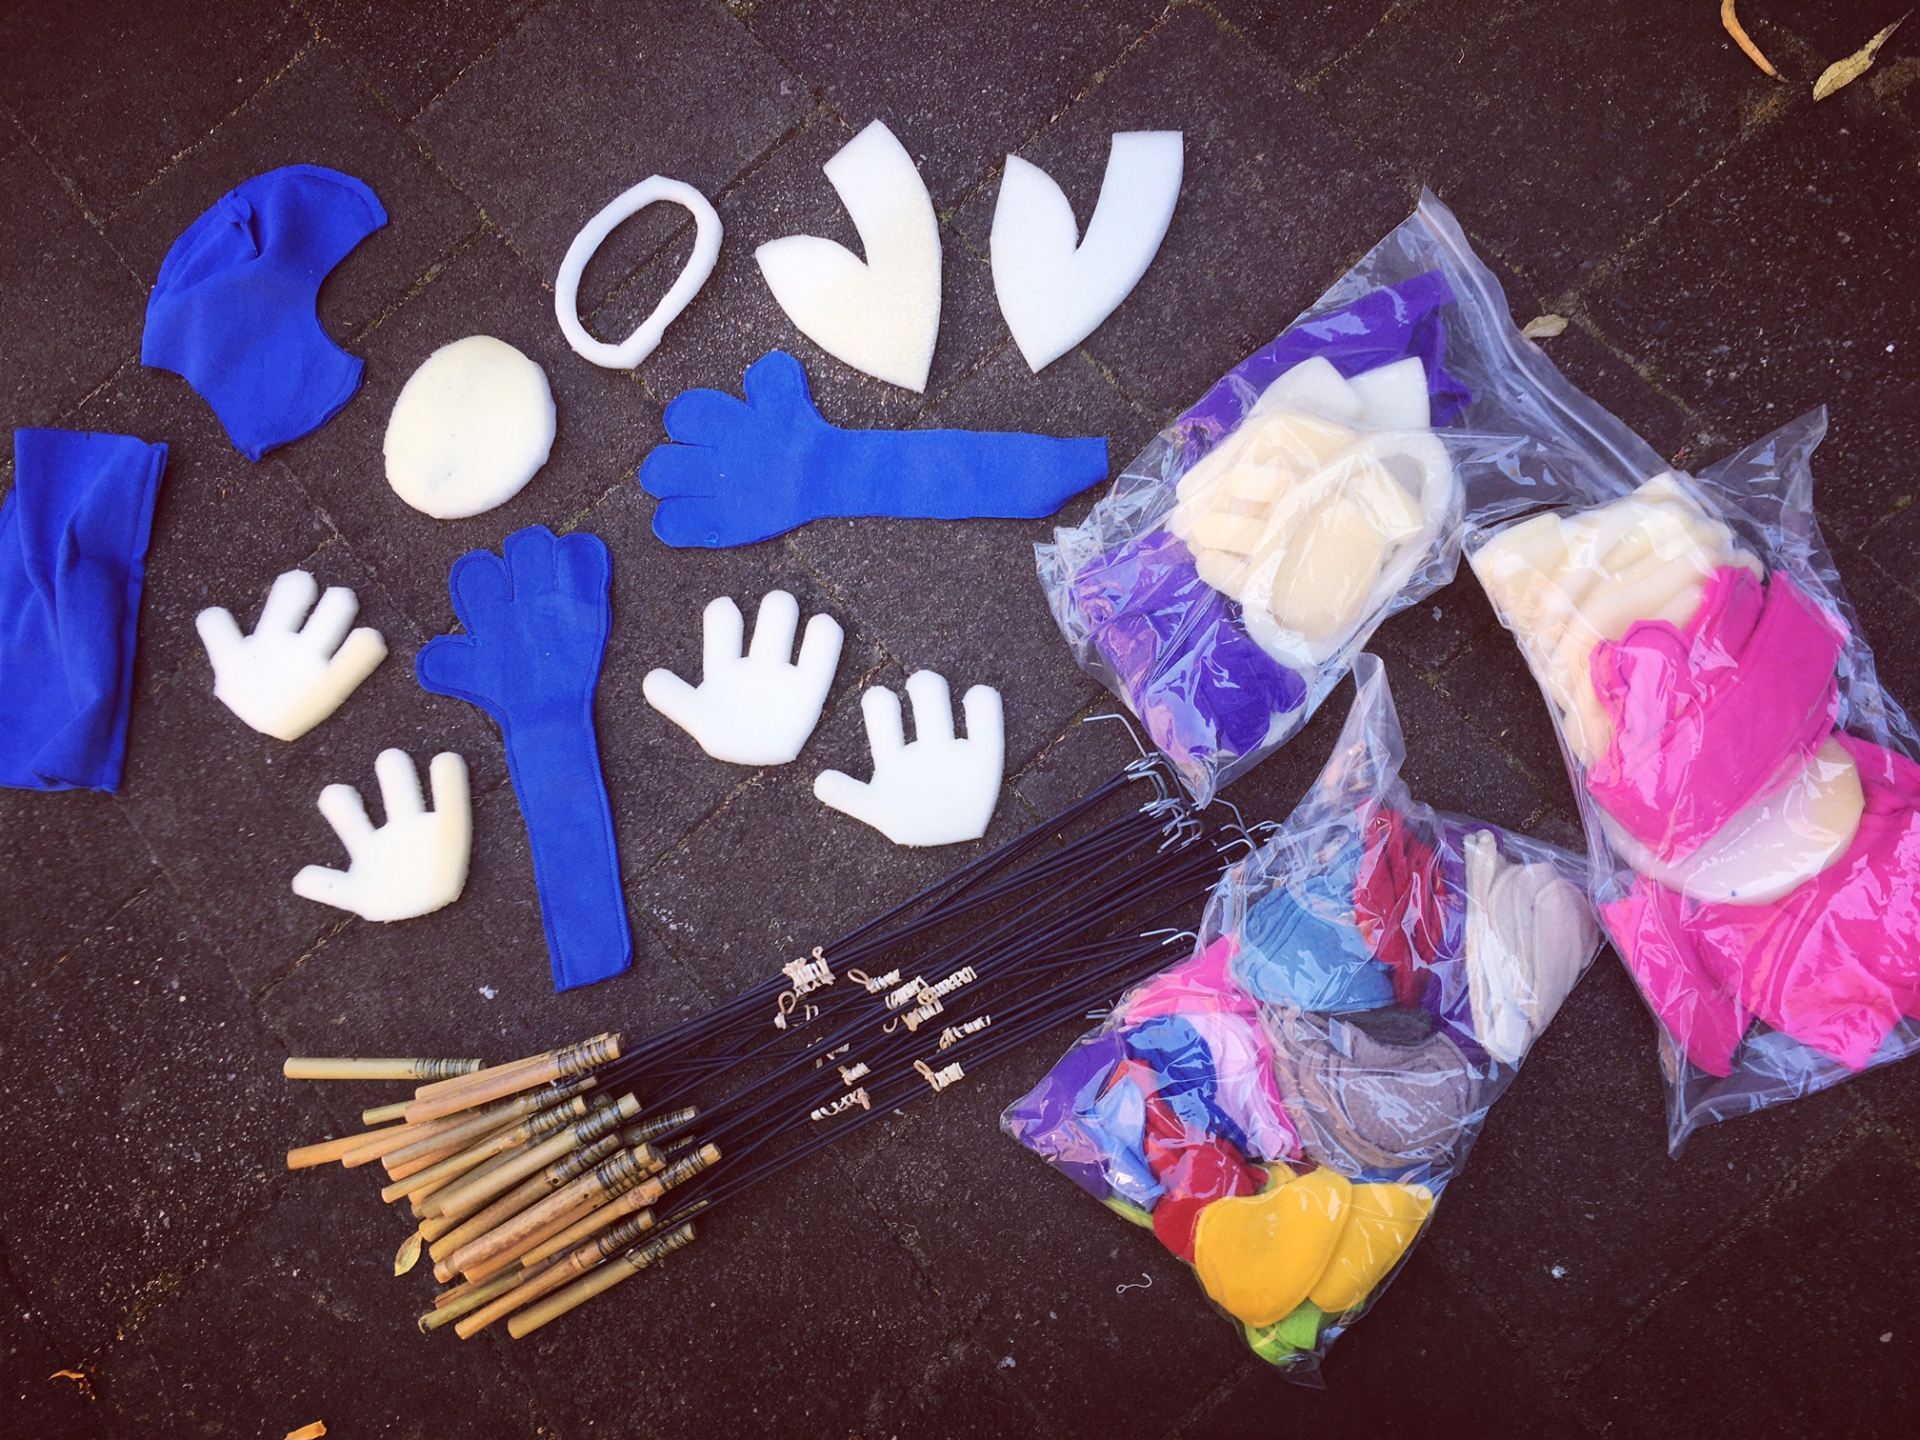
Having all the kits pre-cut and pre-sewn did save a lot of time and hassle. However, some teachers indicated on their feedback forms that they wanted to see the whole process from the beginning including cutting out the foam and fabric using the patterns. Perhaps I can accommodate that part with a video showing how to cut out the foam and fabric.
Using the dome eyes from Out of the Box Puppets worked really well over the traditional Spoon eyes. It does mean that in potential future workshops, I don’t need to take my whole folding crate of eyes.
Everyone used my 3D printed nose forms, as well as my plastic easter eggs. A few people also used the small dome eyes as nose forms. The participants also enjoyed using my box of precious Antron Fleece scraps to make the eyelids and noses for their puppet.
During the performance side of the workshop, doing a conga line to practise sharing the frame was a great deal of fun. It meant that the participants did not have to worry about their puppet standing straight and maintaining eye focus into the camera. The participants could just have fun with the frame.
What could be improved next time:
Give the participants 2 pieces of wire each and use florist wire instead of galvanised wire. Florist wire is easier for inexperienced puppet builders to bend, but the fingers of the puppet will not be as strong.
Need to have at least one pair of pliers per person as it was too difficult to have just 5 pairs of pliers for 15 people. Many participants had to wait a long time between steps because there were not enough pliers.
Have just the instruction portion only of the pattern from Project Puppet on the Smart TV/ or as printouts for participants to follow
if they are running behind the rest of the workshop,
didn’t listen to the verbal instructions or missed the demonstration.
It would also be helpful for people who have a gift for building to move ahead of the group.
The puppets to only have one arm rod. The other hand could be safety pinned/ stitched to the body of the puppet. It would make manipulation easier for beginner puppeteers
The neck and body join could be pre-sewn. It would save time during the workshop. It would mean that the only sewing for participants would be the mouth felt and the hand slits.
Drama Teachers hand sewing parts of their puppet's "Skin".
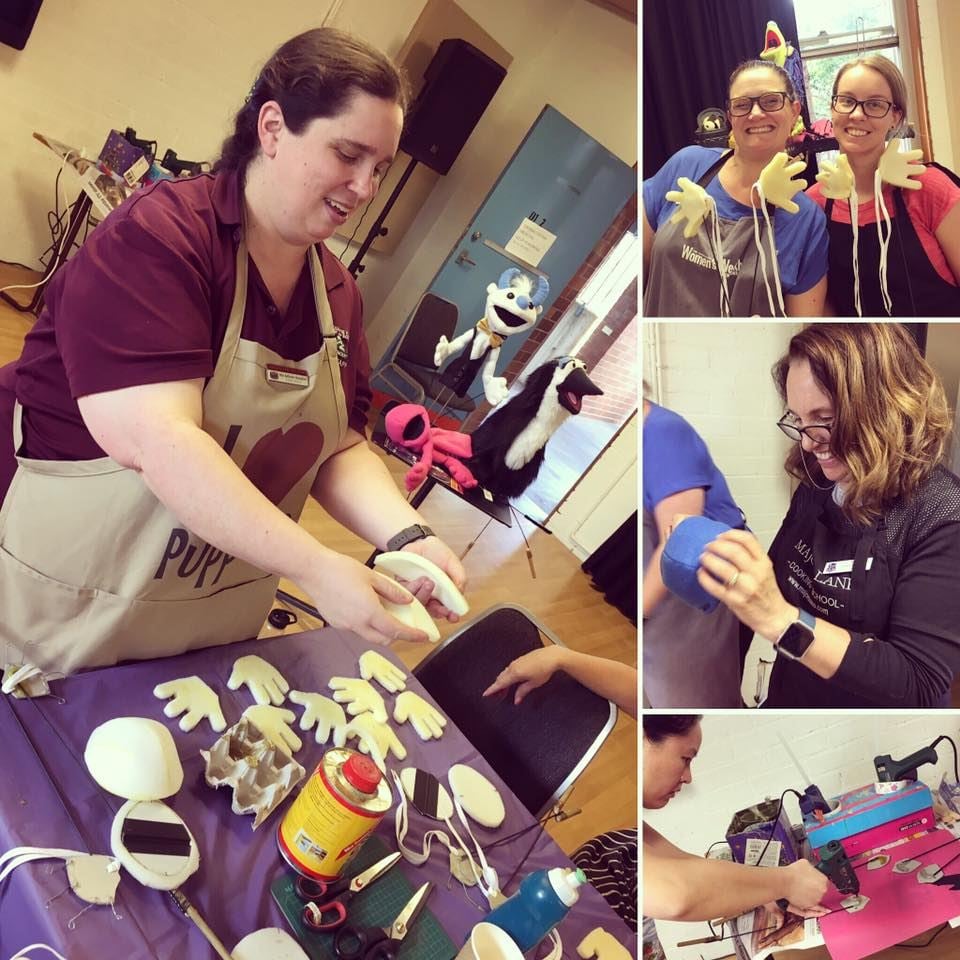
Collection of photos of the drama teachers making their puppets and me demonstrating the steps.
Me demonstrating how to do the ladder stitch to close the arm rod slit in the hand of the puppet.
Overview of the puppet kits that were pre-made for each participant.
My favourite thing to do in the world of puppetry is build puppets. I have been building puppets for 15 years, mostly out of foam in what is known commonly as Muppet style. When Lucy Green and I attended Beyond the Sock Puppetry for Television and Film Workshop in June this year, one of the special features of this year’s workshop was that attendees were given two puppet patterns to build. Pattern A was a round head pattern, and pattern B is a tall, pill shaped head. Both patterns were designed exclusively for Beyond the Sock by Pasha Romanowski, who runs the amazing Project Puppet and teaches the building side of the workshop.
Each year, the overall theme of the workshop is different. My first year was 2015, which was Monkey puppets on a tropical island. My second year, 2016 was Chicken puppets on a space ship. This year, 2017, the theme was pirates! My puppet travelling companion Lucy blogged about our pirate experience.
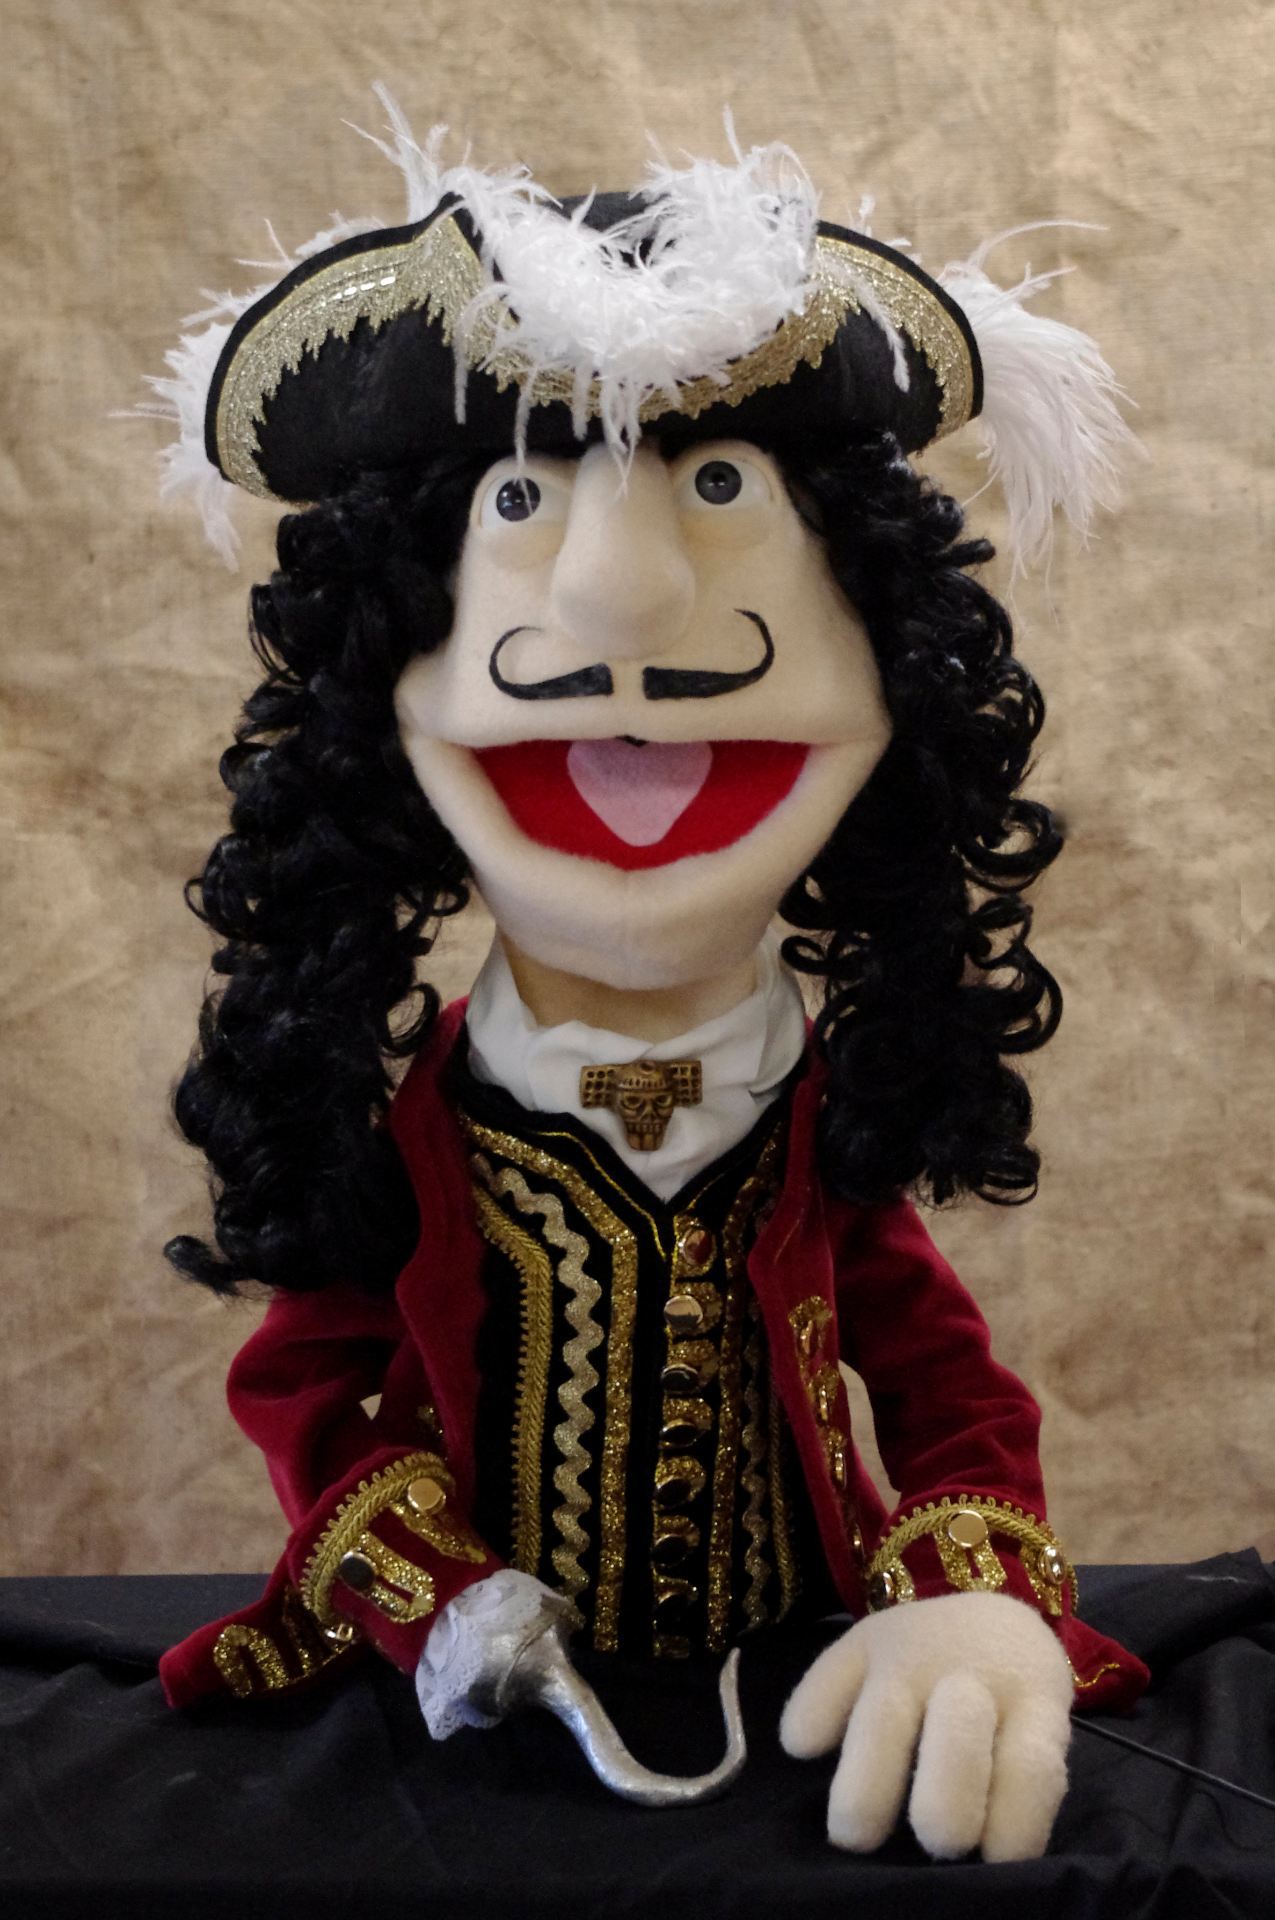
During the workshop, I built pattern B as it was a new head form for me to explore. Once I got home to Australia, I wanted to build puppet pattern A before I forgot all the special instructions for that pattern. The tricky part was trying to decide what character I wanted to make, but unpacking all my puppets and putting them back where they belong in my house and on the tree at school, I was struck by an “apostrophe” to quote one of my favourite movies. I would make Peter Pan to be a great and worthy opponent to my best ever puppet, Captain James Hook!
I wanted my Peter Pan to have the same level of detail and workmanship that my Captain Hook has. I built Hook in early 2014 and I built everything from scratch except for his wig. Sufficed to say, I am very proud of my Captain Hook. I consider him to be my best ever puppet, and I took him with me to America this year so I could show him to my puppet building teacher. For the record, I had no idea that the theme for Beyond the Sock was pirates, it was just an incredible co-incidence! My Captain Hook is even featured on the Project Puppet Gallery
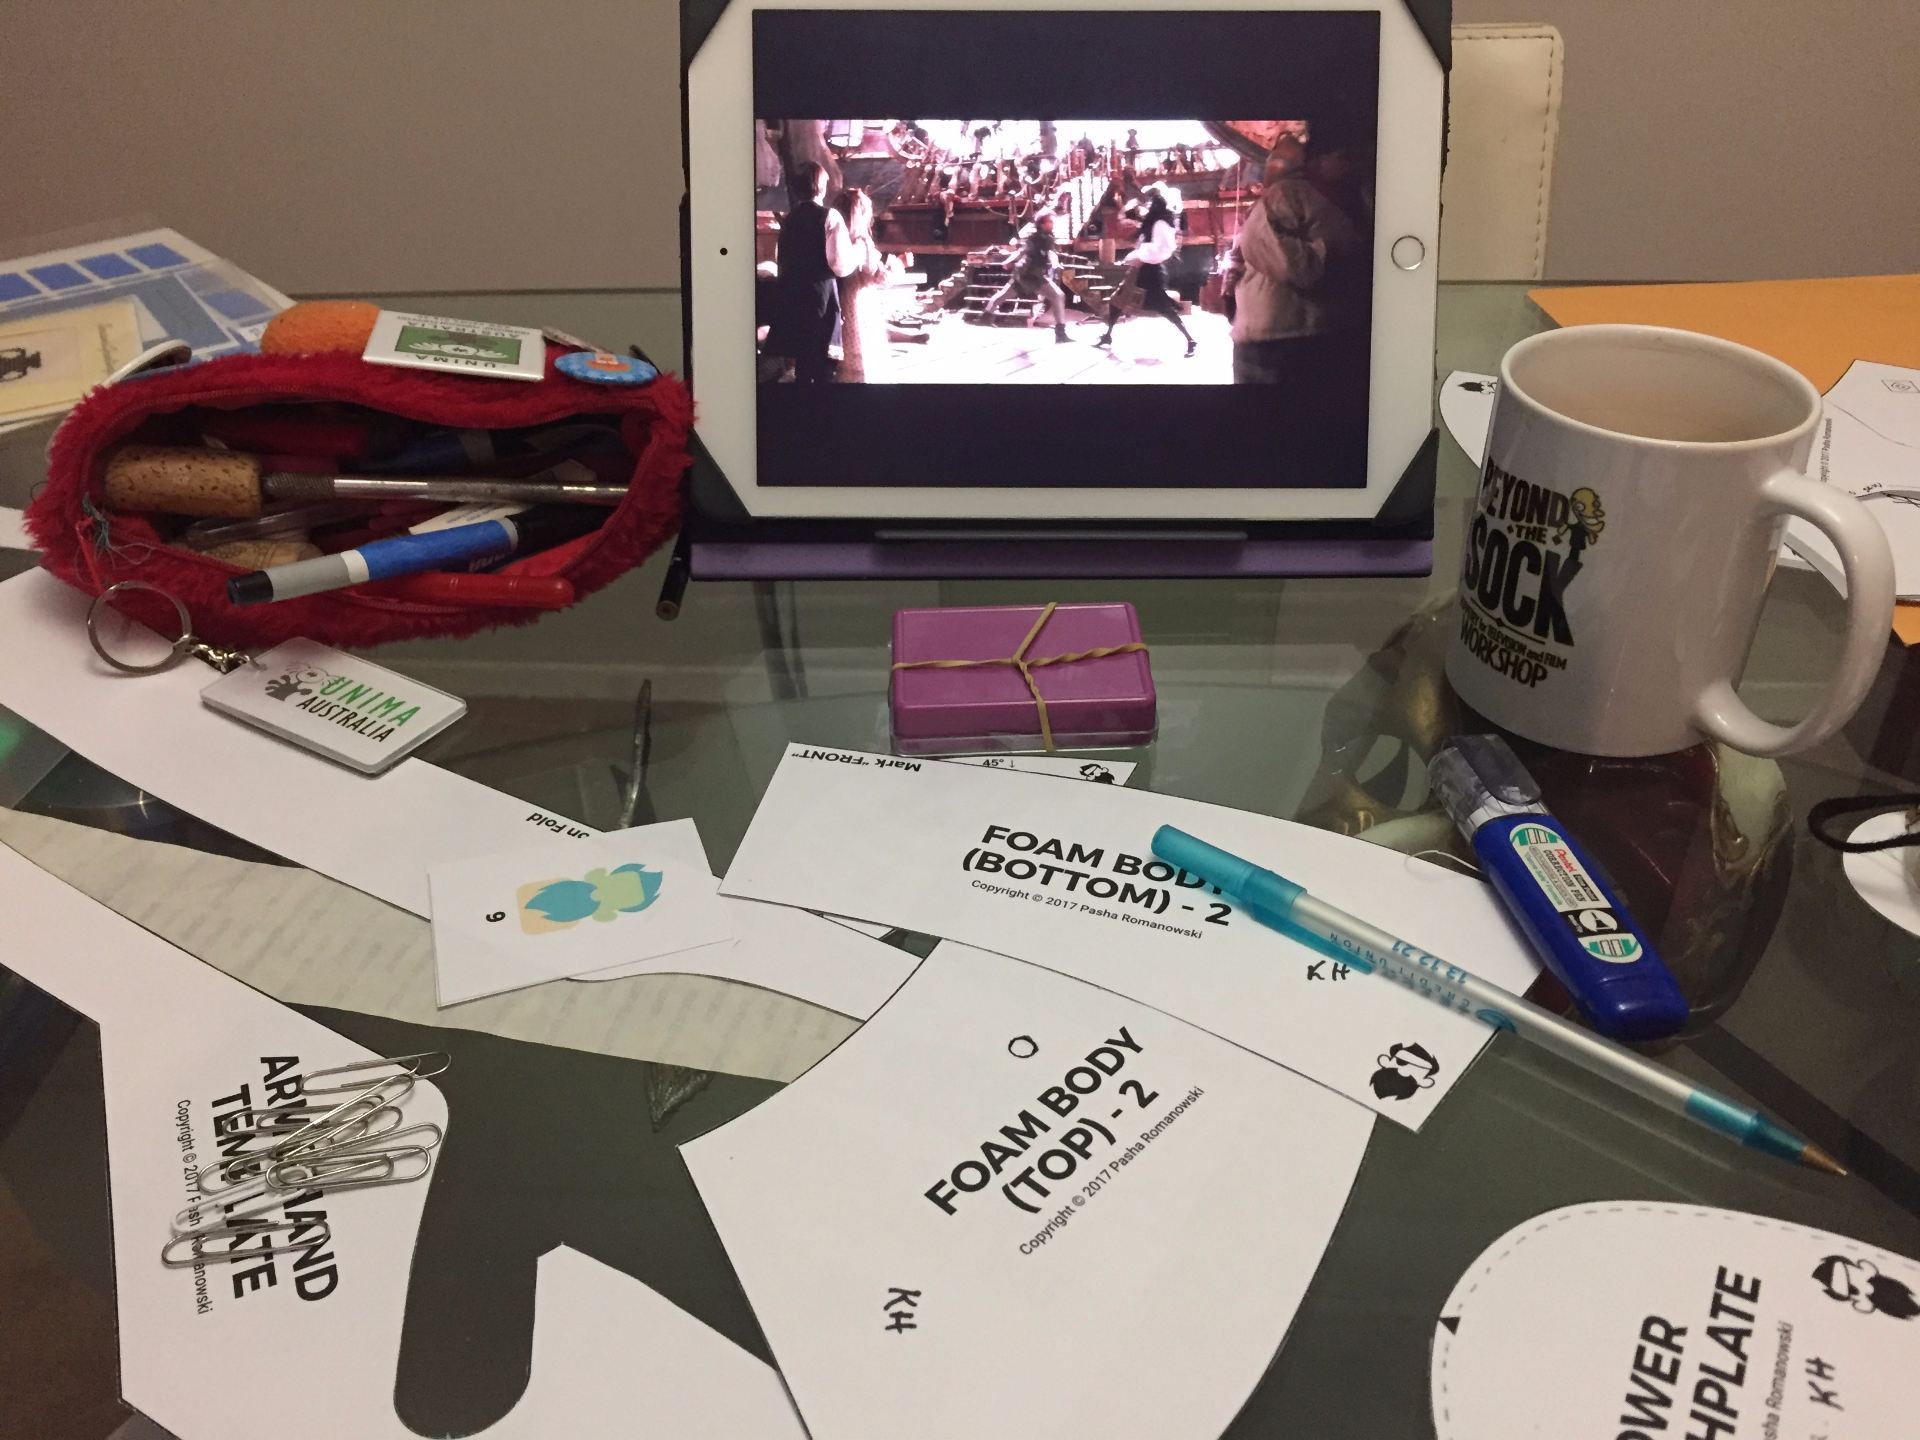
So design and construction began, I used screen shots of the 1991 movie Hook to design Pan’s costume based on the costume worn by Robin Williams. I wanted to include lots of leaf detail but avoid any reference to the stereotypical costume of Robin Hood which is also a green tunic and tights. I also wanted to make the ears more elf/ fairy like, and use the same technique for making the realistic eyes that I had used in 2014 when making Hook.
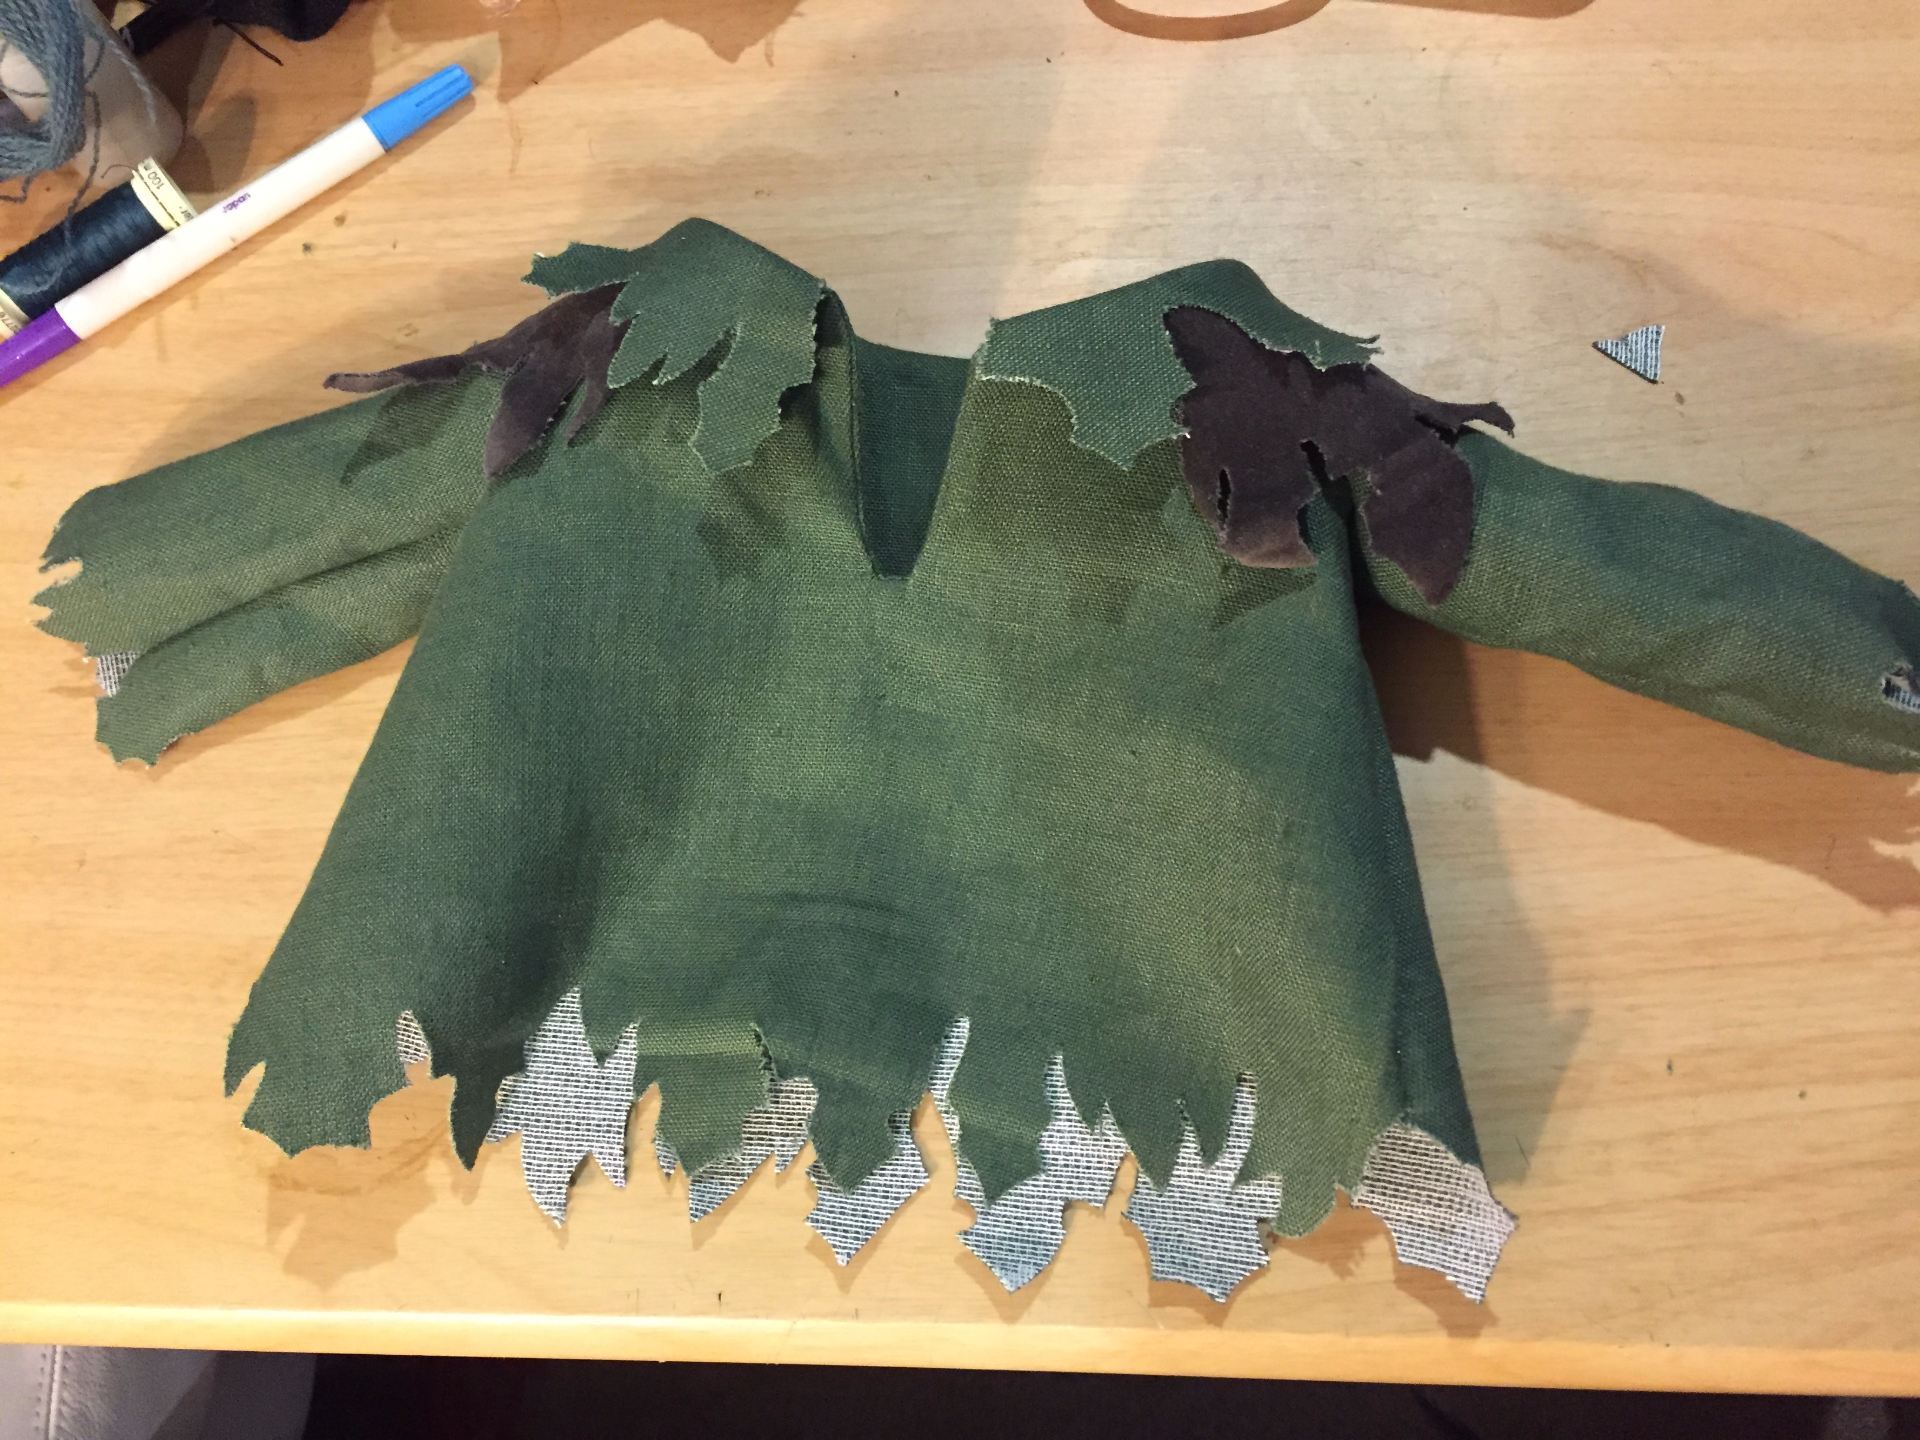
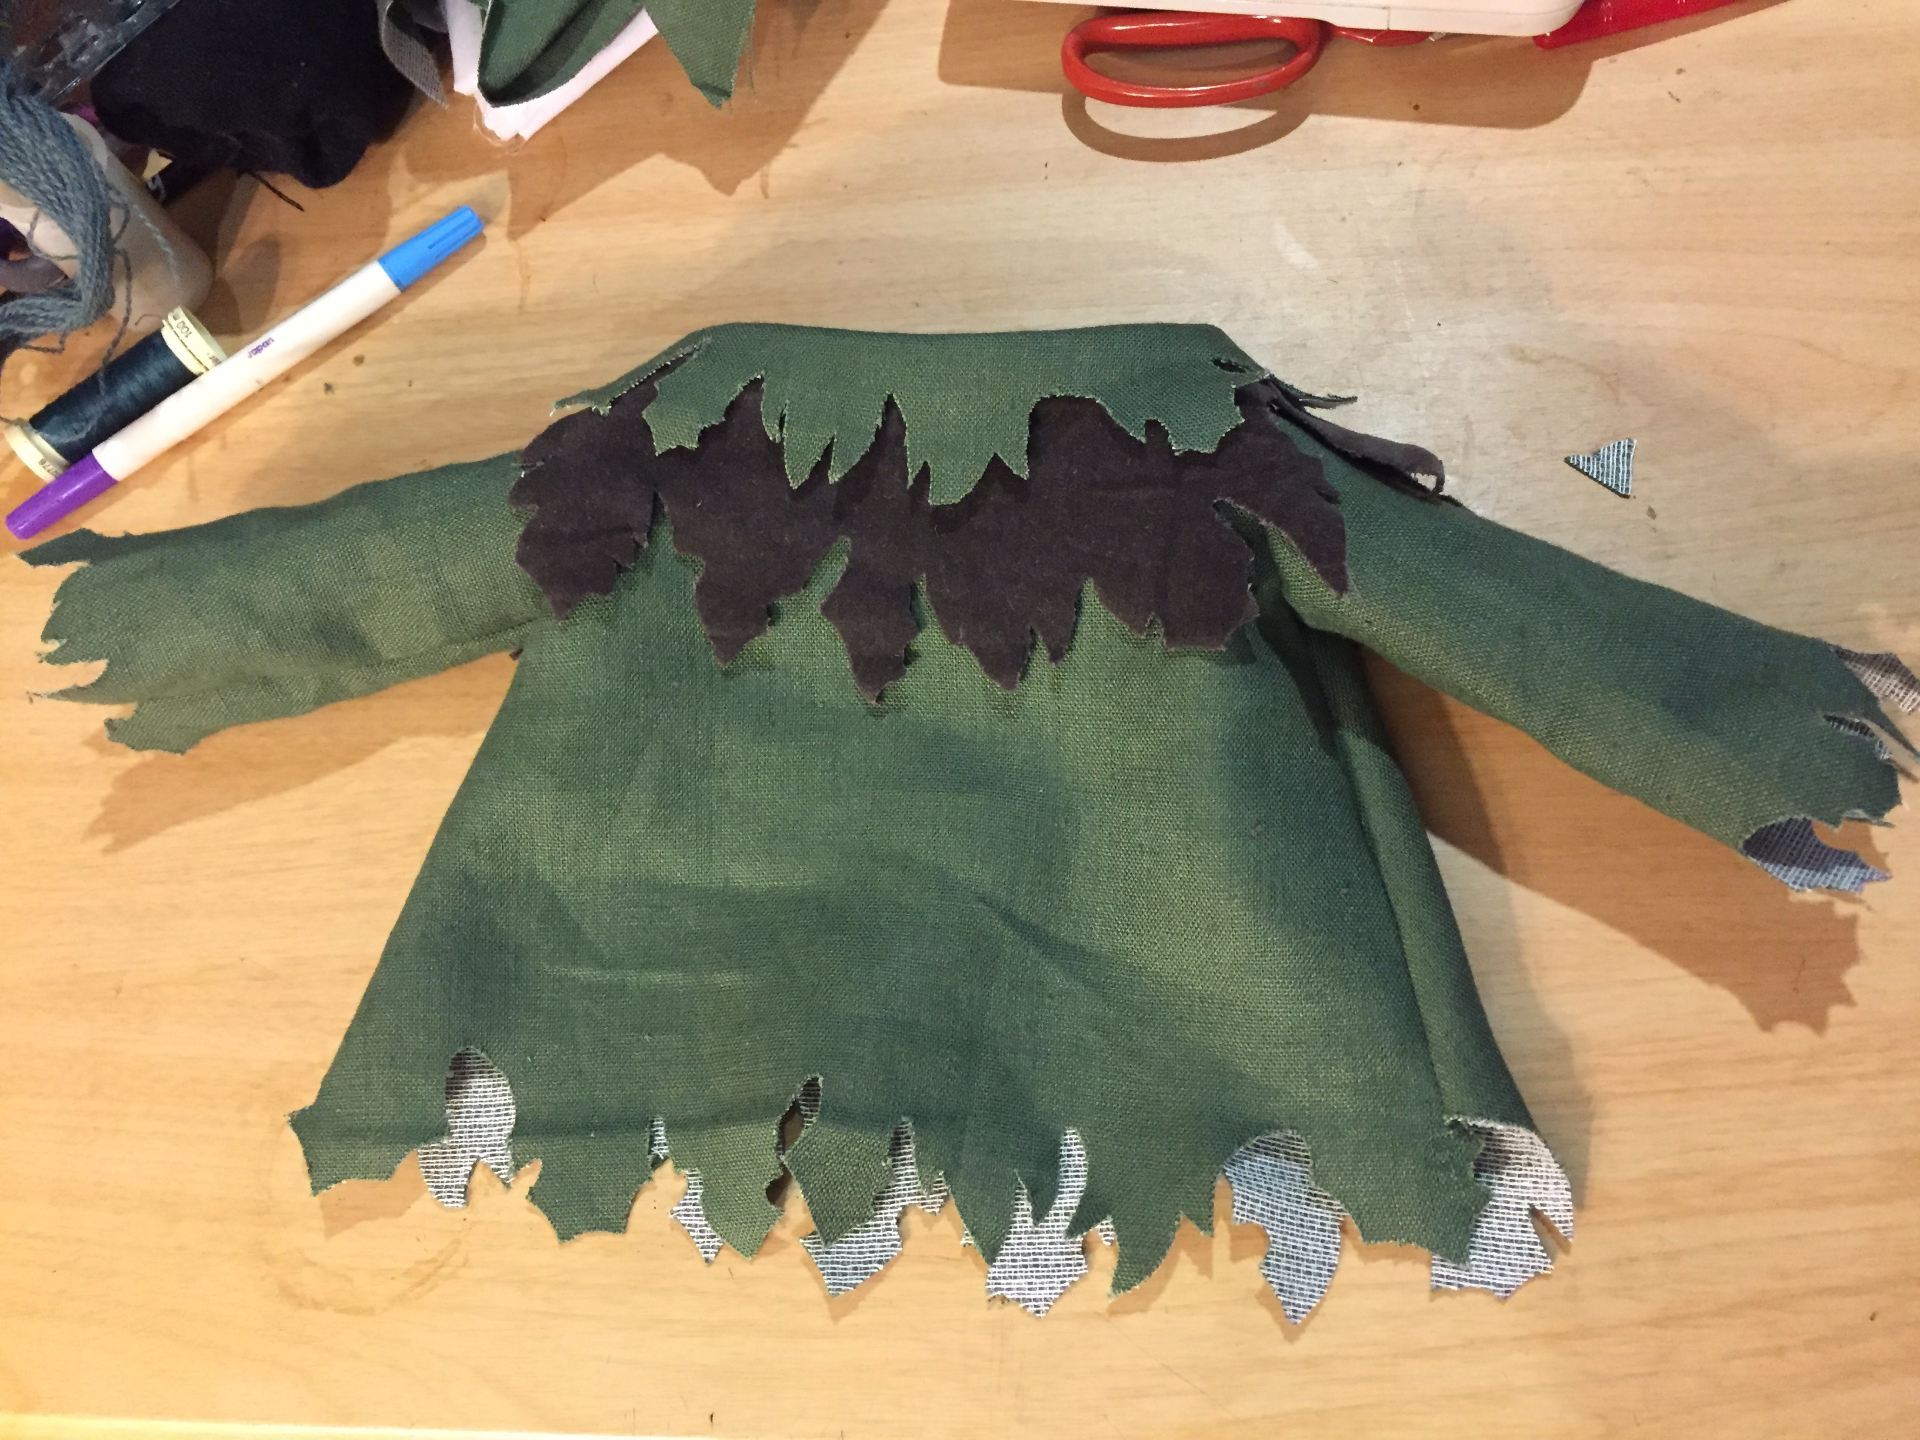
I used Premium Linen suiting for the main fabric of the shirt with cotton velveteen for the dark brown yoke under the collar, and dark green sheeting for the shorts. I was aiming for a colour pallette that reminded me of eucalyptus leaves. The pattern of the shirt was based on the shirt and pants pattern that came with the puppet pattern. The biggest headache in constructing the shirt was that the edges of the leaf detail keep fraying. I tried to use iron on interfacing to resolve the issue, but in some places, the interfacing hasn’t bonded with the fabric, and I don’t like how the white interfacing is showing up on the underside of the fabric when the puppet moves. If I could remake the shirt, I would try using visy-fix and glue the same fabric on the underside.
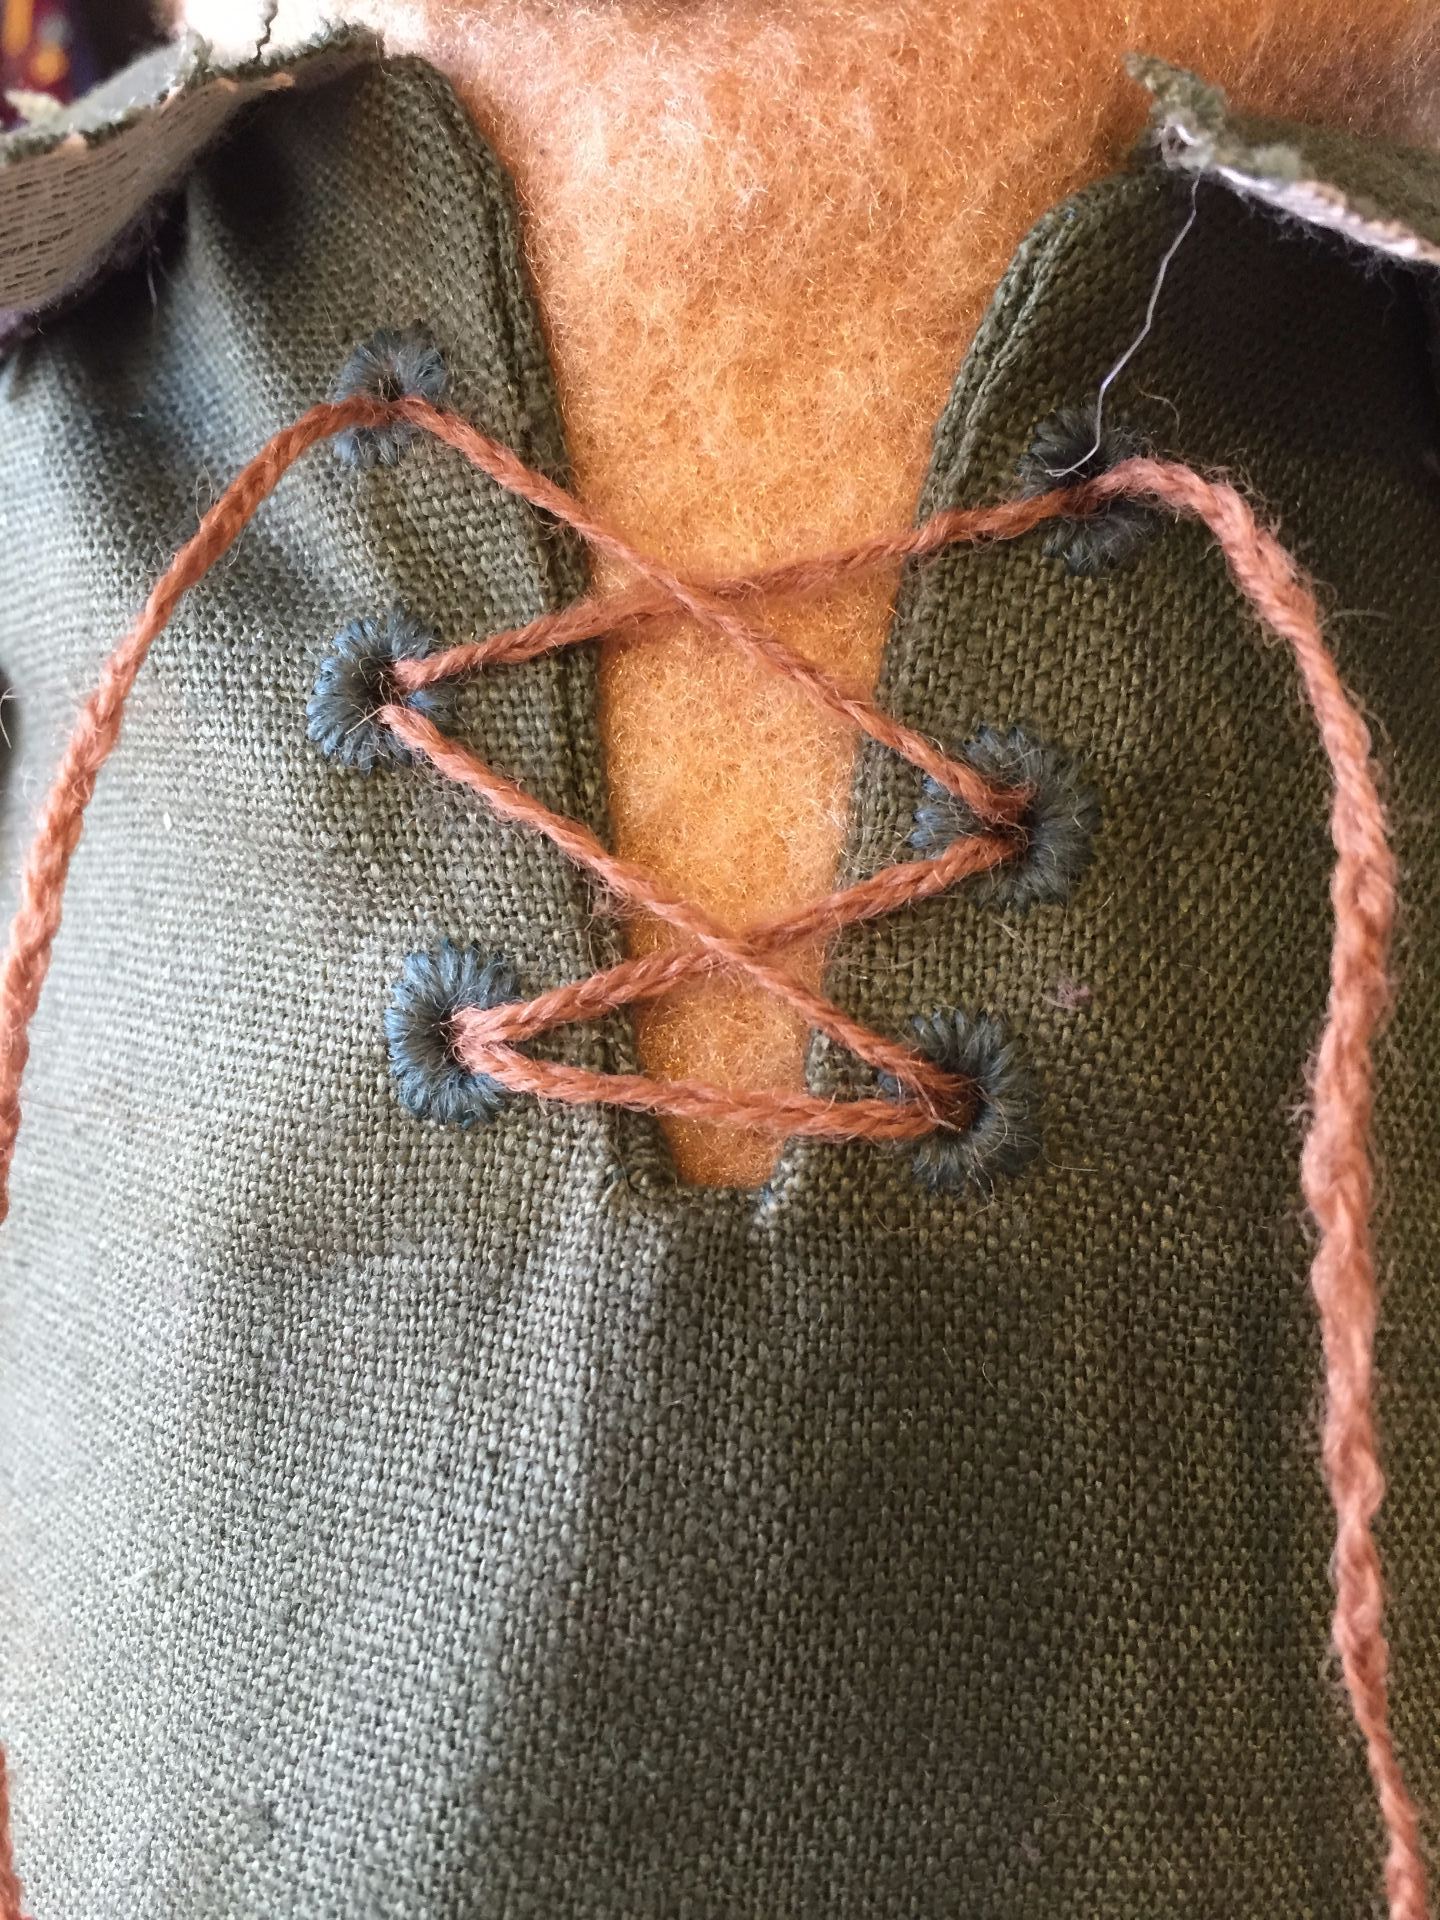
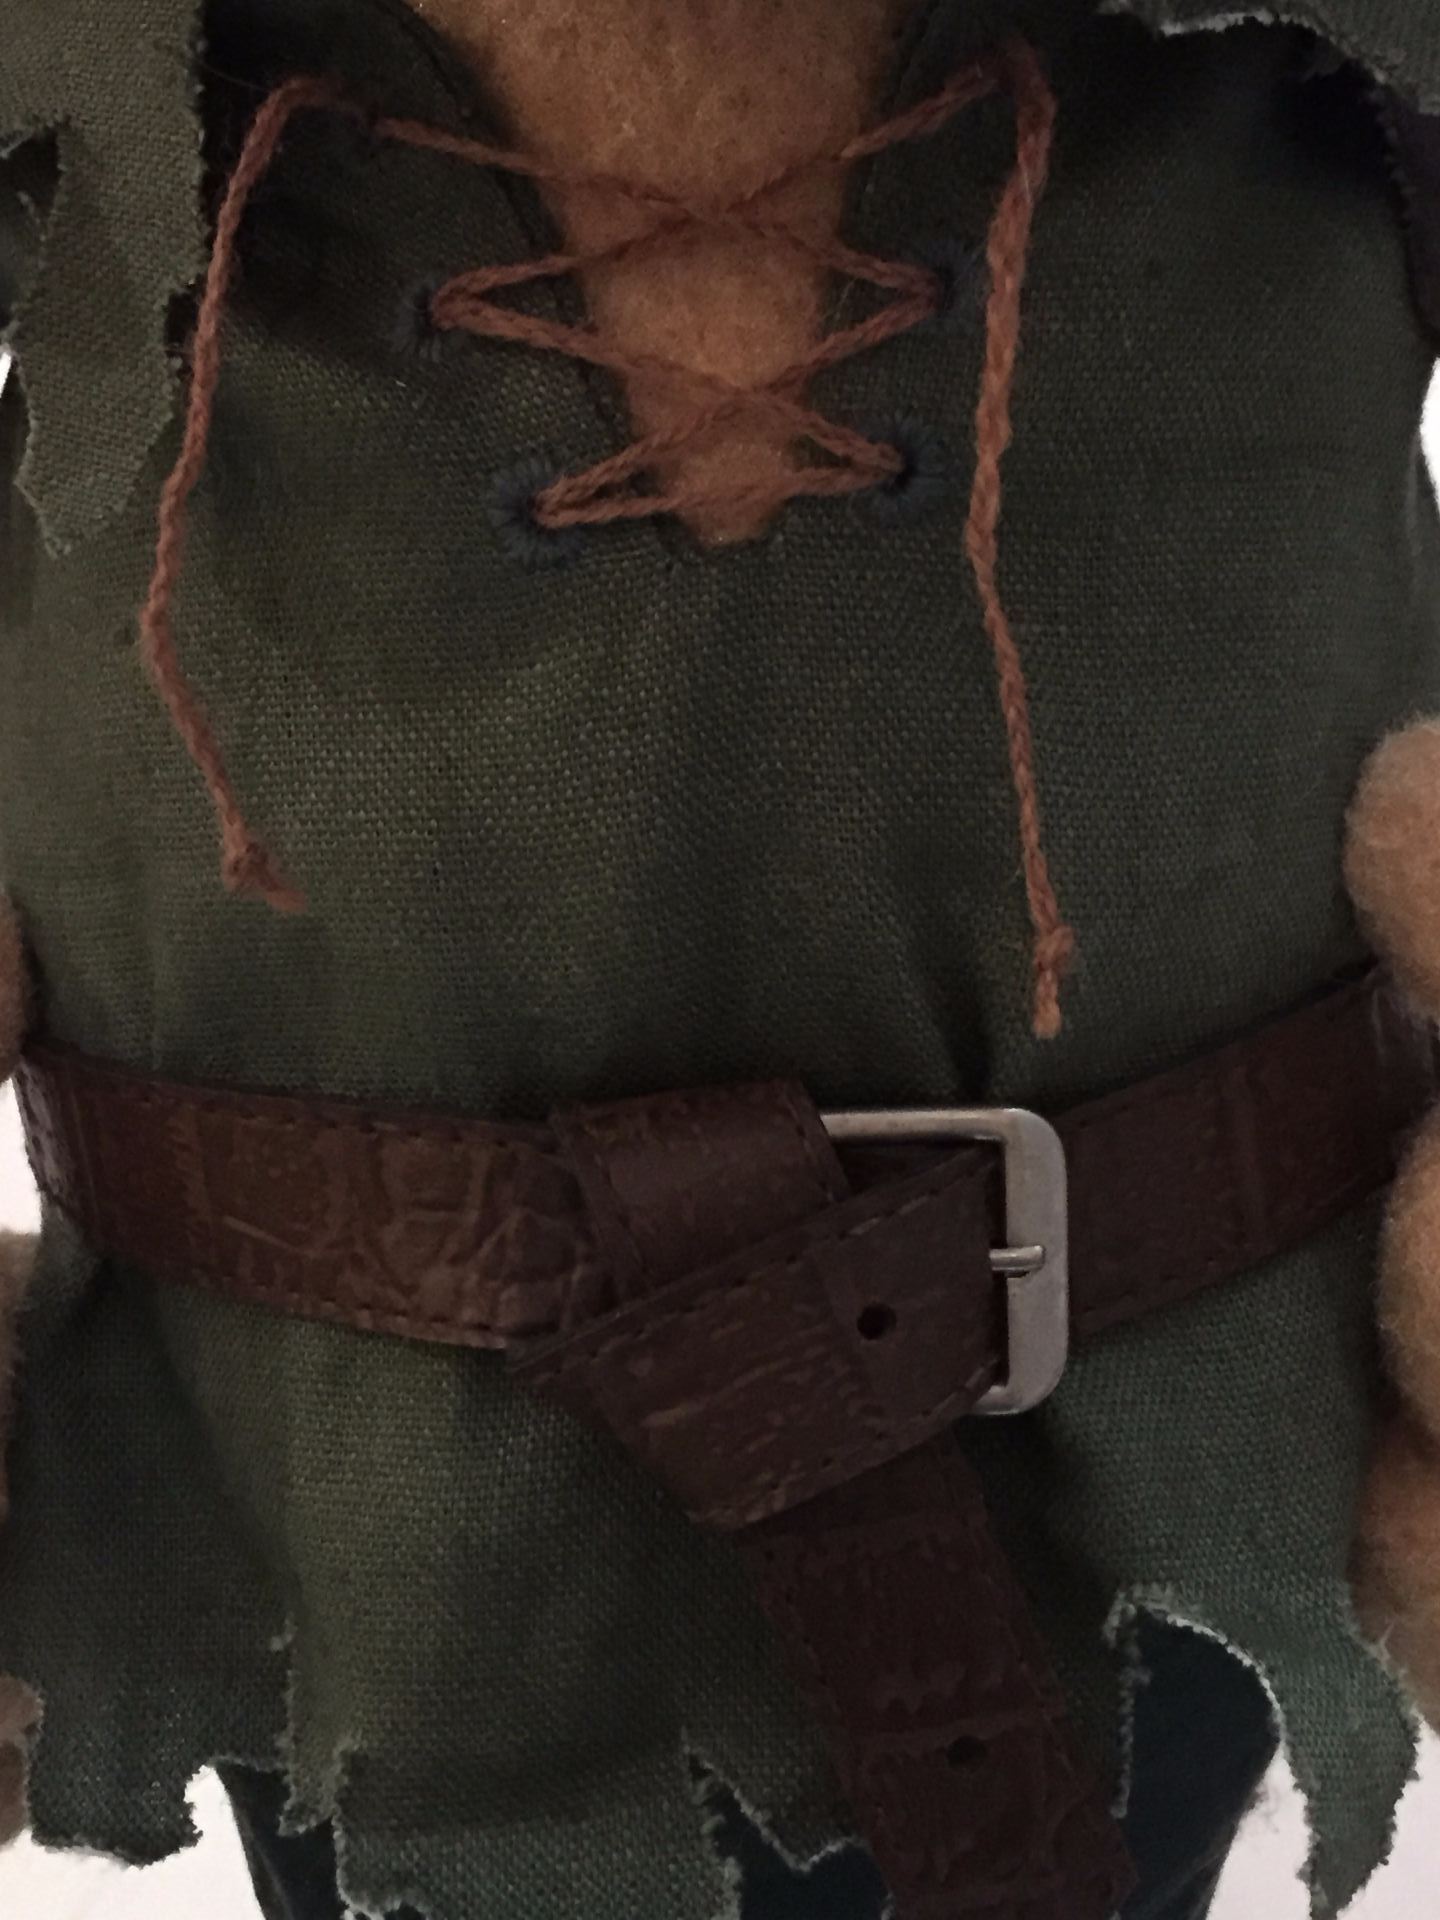
I did learn a new technique while making the shirt. I needed eyelets, but I didn’t want metal. I remembered that in the 16th-17th century, corset eyelets were hand stitched. A little bit of research later, I found that the best approach for puppet scale was to baste the fabric around the inner and outer margins of the eyelet, pierce the shirt with an awl, and use a satin stitch in green embroidery wool.
Peter Pan’s belt is made from a old narrow belt I found at a charity shop. I changed the buckle from gold plated to an old galvanised buckle, shortened the length to fit the puppet, punched new holes and wrapped it at the front so that it looked like the screen shots I had collected of the original costume.
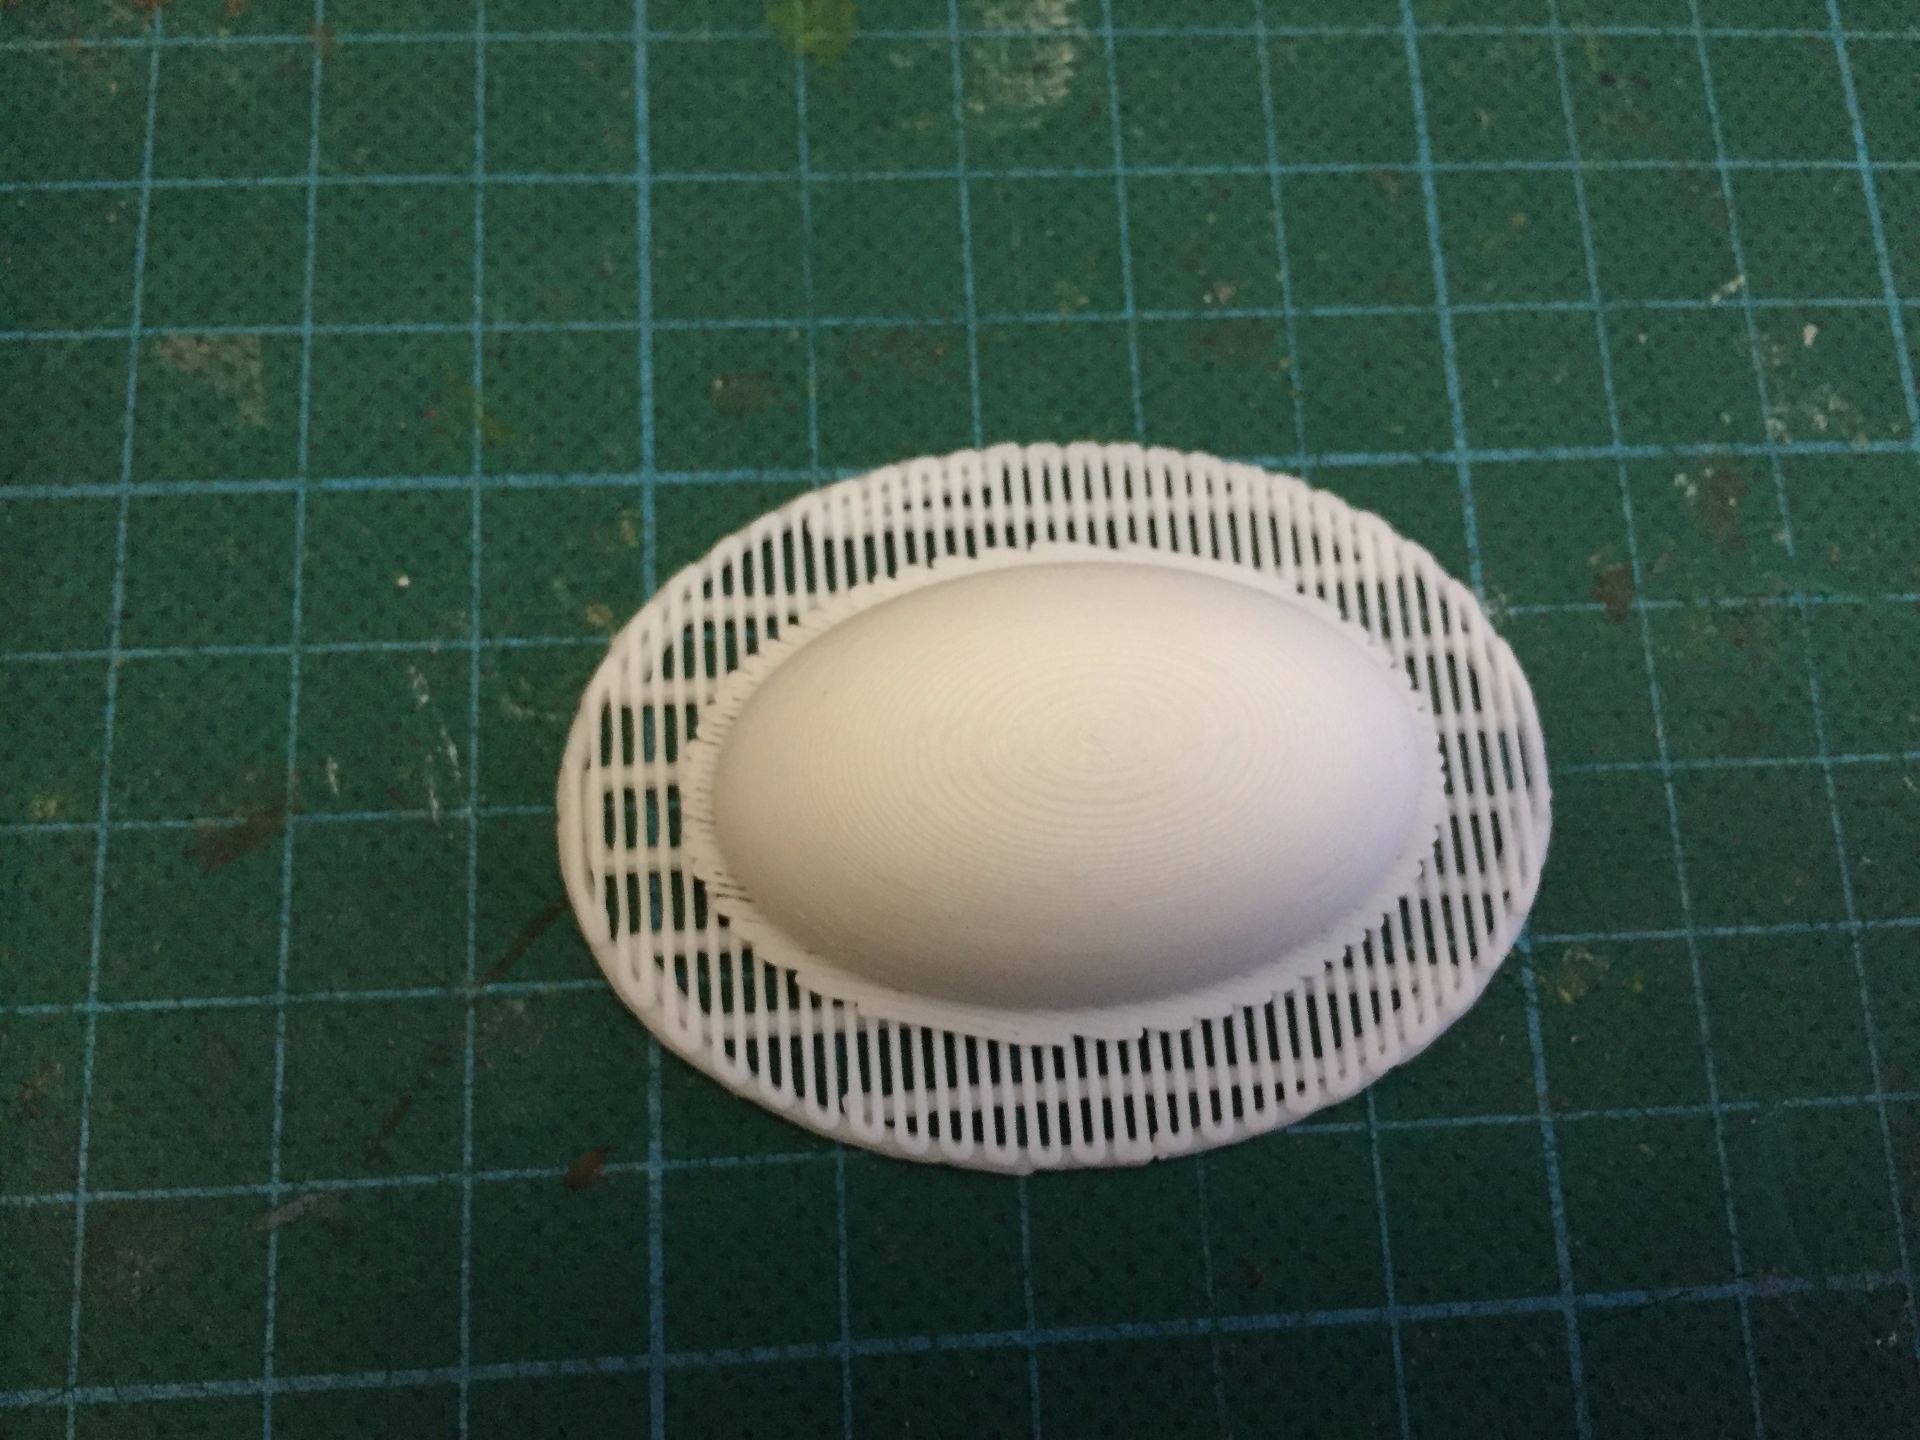
I have recently been experimenting with 3D printed puppet parts as an alternative to carved and polystyrene foam understructures. I used ABS plastic to 3D print an oval nose form and covered it in the same Antron fabric as the rest of the puppet using hot glue. The form was then stitched to the face of the puppet.
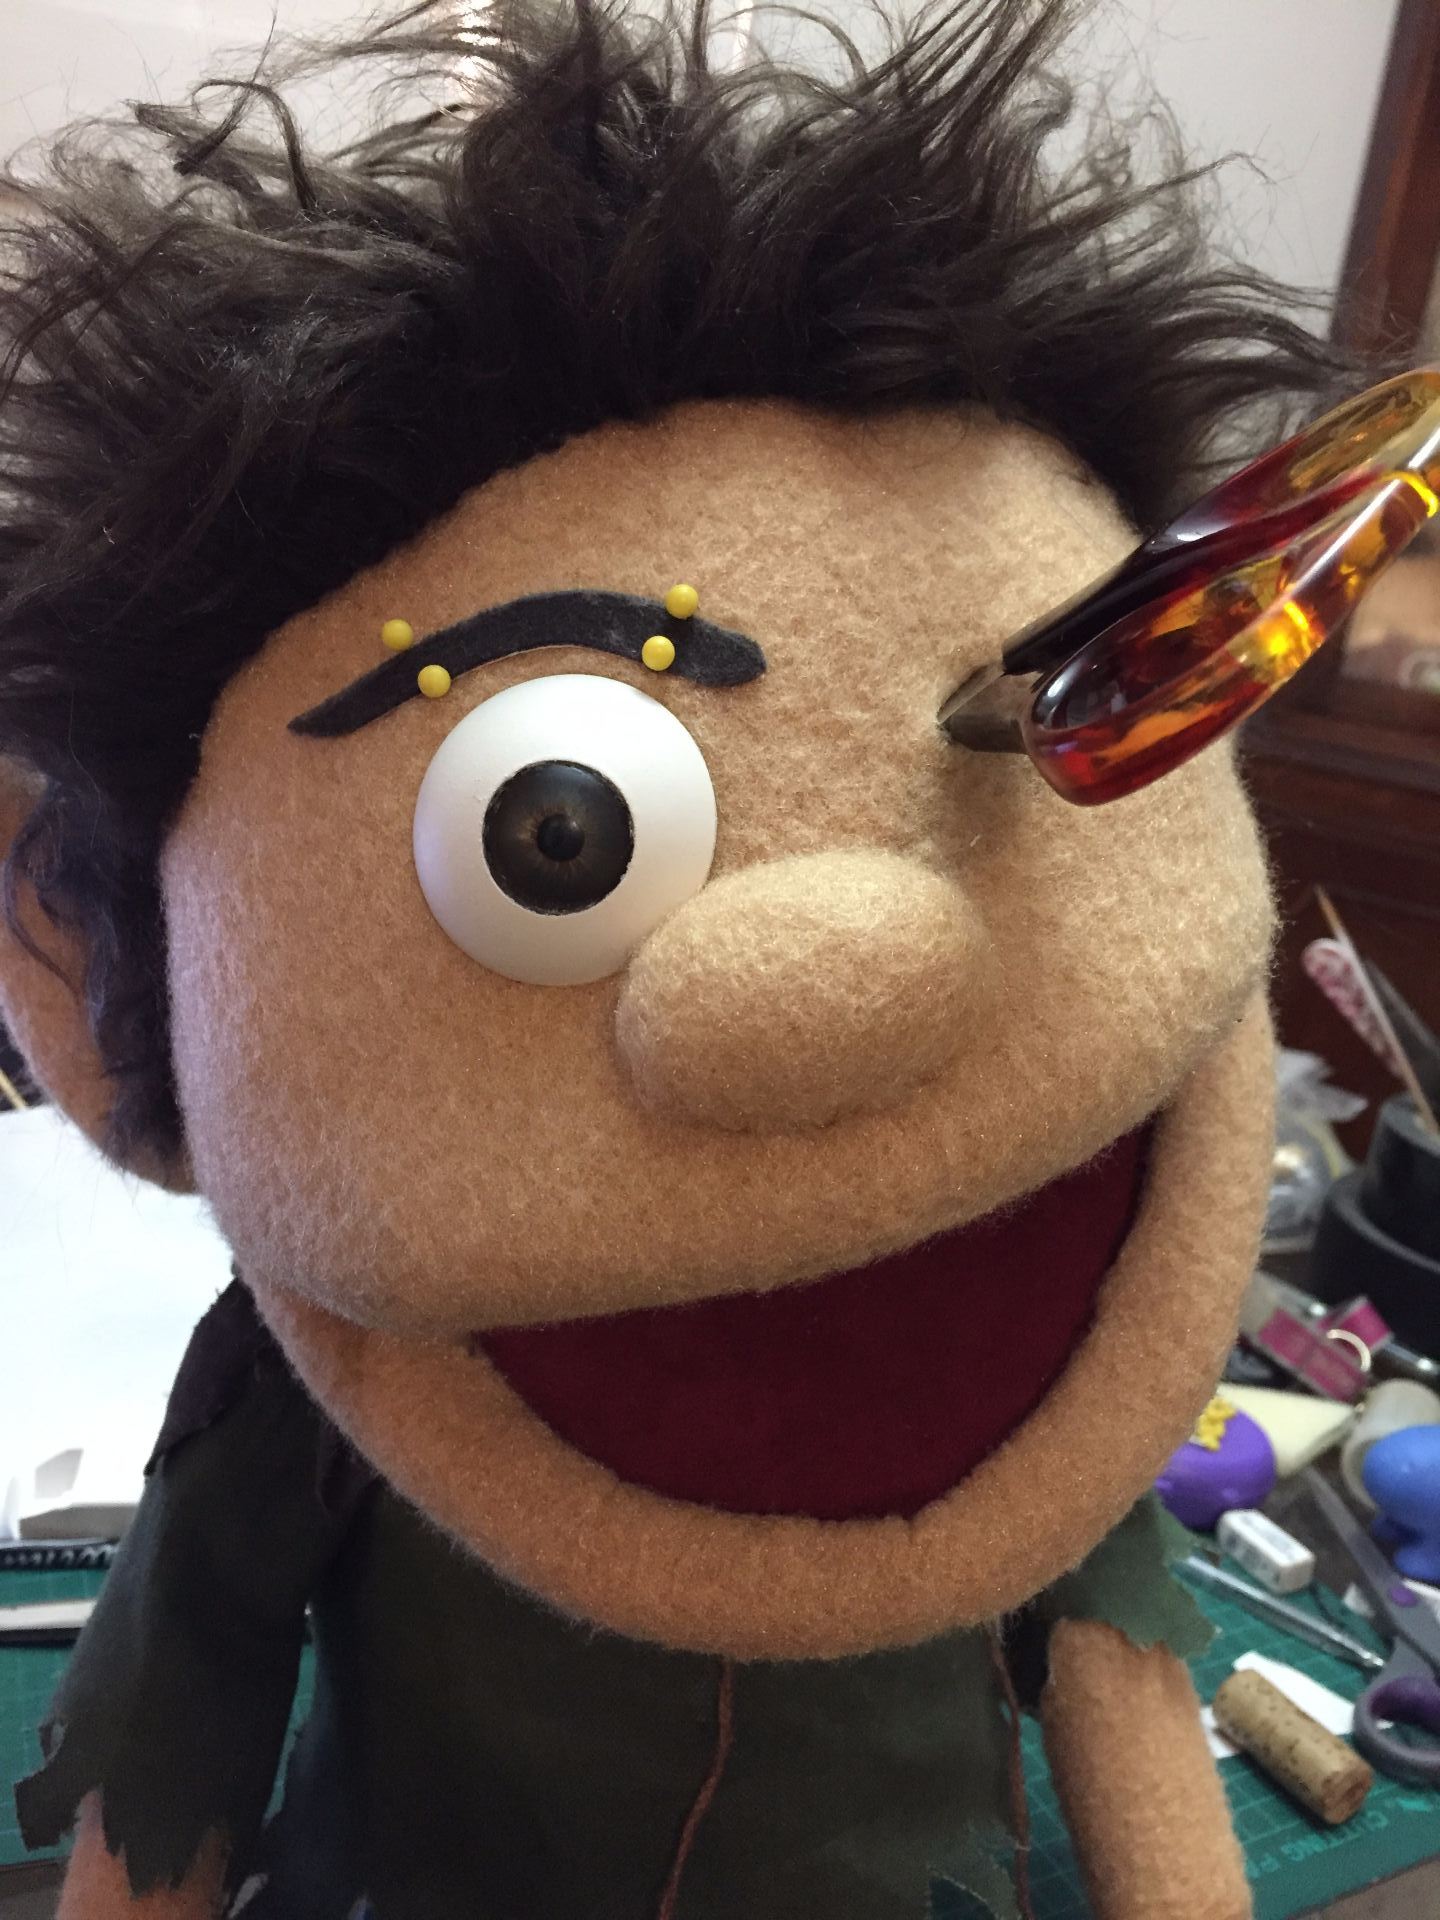
The eyes were a big challenge. I used realistic taxidermy eyes from Van Dykes Taxidermy in the USA. I inserted them into ping pong balls from behind, but the challenge is that there is very little surface area to glue the eye to the ball because of the difference in curved profiles. It is also a big challenge to not have any glue get onto the iris of the eye! The eyebrows were made from the same Mocha cotton Velveteen as I used on the yoke of the shirt. The hair is shaggy brown fur that I laid down in particular directions to get the fur to stand up.
I am very happy with how Peter Pan has turned out. I think is a great and worthy pair/ opponent to my Hook.
Check out the build progress photos in the gallery below!
Watching Hook while preparing pattern A
Designing the shirt pattern. So many leaf shapes!
Front of Pan's Shirt
Back of Pan's shirt
Hand embroidered eyelets on Pan's Shirt
3D printed nose form for Pan.
Taxidermy eyes being inserted into eye forms
Don't run with scissors!- Attaching the eyes to the head.
I was very privileged to have the New South Wales Teachers Federation come to my school to interview me and my students about the puppetry class I teach to Year 8 students this year.
I teach the class once a week how to make and perform puppets, and for homework, the students research different puppet traditions from around the world.
I am so proud of the video the Teachers Federation made about my class, that I just had to share it here on my blog.
Here is a link to the fantastic article about my class that was published in the state-wide journal Education.
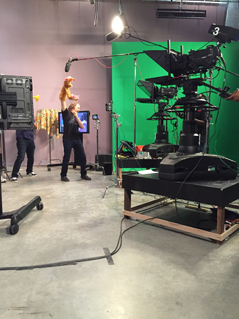
The timetable for today’s workshops is the same as the last 2 days which made knowing where to be and what to do much easier! During the morning session puppet making workshop, Miss Hannaford learnt a new way of attaching arm rods to the hands of the puppet. This method involving gluing the metal arm rod onto a piece of plastic called Sintra, then gluing the plastic between the 2 foam pieces of the hand. The rest of the workshop was devoted to sewing all the pieces of fur together to finish the skin of the monkey! There are many pieces of fur so some of the students chose to send the sewing to the other room where there were volunteers with sewing machines but Miss Hannaford chose to bring the pieces back to the hotel and put them together by hand stitching for homework.
After lunch with all the other students, it was time for the performance workshop!
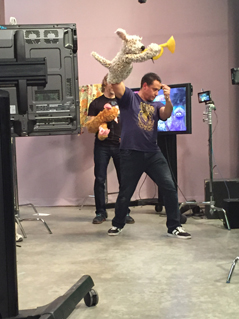
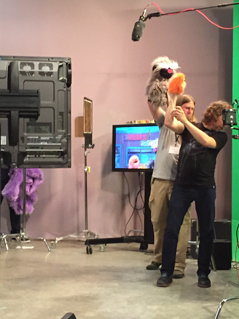
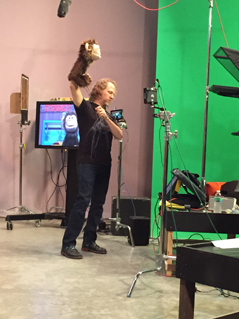
Today’s lesson focussed on using the Camera’s depth of field. This meant that the puppet started at the very back corner of the set and walked diagonally across the screen. The trickiest part was that the puppeteer has to not only stop moving when the puppet is at the middle and make the puppet look at the camera and say hi before walking off the screen at the last possible moment but the further away from the camera the puppet is the more the puppeteer has to bend their body out of the camera shot!
After a few more small group exercises in telling stories and making the puppets look at the puppet who is talking, it was time to start rehearsing the final show! Each student is asked to create their own short performance of less than 3 minutes as well as participate in a group song which has all the workshop attendees plus the instructors in it! The song chosen for 2015 was “We’ve got a dream” from the movie Tangled. 20 puppeteers and puppets had to squish into a very small space to learn to move together. The good part is that no one had to sing! All the puppets were lipsyncing to the song! The homework from the performance class was to learn the puppet choreography and the words of the song! So once Miss Hannaford and the other attendees got back to the hotel, everyone had so much homework that they organised their own dinner and went back to their rooms to finish their homework.
Day 7: Saturday, 23 May 2015
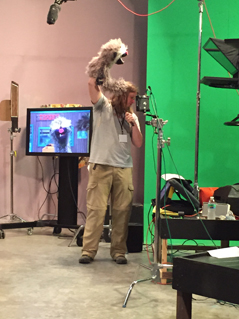
Today was the last day of Beyond the Sock 2015! Miss Hannaford finished all her homework but she was worried that she didn’t quite have the choreography of the song quite right. The timetable was the same as the last few days, so in the morning, Miss Hannaford nearly finished building her Monkey puppet by inserting the foam head into the skin and she nearly finished creating the eyes when she had to stop for lunch. No one was allowed to stay inside the workshop room on their own because of all the dangerous equipment around!
After lunch was the performance workshop where the focus of today’s lesson was learning to read scripts taped beside the monitors but to read the script and perform the puppet as a character. Students were paired together but each pair was given a different script to perform. The goal of the exercise was to be bold in terms of character choices as the script that Miss Hannaford and her pair named Will was given could be interpreted in many different ways! After all the groups performed their scripts, it was time to rehearse the group song a few more times!
The performance workshop ended at 4pm because everyone had to run back to the build workshop to finish their monkey puppets! All Miss Hannaford had to do was attach the nose and eyes to her puppet. What really interested Miss Hannaford was that the nose shape of her puppet was printed using a 3D printer and that while she was at the performance class, the volunteers in the build workshop had glued on a safety stem from a doll joint so she could attach the nose to the puppet and it won’t come off! Once the puppet was finished, Miss Hannaford had to take her puppet to a photo shoot back in the theatre and race back to the performance studio so she could rehearse her performance piece and the group song with her new monkey puppet called Matilda!
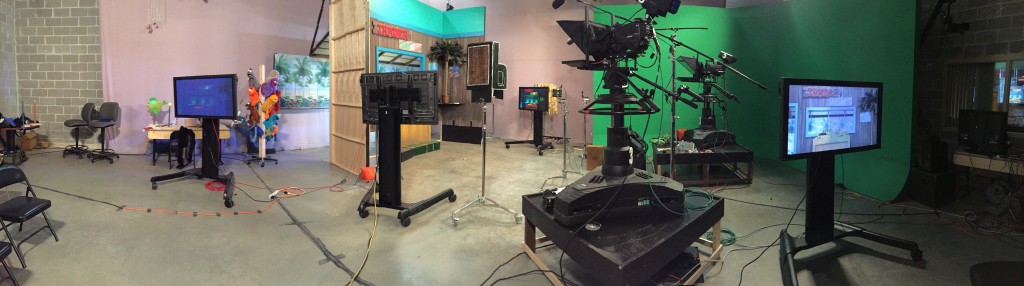
At 7pm, the audience for the show started to arrive. The audience was made up of friends and family of the attendees; Professors, Lecturers and students from the University; and people off the street who had heard that there was a free puppet show! Everyone did their little performances that included songs, scenes and jokes. The two performance teachers Noel McNeal and Peter Linz used puppets to act as hosts for the show by introducing each act but they also helped the workshop attendees perform their characters by moving arm rods or bits of scenery! You can see a panorama photo of the TV studio and set we got to perform in at the bottom of all the pictures! You can even see the 2 real tv cameras that recorded the performance!
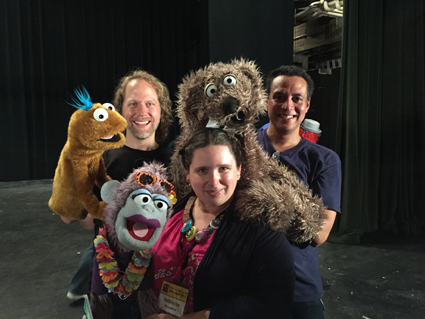
The show was really funny and the group song was a huge success! At the end of the show, it was time to take the big group photo and for everyone to say goodbye. Miss Hannaford’s highlight was to have a picture taken with the teachers Peter and Noel but she also got a hug from both of them! I was really proud of Miss Hannaford for being brave and performing in front of a TV camera and studio audience!
Tomorrow we fly home to Australia. I can see how tired Miss Hannaford is after such an exciting week so I expect that she will sleep most of the way home. I had a wonderful holiday with Miss Hannaford!
Well there is a reason why I have not written here in a while…. I have been building lots of commissioned puppets! Some I can’t share here yet- but I can share the journey of one puppet that has an extra special place in my heart. I have blogged, tweeted and facebooked about a wonderful puppet shop I have been visiting for over a year now called Loutky Puppets. Recently the creative genius behind Loutky Puppets, Wez Champion asked me to collaborate on building a foam puppet for the new Gaki Puppet Series. Gaki is Japanese for Devil and the puppet series focuses on the Tasmanian Devil using rare Australian Timbers carved and burnt in the Japanese Kokeshi doll style.
I jumped at the chance to build this puppet as Wez is a great collaborator and puppet designer in that he provides gentle direction but lets me have creative freedom! While I don’t yet have an official photo of the Gaki Puppet who we call Cerny, (Czech word for Black) I have been the guest build blogger and you can see how I built the puppet.
I hope in the future that I can collaborate with Wez to develop more new puppets. It is such a wonderful creative process that I have been privileged to experience twice now. The Cerny puppet will now be up for sale- so while I will miss him as he is crafted with care and love, I hope his life’s journey as a puppet will mean that he will be ‘treasured forever’.
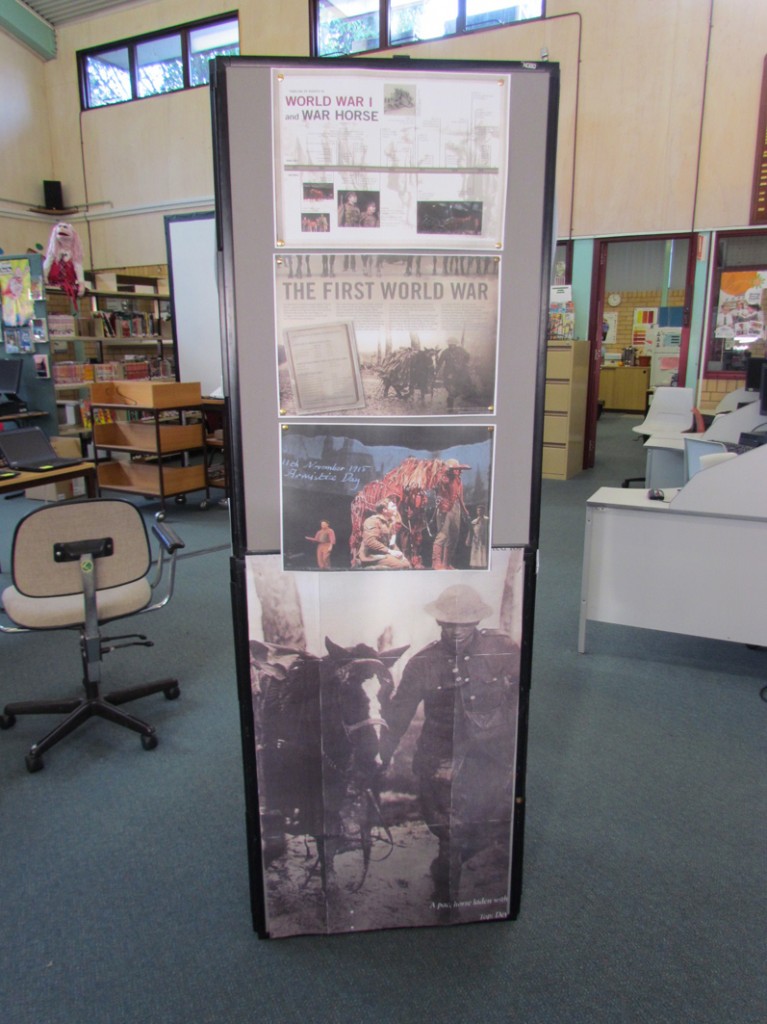
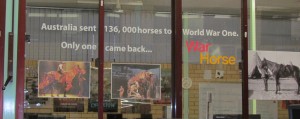
Over the last few months, War Horse, the incredible stage production from the National Theatre based on the book by Micheal Morpurgo has been playing here in Sydney at the Lyric Theatre. I was fortunate to see the Sydney production 3 times and fell in love with the incredible puppets made by the Handspring Puppet Company in South Africa. I was deeply moved by the notion that very few of the animals used in war especially the horses did not return from the war and many were left behind. Out of more than 136, 000 Australian Horses sent to the first world war, only one horse returned- Sandy the horse of Major General Bridges who died in Gallipoli and requested that his horse be returned to Australia.
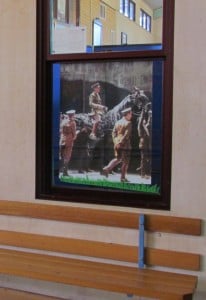
Image of a War Horse stuck in the mud of World War 1.Images from the play of War Horse.
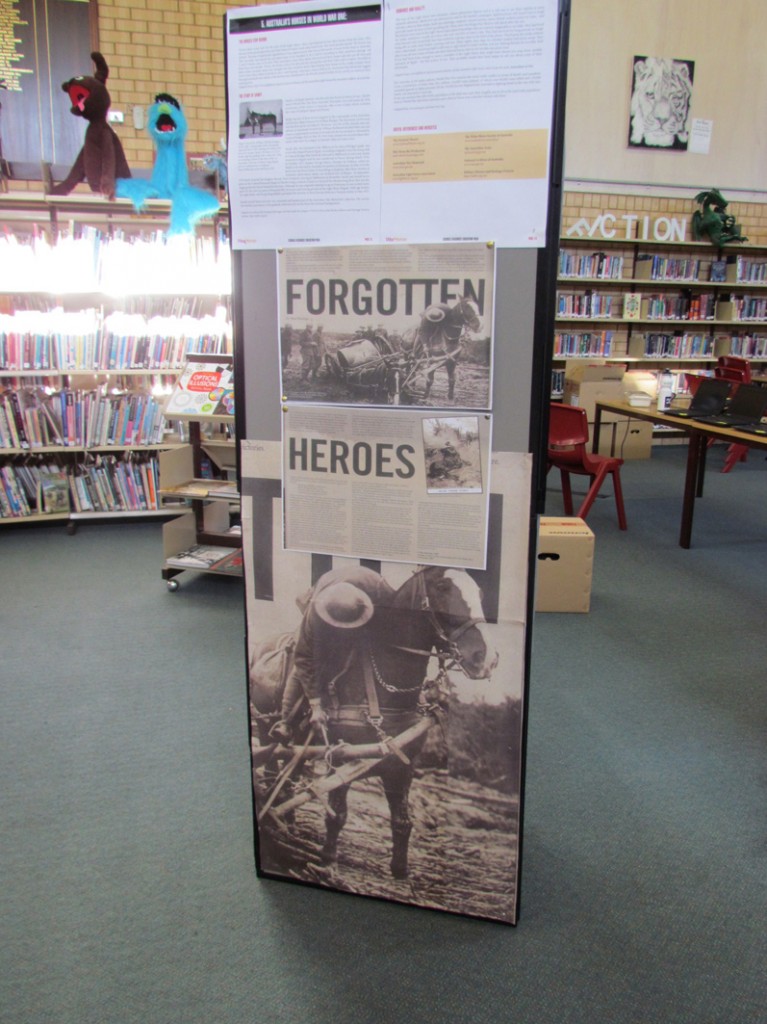
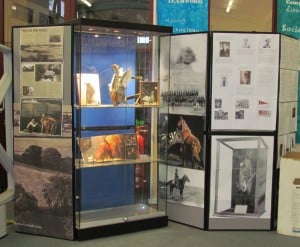
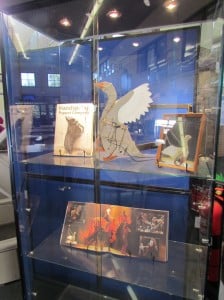
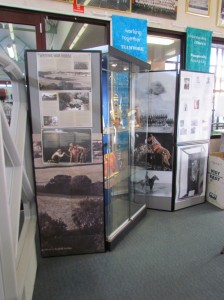
Using the play of War Horse as a foundation, and the education pack from the learning program for the play as well as my Goose puppet from the National Theatre of Great Britain, I created the display for term 2. The display focused on information about the Australian Light Horse Regiment as well as how the original story and play were developed. This way the display linked into the History, English, Creative Arts and Design and Technology curricula. I also used the vision from the Handspring TED talk about War Horse as well as the vision from the Making War Horse documentary and the Michael Parkinson Masterclass program that featured Micheal Morpurgo on the Library TV screen. This way students could see and hear elements of the play and appreciate the artistry of the beautiful puppets.
General view of the display wall at the front of the library including the display cabinet.
Photograph of the vinyl lettering to teach students about the 136000 horses sent to World War 1 and only 1 returned.
Photograph of Topthorn from War Horse.
Image of the puppet of Joey from War Horse including the plans of how the horses are constructed.
Contents of the display cabinet containing the Goose Puppet, Handspring puppet book and the program from the play
Side view of the display cabinet with information about the writing of War Horse as a story.
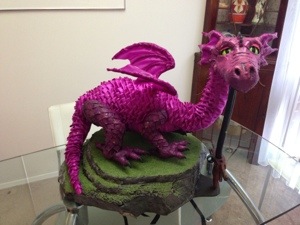
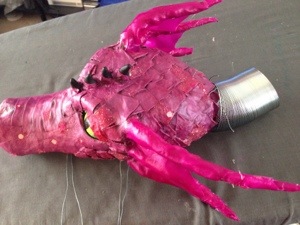
It has been a very long time since my last post but since my last post, my Dragon is now FINISHED!! Her name is Ayra- a name suggested to me by a young talented artist Abira Harvey.
Meet Ayra the Dragon!
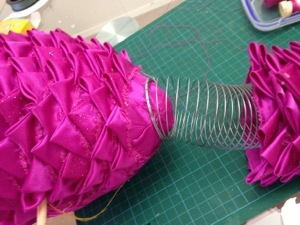
The scales on her neck , body and tail are done using Prairie Triangles and every single one of them is hand sewn onto her body. I had to custom make the fabric skin that is sewn onto her paper mâché body (under the scales). The trick with custom making the body skin is that you cover the body in a plastic shopping bag then wrap it with packing tape all over. You then cut the plastic off along the spine and belly and cut darts into the plastic to make a flat template. This is the link I used http://www.instructables.com/id/Make-a-sewing-pattern-from-a-packing-tape-mould/
Fitting the fabric “skin” around the Papier Mache bodyFitting the wing structure onto the body. The wings are made from lengths of wire covered in paper and hardened fabric.
The mechanisms in her head do everything I planned except I was not able to get her eyes to open wider. So her mouth opens and closes using a trigger on the handle and her eyes blink using a separate trigger on the side of the handle. Her handle was carved from Rosewood by the amazing puppet carver Wez Champion and the control rod is a length of PVC pipe that has been coated in a black rubber called plastidip. The legs are made using the techniques I linked to in the previous post.
Making the feet using telephone book paper and masking tape. The knuckles on the joints have not yet been added to the foot on the right
Front legs of the dragon showing how the legs were cut open to remove the plasticene. They have not yet had the fimo claws added to the toes. The pvc pipe is the bone of the leg to allow the movement mechanism so that her legs can ‘walk’.The almost finished front leg- just needs the top section put back on and the scales added down the leg. You can see how the leg pivots through the pvc ‘bone’ and the black fimo claws.
Her neck works by attaching a slinky between the head and body. This not only allows for fantastic movement but the slinky also supports the fabric of the neck so that it does not collapse.
Attaching the Slinky to the bodyAttaching the slinky to the head before I attached the neck fabric.
Because of the length of the control rod and handle, it was necessary to make a base for Ayra to sit on. I decided to make her a foam ‘rock’. The rock is made of 5 layers of 1 inch foam glued together then carved to make a rock texture. The whole rock was coated in multiple layers of pva glue and in some places tissue paper to give a smoother weathered look. The whole rock was then painted with acrylic paints and I used green flocking to simulate grass and moss.
Planning the layers of the rock using 1 inch upholstery foam.Carving the foam to look like a ‘rock’.Coating the rock in multiple layers of pva glue and tissue paper.Painting the “rock” using acrylic paints.Adding the green moss using Summer flowers flocking.The top layer of ‘grass’ (green summer flowers flocking) to make the rock nice and comfy for Ayra
Overall Ayra has been a wonderful and sometimes frustrating learning experience. I have never built anything like her before but I really want to build more paper mâché puppets with or without mechanisms. She took 5 months to build but in that time, she has really extended my puppet making skills.
The theme for this year’s book week is One World, Many Stories. With such an open theme, I found it very challenging to come up with a display idea for the Library I work in.
The windows at the front of the library before their transformation
When I recently recieved a new puppet from Vietnam for my collection of puppets- I was inspired! Before books, puppets were used to tell stories. What if I used my collection of puppets from around the world as my display. I could also use the windows at the front of the library similar to department store windows and put the puppets in them.
I wanted to try and make each window like a puppet theatre so it needs a curtain and a banner celebrating the theme. I found the curtains image on the internet at http://www.myvbay.com/2011/06/one-enchanted-eveing-musical-review.html, and I found the banner/ ribbon in MS Publisher 2007 clipart.
To make the curtains fit the window, I measured the windows and transferred those measurements to MS Publisher 2007. I then resized the curtains to fit, printed it out on multiple sheets of A3 paper, glued the pages together and cut out the opening to see the puppets. I then used sticky tape to ‘hang’ the curtains in the window.
This is my puppet Lachlan Macquarie representing Muppets
Punch and Judy Puppets holding book week books
The backgrounds behind the puppets are 3 panel folding display boards with black fabric draped over the top. All of the puppets except my Vietnamese Water Puppets are holding scaled copies of book week nominated titles. I could not attach copies of the book week books to the puppet’s hands without damaging the paintwork on the puppet.
Wayang Kulit Shadow Puppets Holding more bookweek titles.
Vietnamese Water Puppets
This has been a wonderful opportunity to blend my passion for puppets with my role as the Teacher Librarian as well as creating a talking point around the school. Many teachers have suggested that I design animated windows for Christmas just like some of the major department stores here in Australia… we’ll see when Christmas comes around.
Book week will be held this year from August 20 to 26th.
 Lucy and Miss Hannaford outside the Centre for Puppetry Arts