Going Beyond the Sock in 2019 Day 4-6

Day 4, Tuesday June 4 2019

Today was the first day of the Beyond the Sock course. The day started with a briefing and a tour of the University of North Texas Radio, TV, Film and Performing Arts Building. We got to see the set in the TV studio, and it 2 years ago, the set told me instantly what the puppet was, but the strange purple and blue tones did not help with the guessing game of what is the puppet we are making?

After the tour, we went to lunch at our favourite BTS lunch spot- Crooked Crust.

BTS group lunch at Crooked Crust

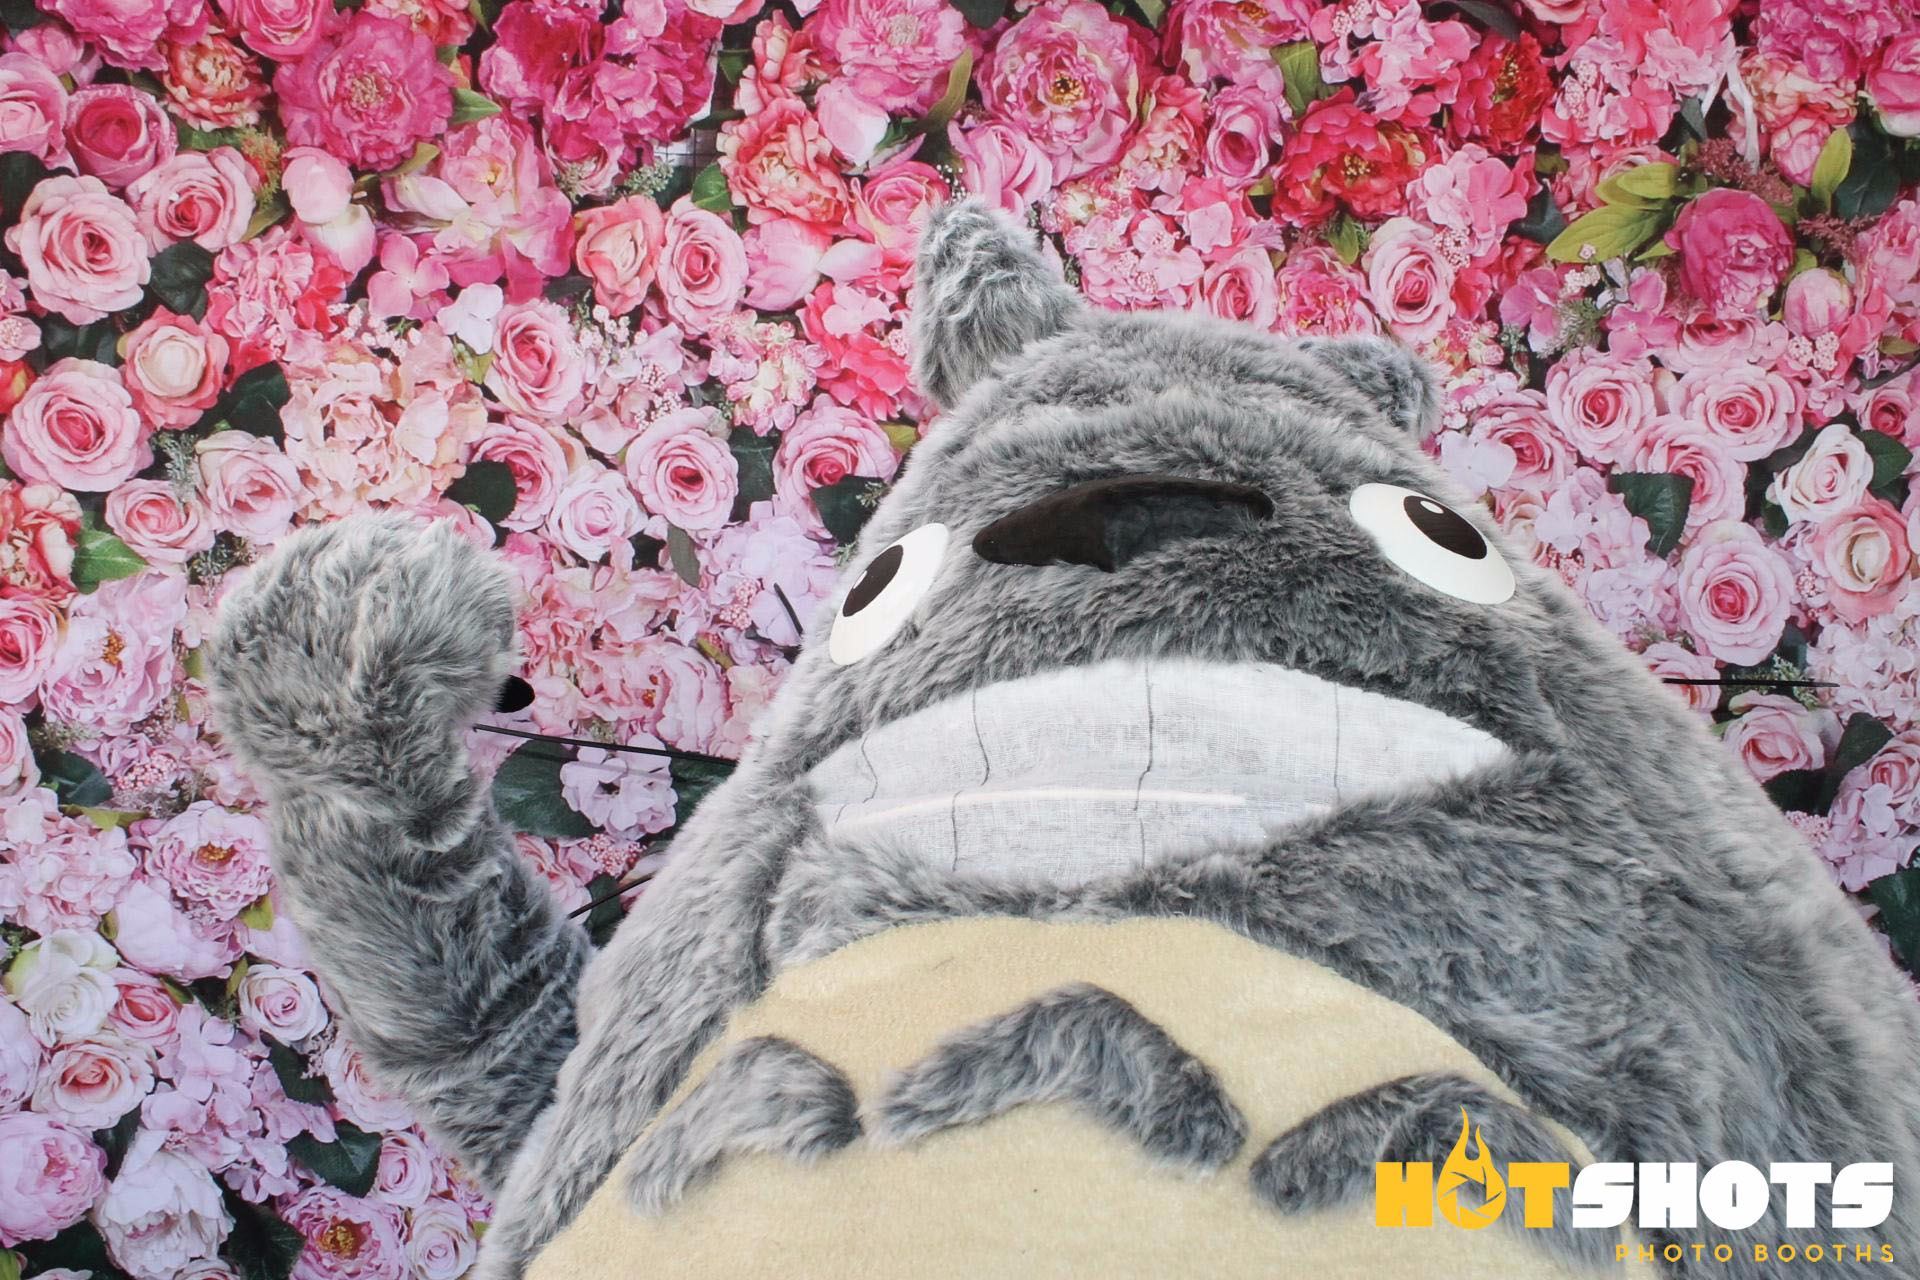
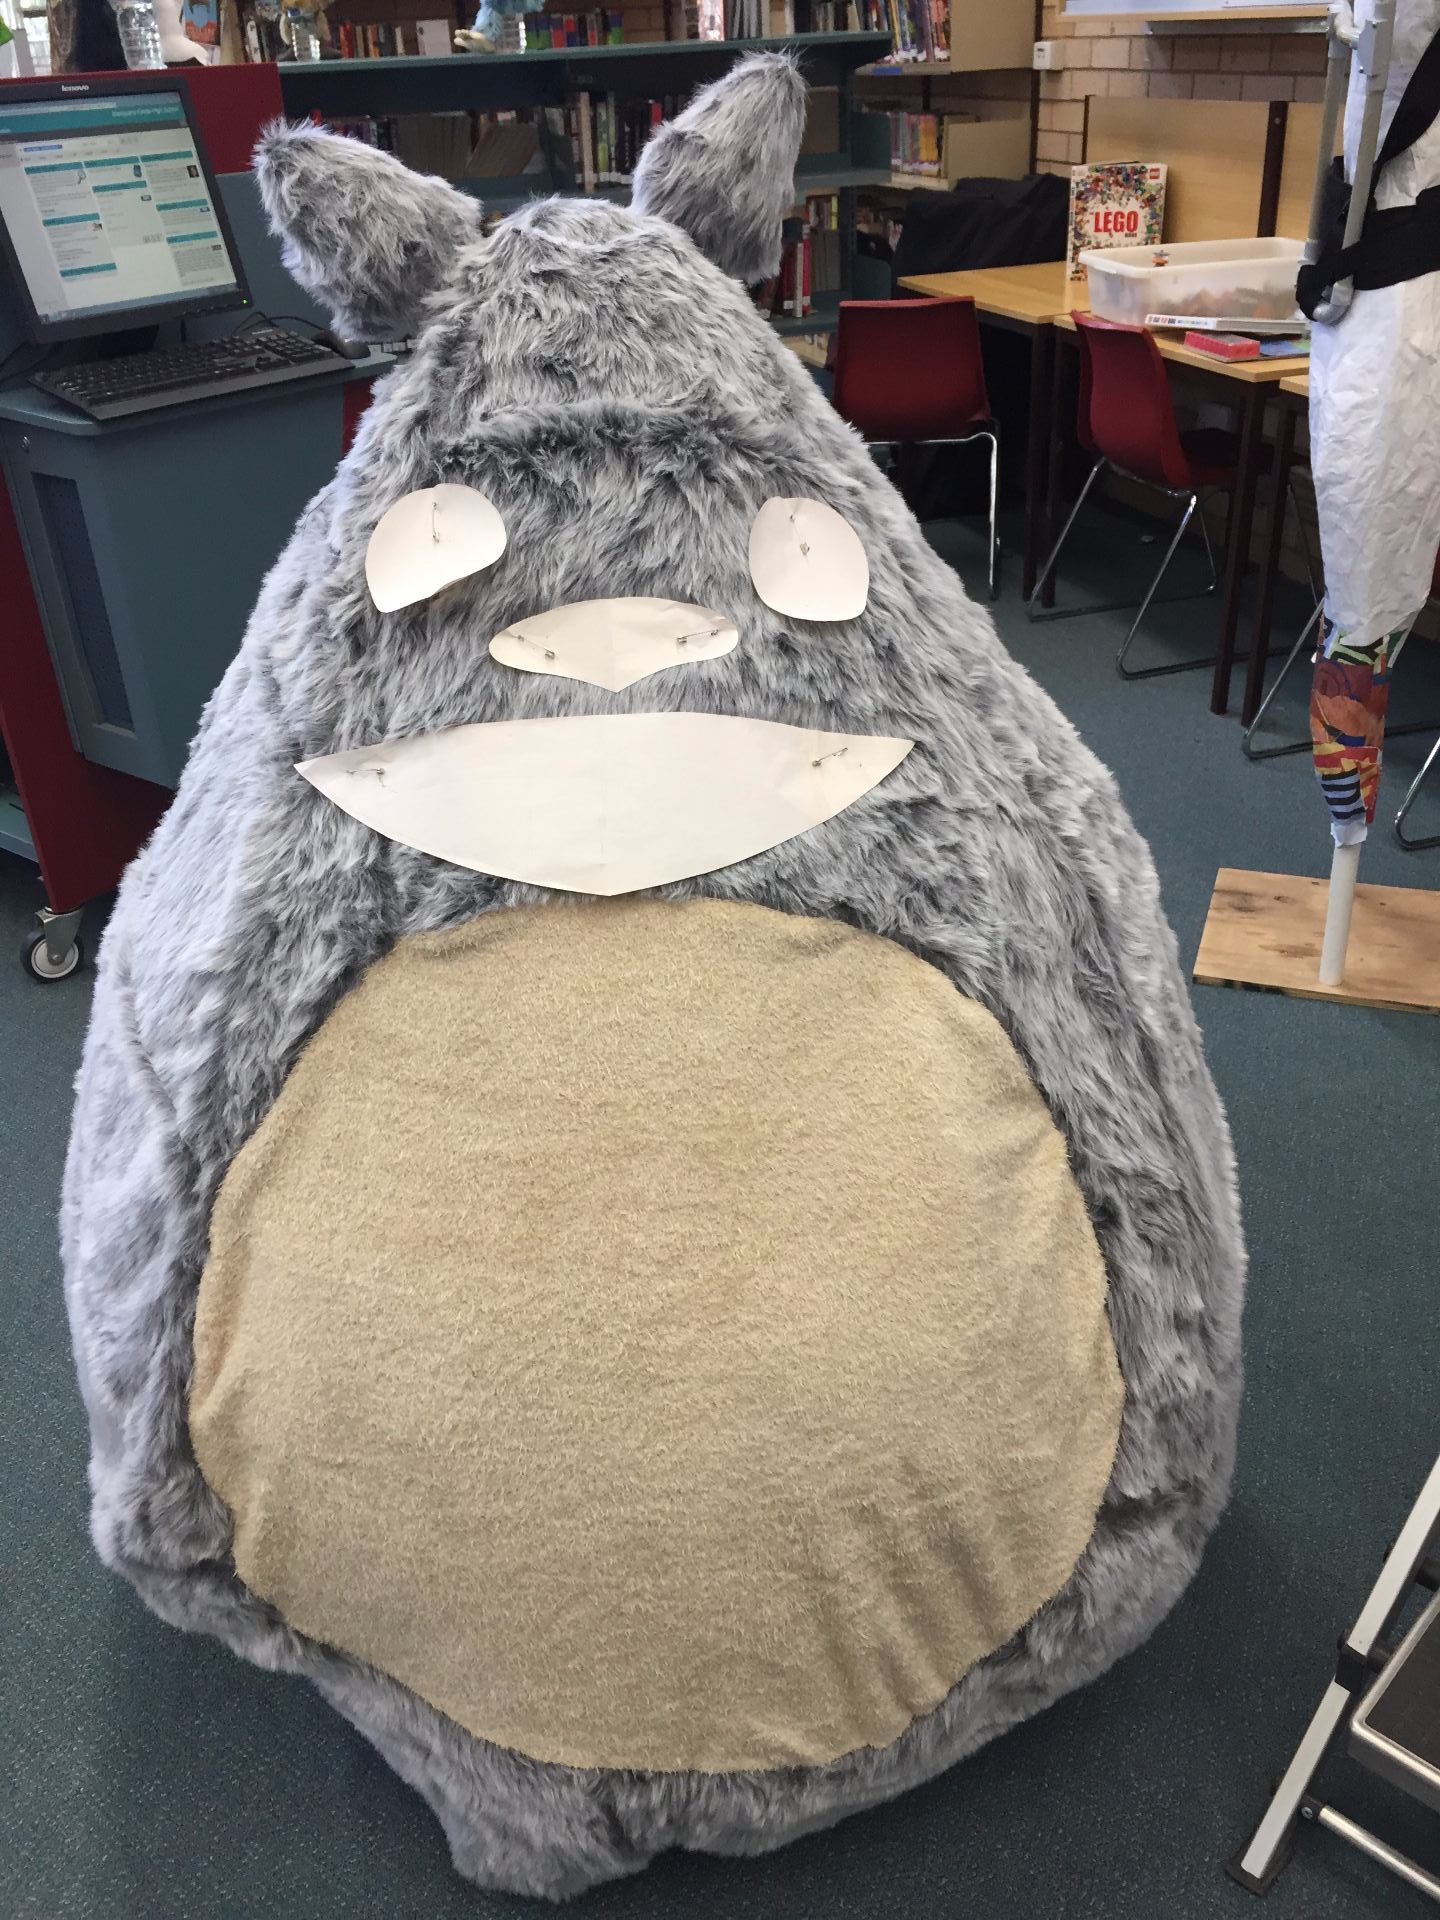
After lunch, back at the design studio, all was revealed- the 2019 BTS puppets was going to be Dogs! We had a session on what makes a successful character. It is important to consider that can the character be read by just looking at the puppet. We also had a discussion on successful character design vs marketable character design.

Design sketch of Jill the Australian Cattle Dog

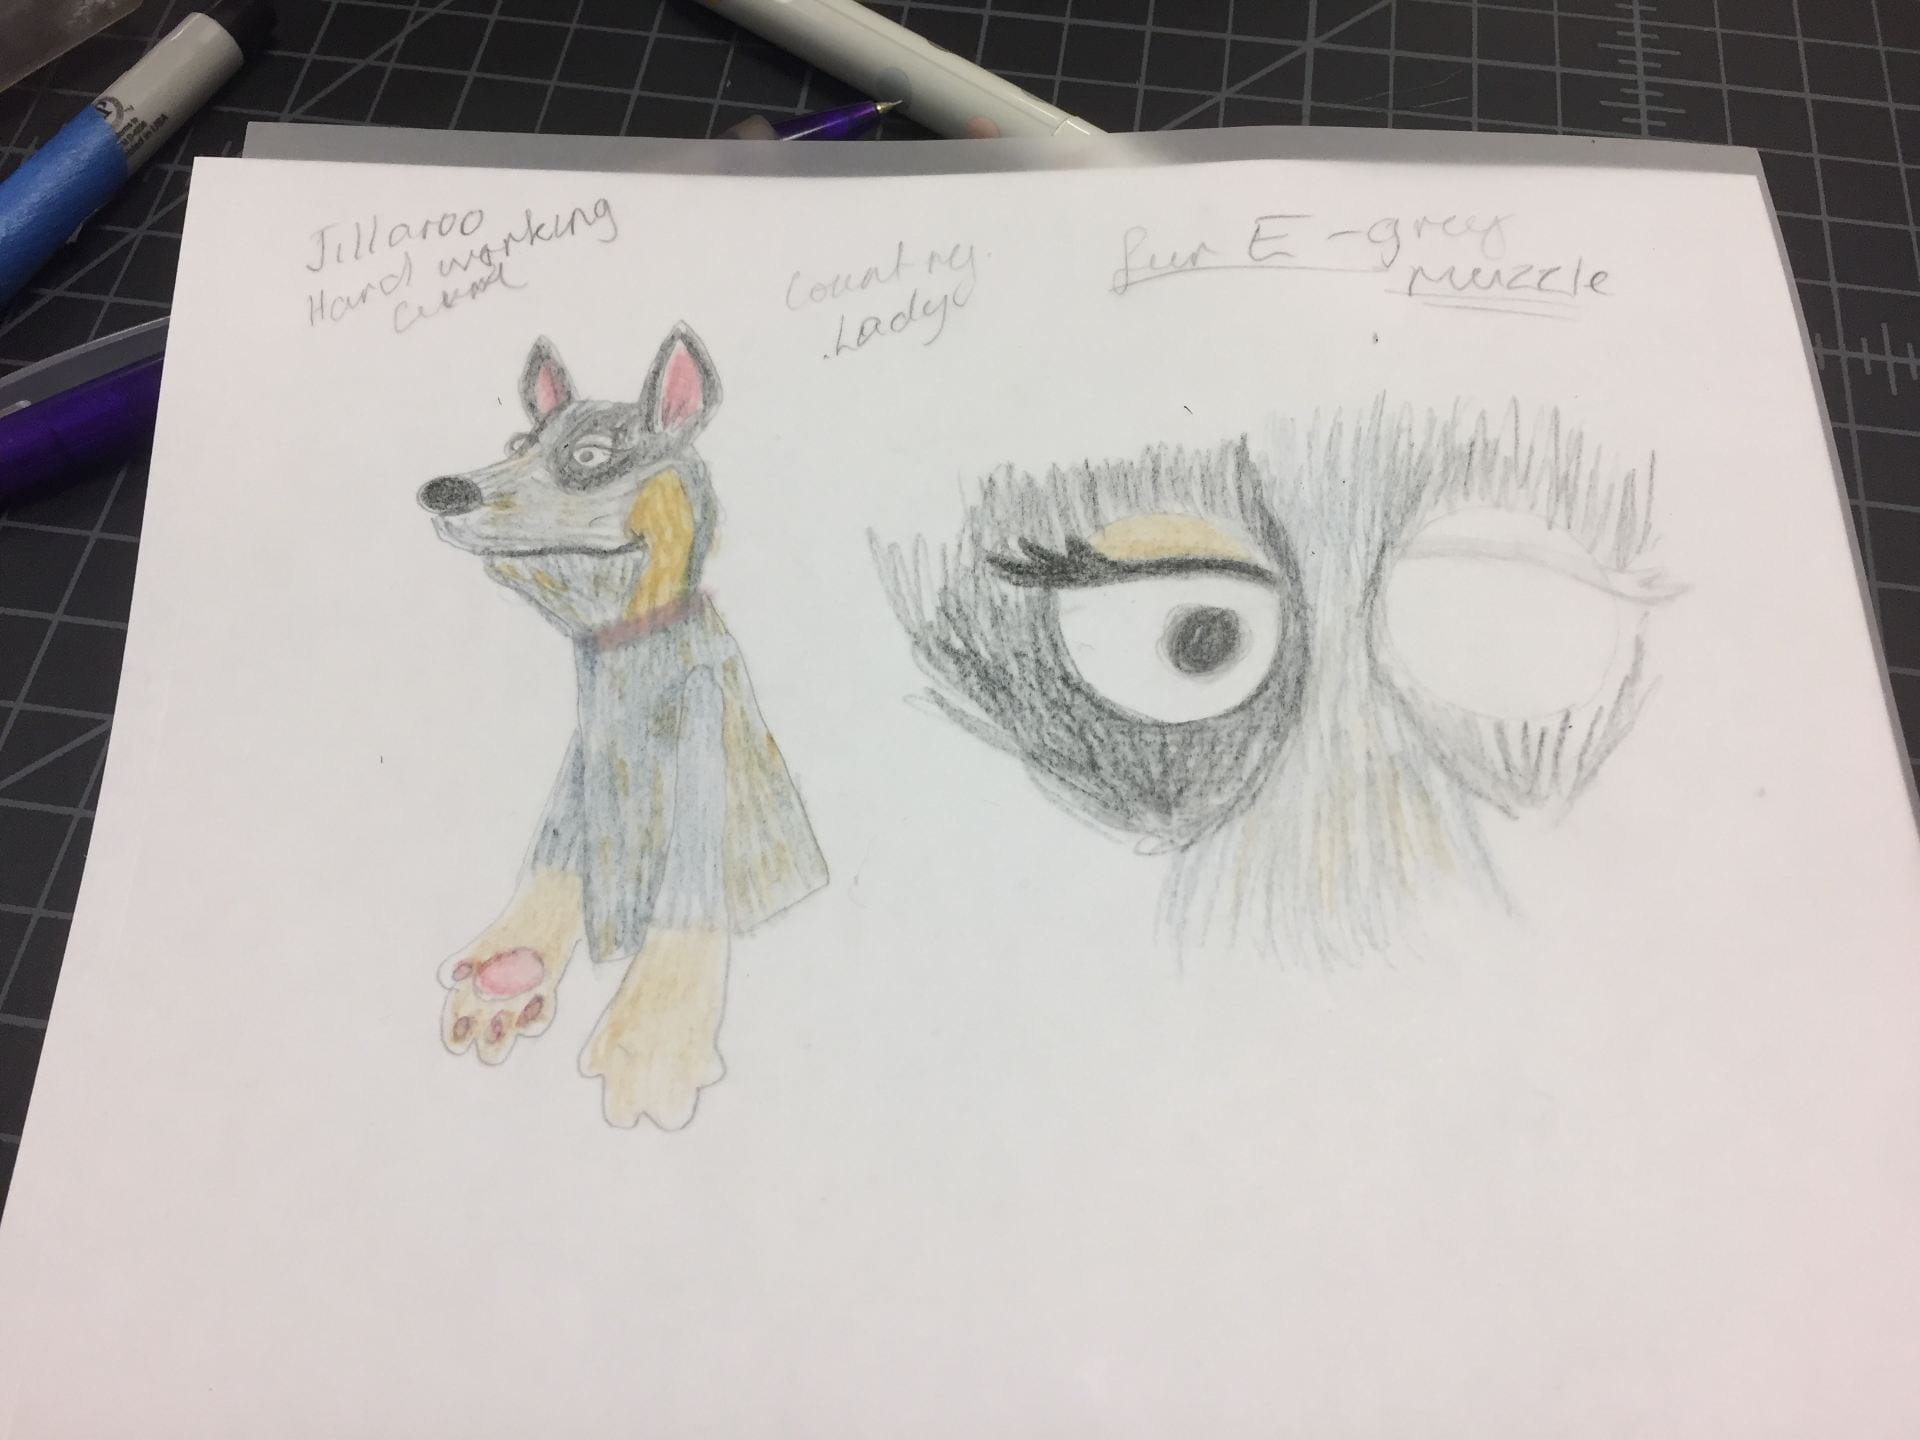
Next came the exciting part, designing my character. Each attendee had the opportunity to take a lucky dip and select a card with a letter on it. That was our main fur colour. After some trading with other attendees, I managed to get a fur that inspired my character design- an Australian Cattle Dog. The rest of the afternoon was dedicated to cutting out the cardstock puppet pattern, and refining our designs.

A Friend in Need 1903

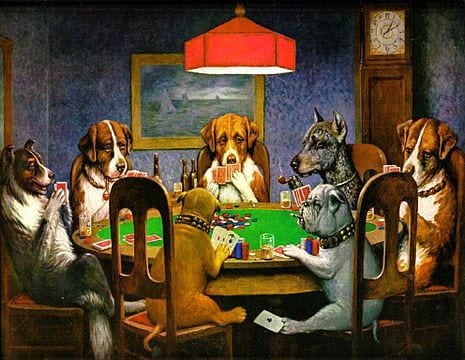
While we were working, the mystery of the set design was explained. It was a representation of the famous painting “A Friend in Need” 1903 by American artist C.M. Collidge. Over the next few days, set dressing will be added to complete the picture.

Day 5, Wednesday June 5 2019

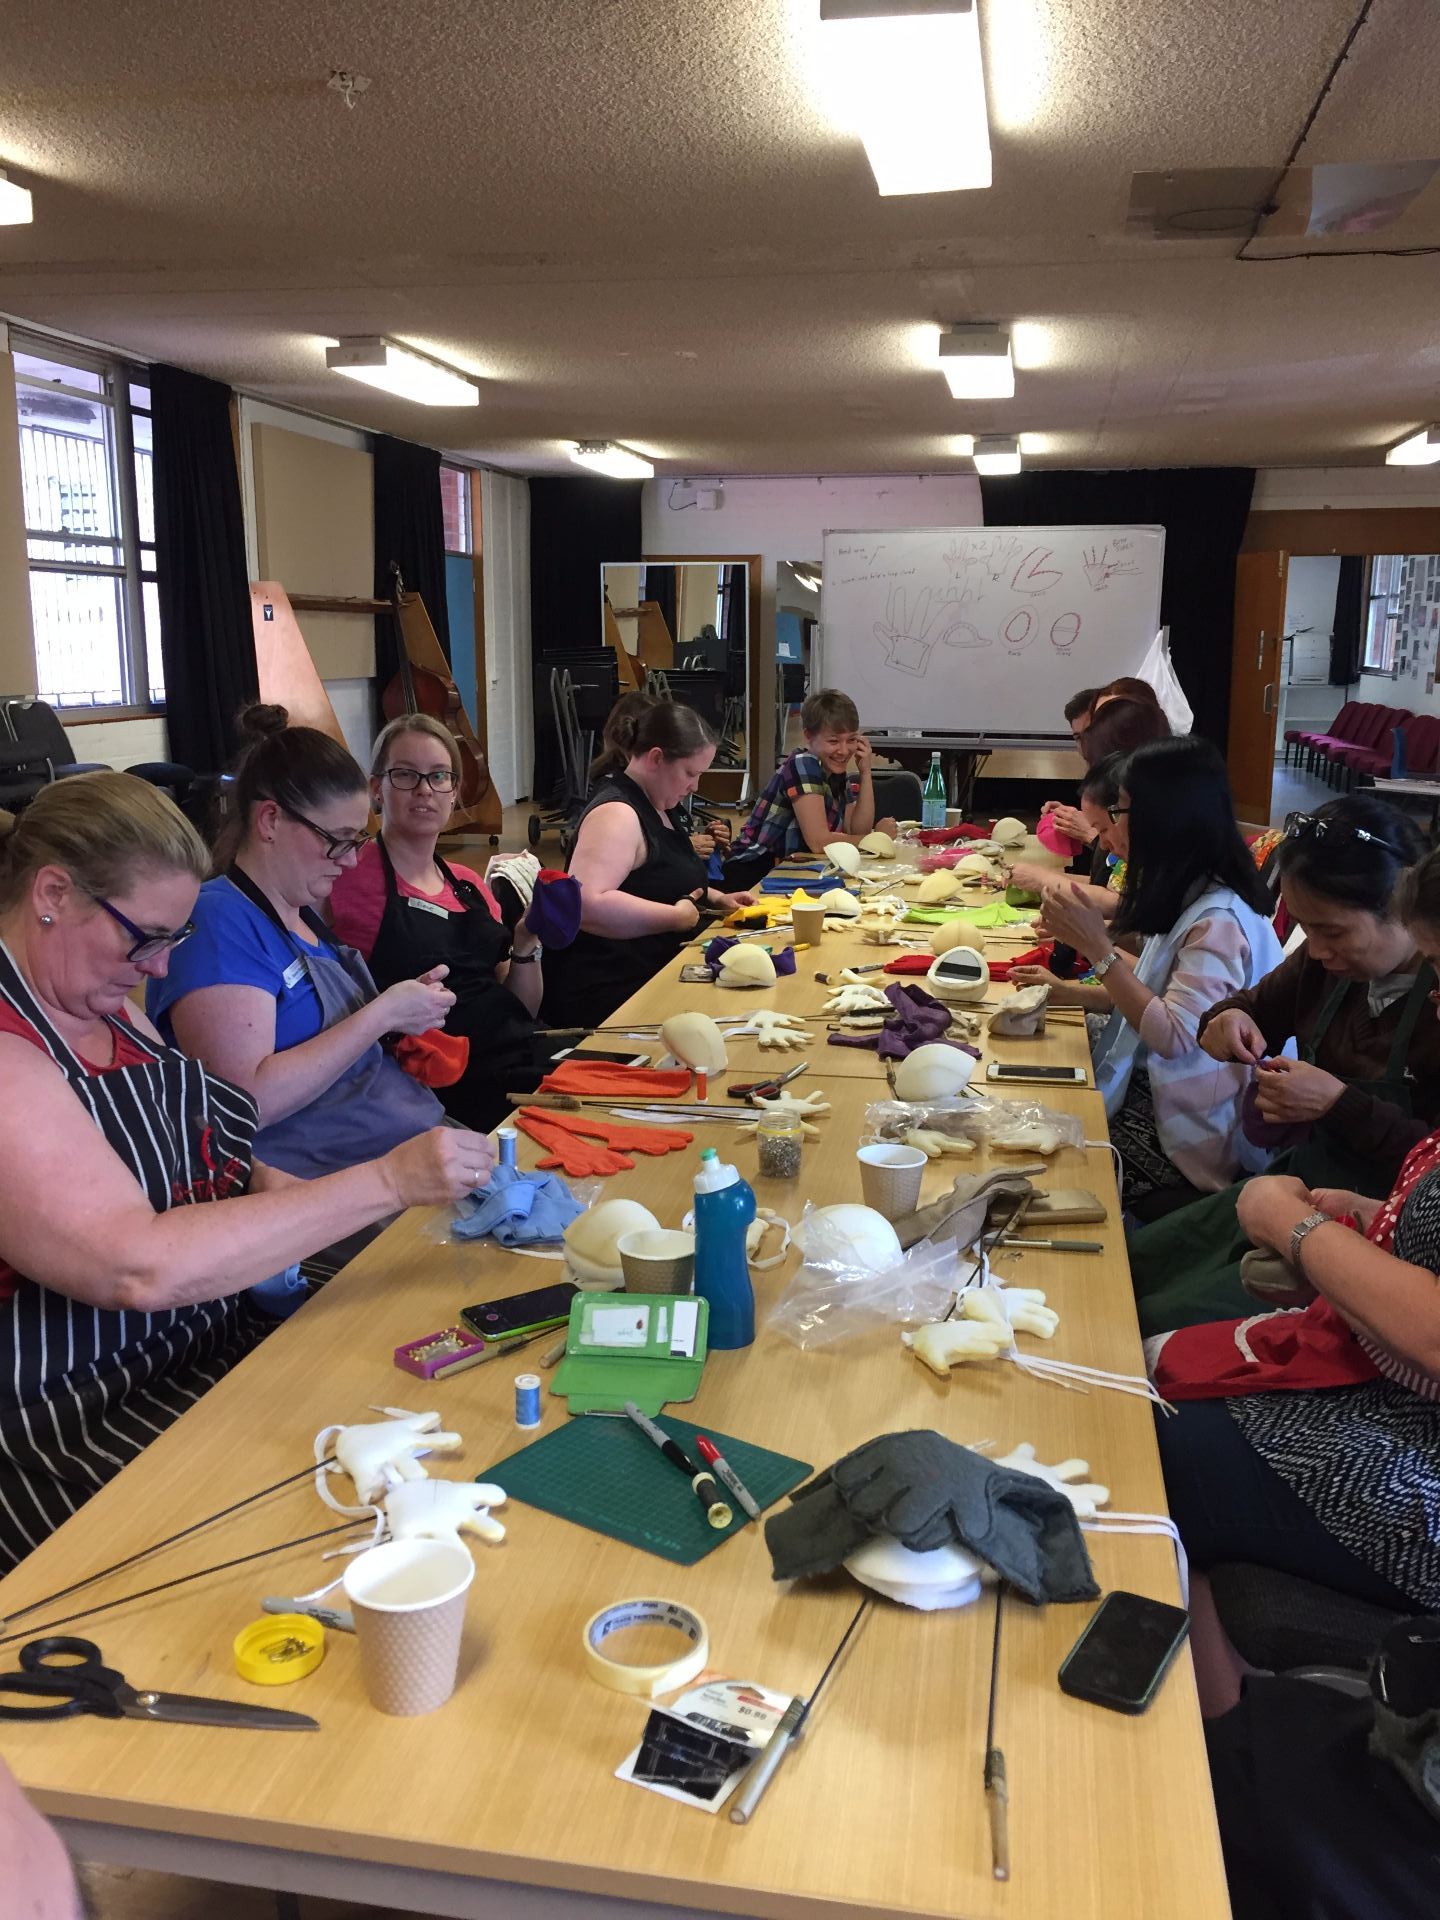
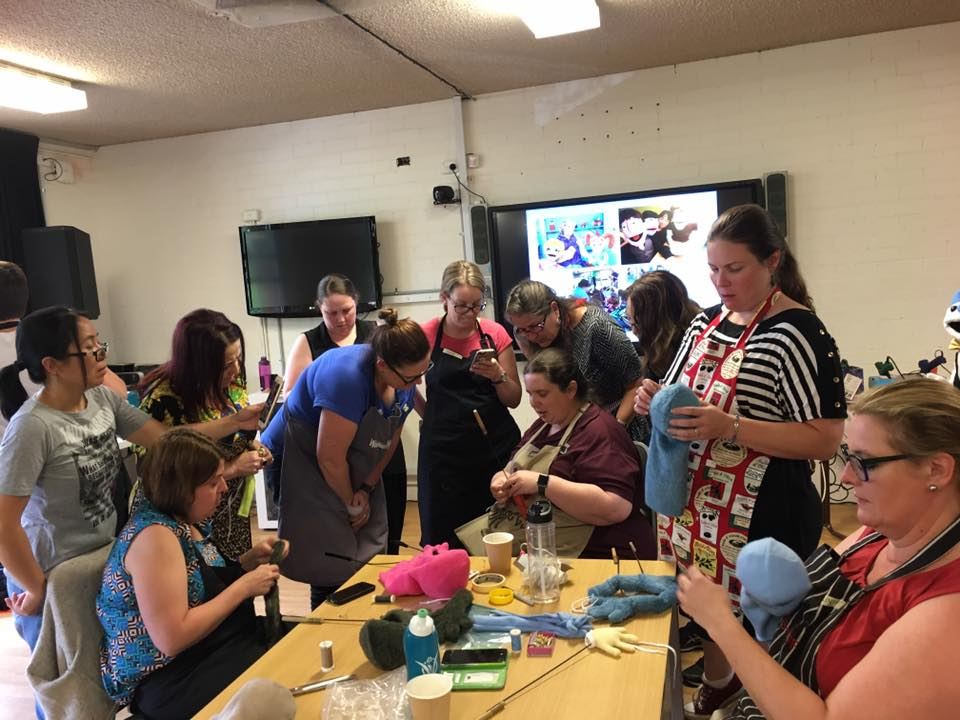
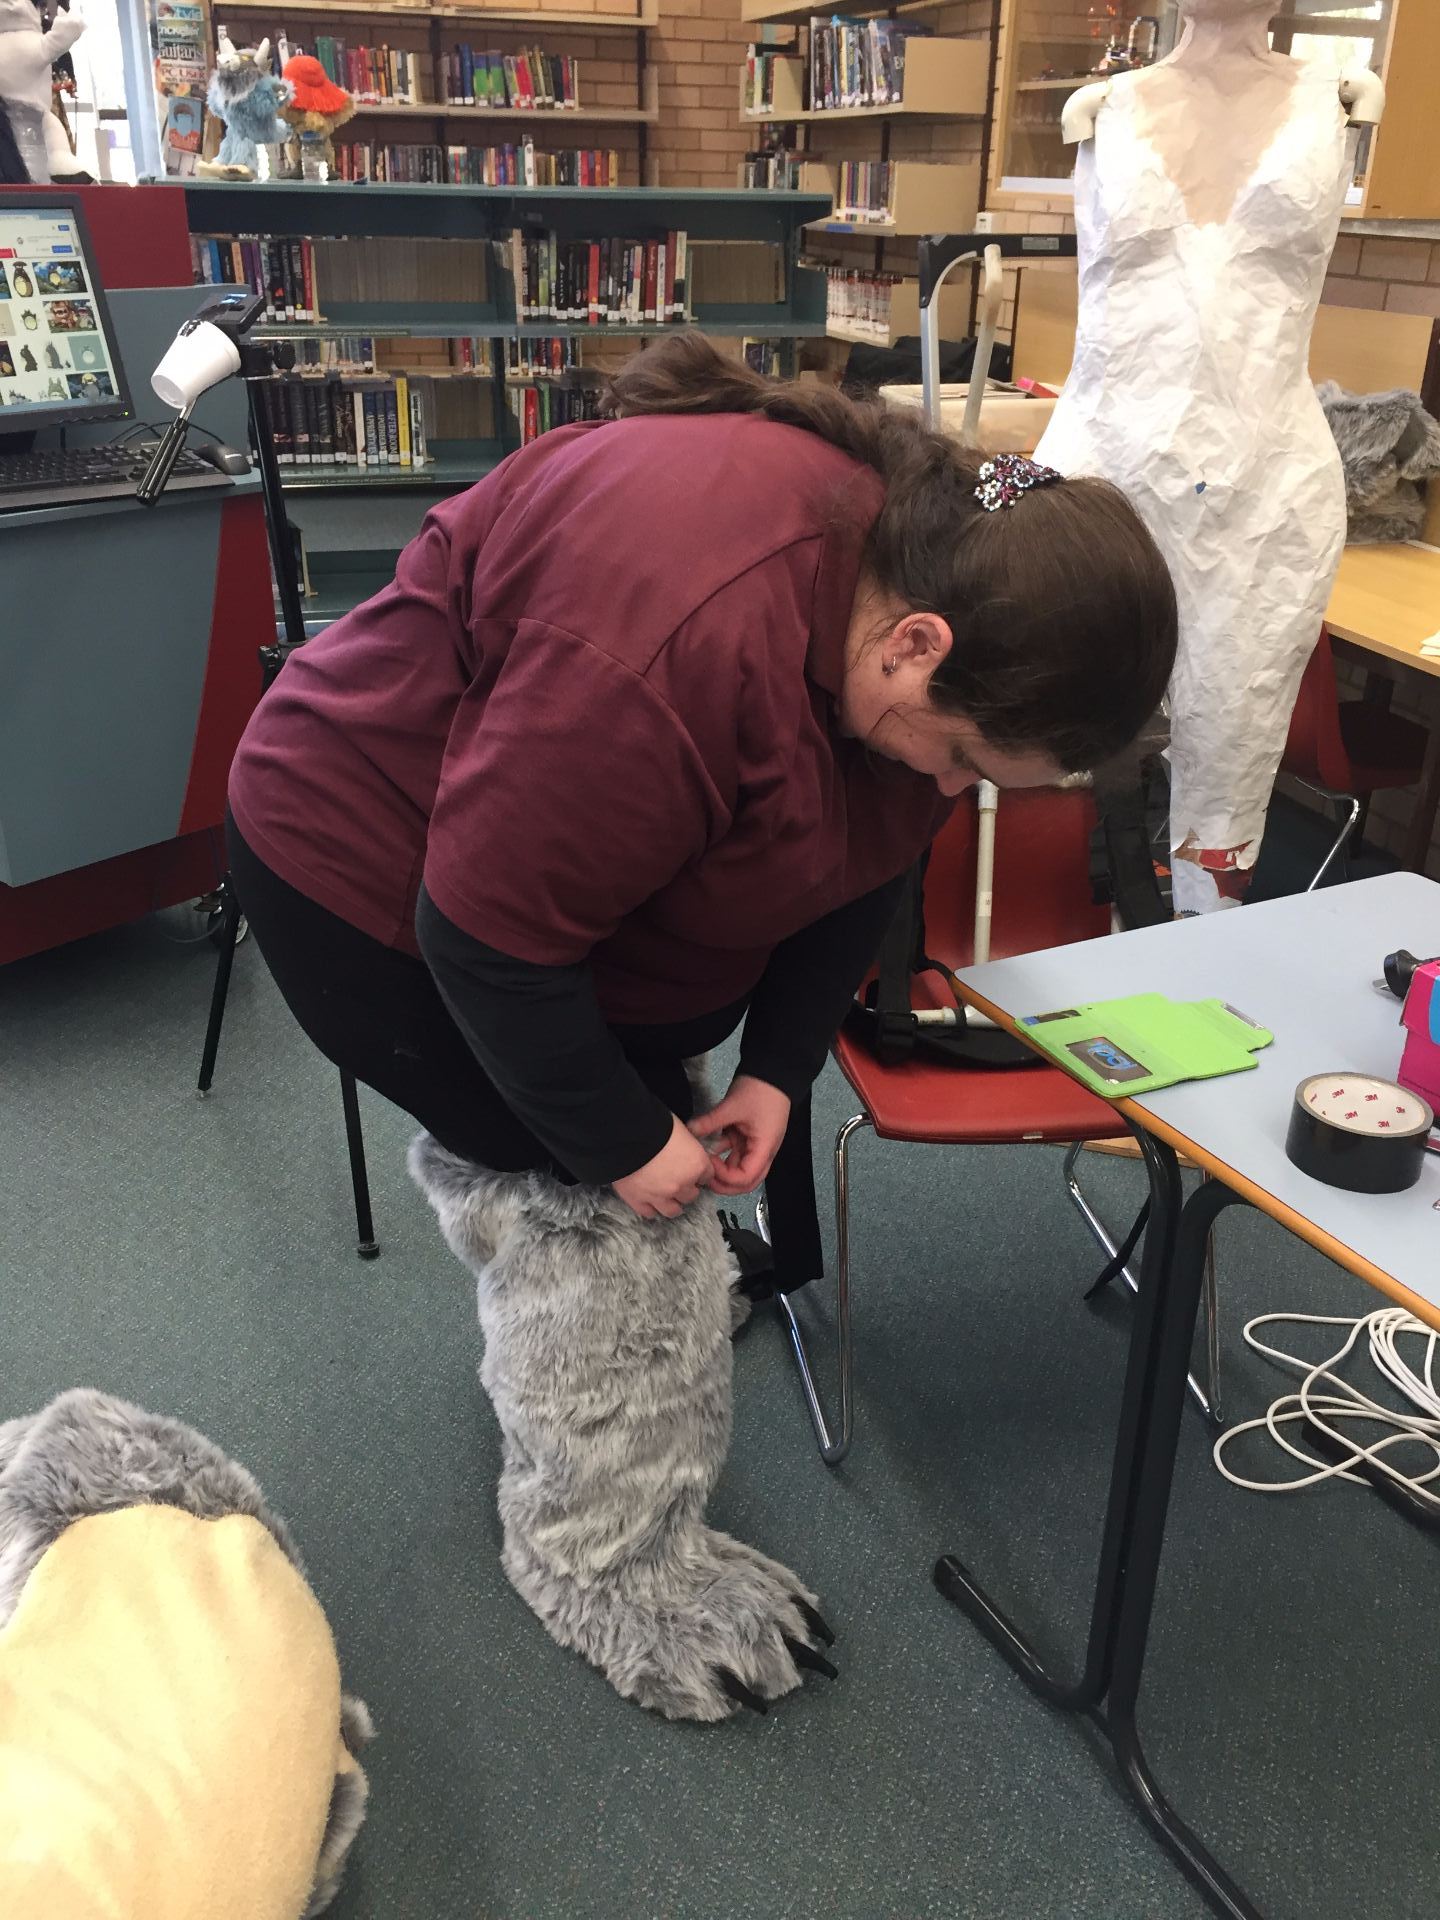
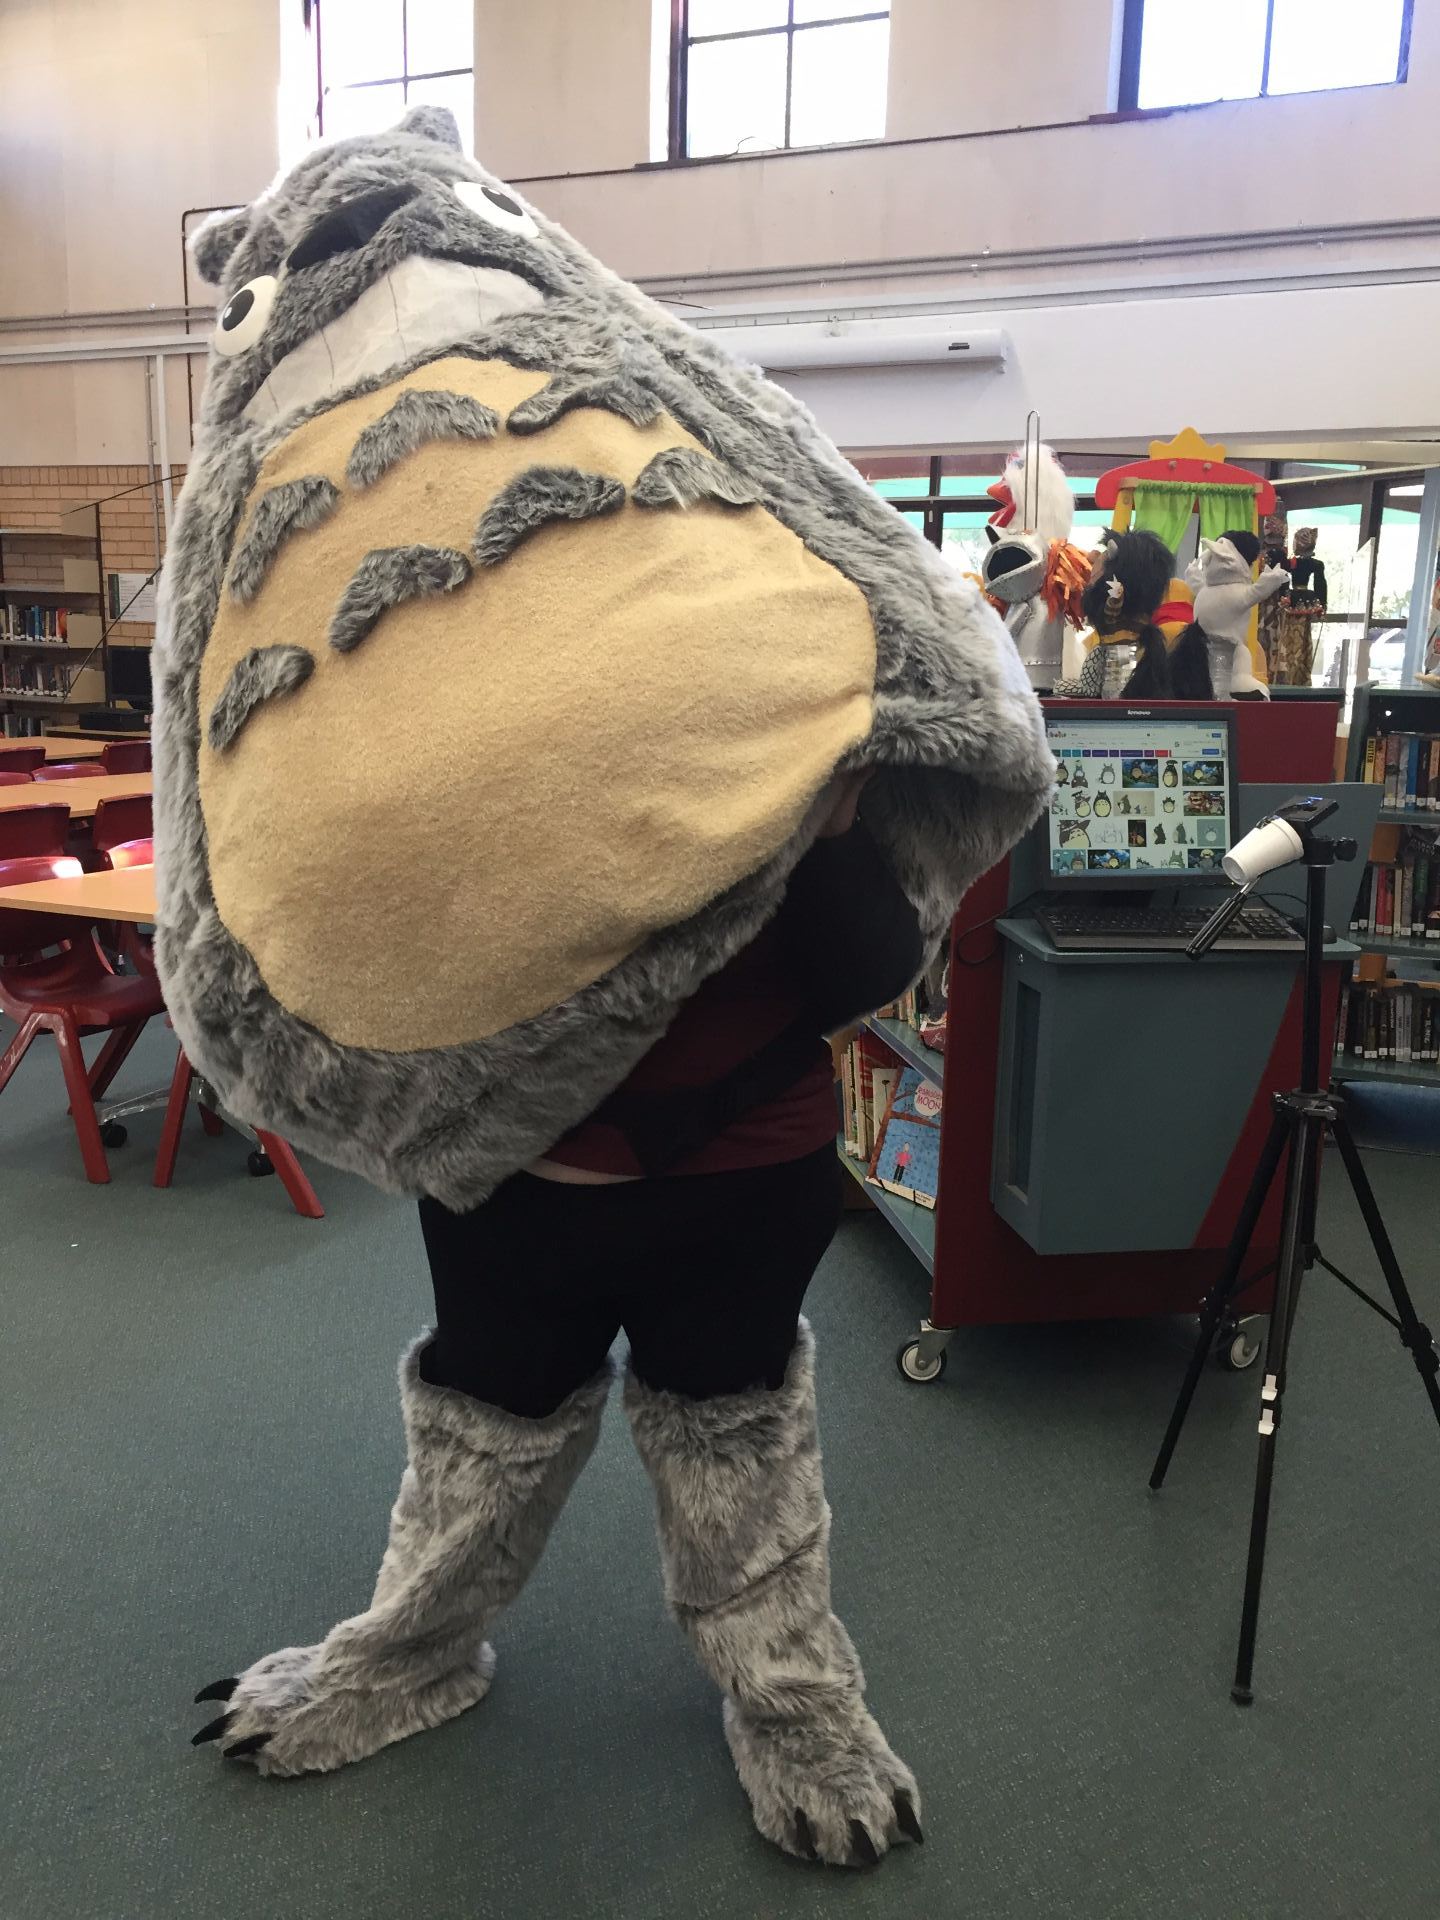
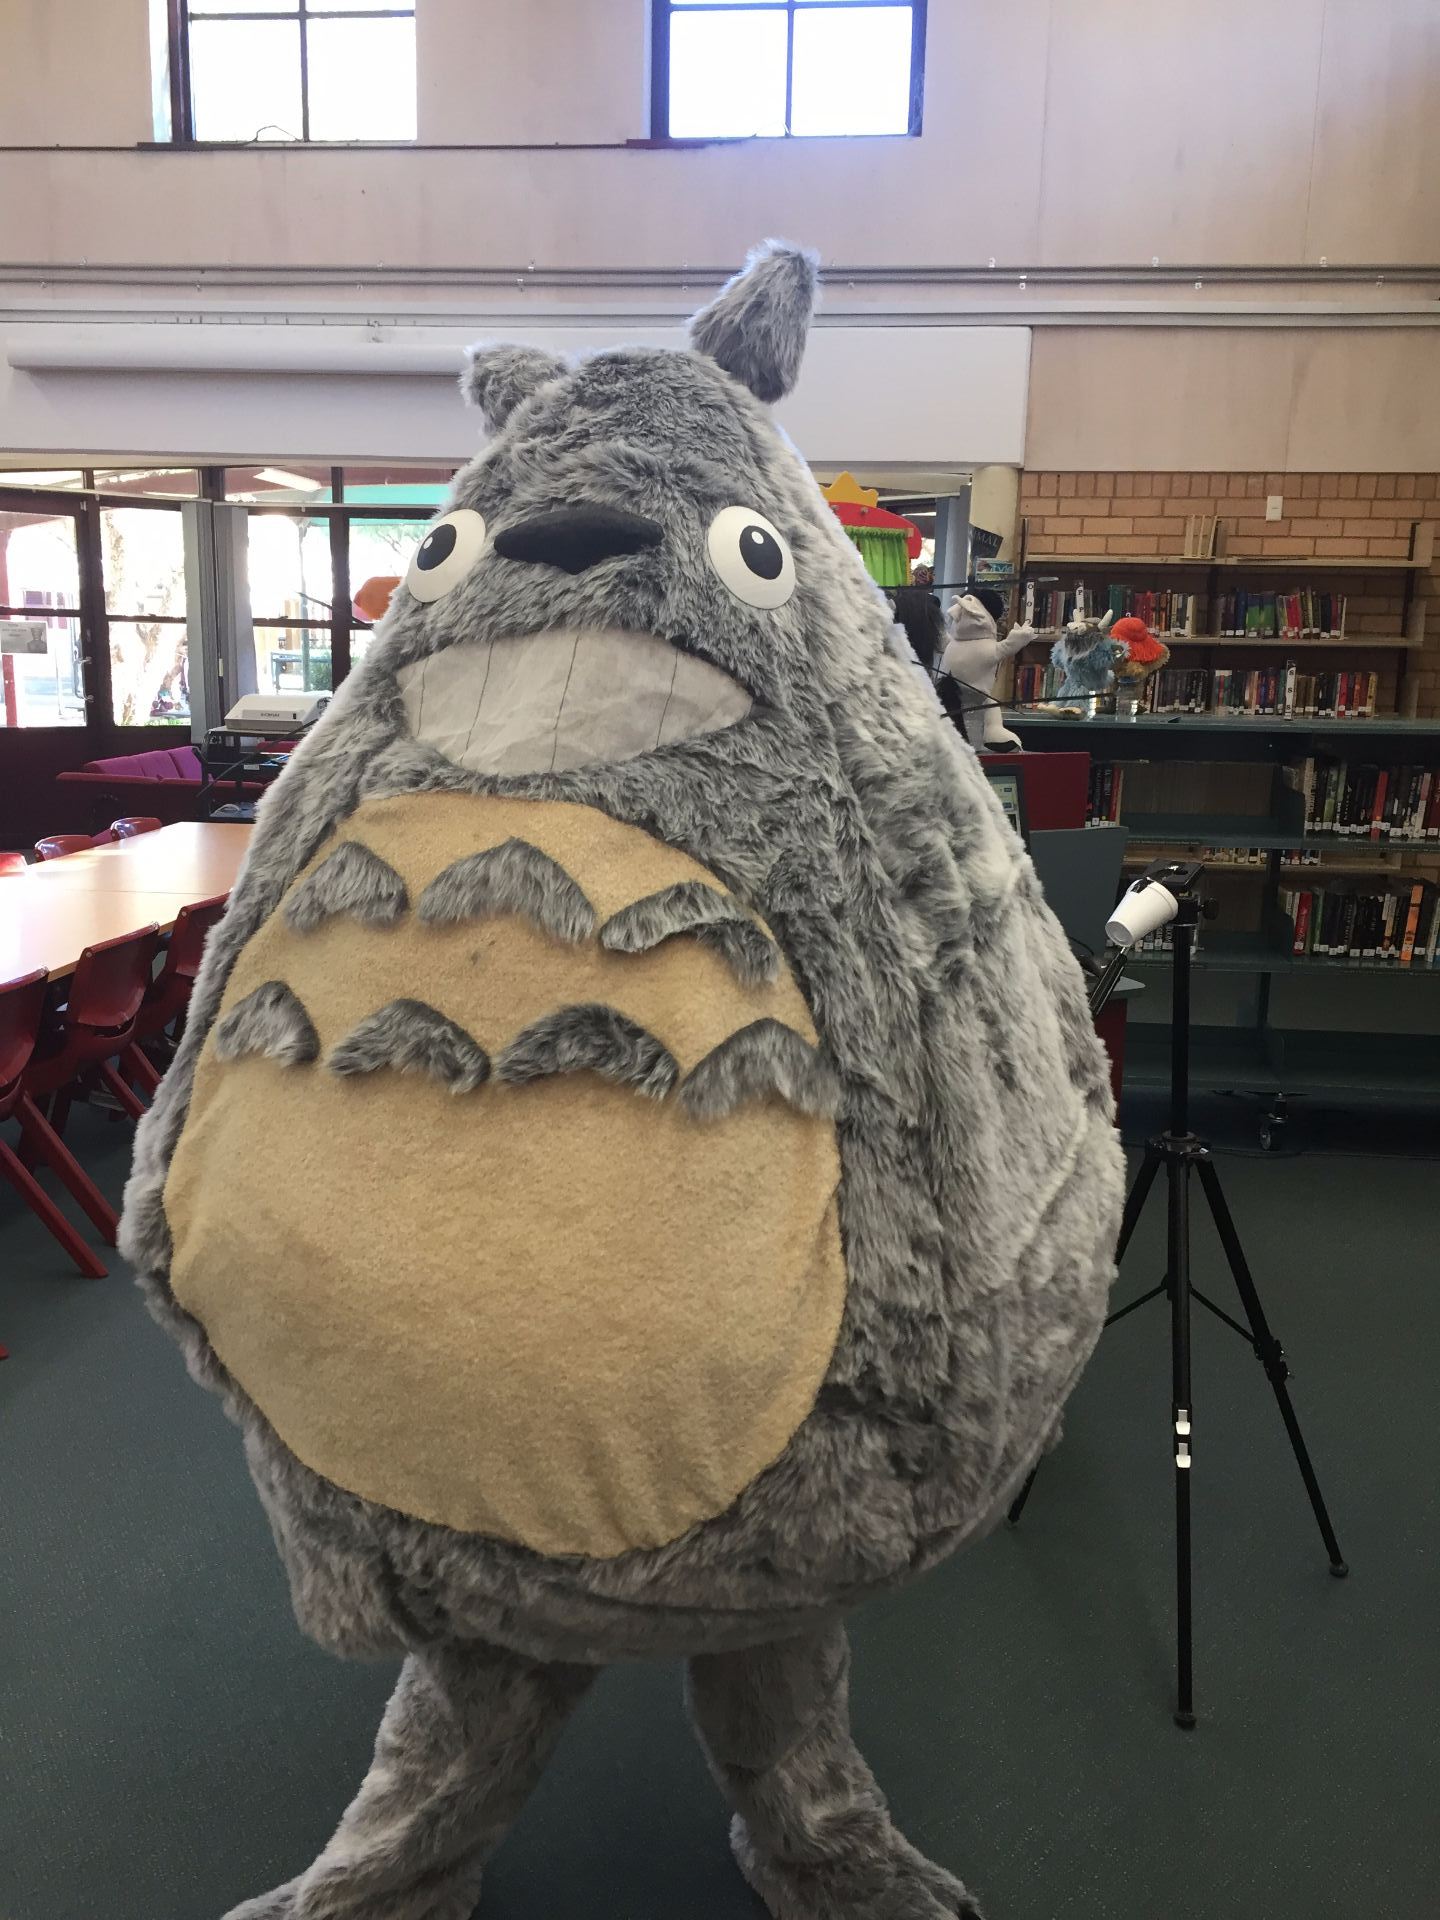
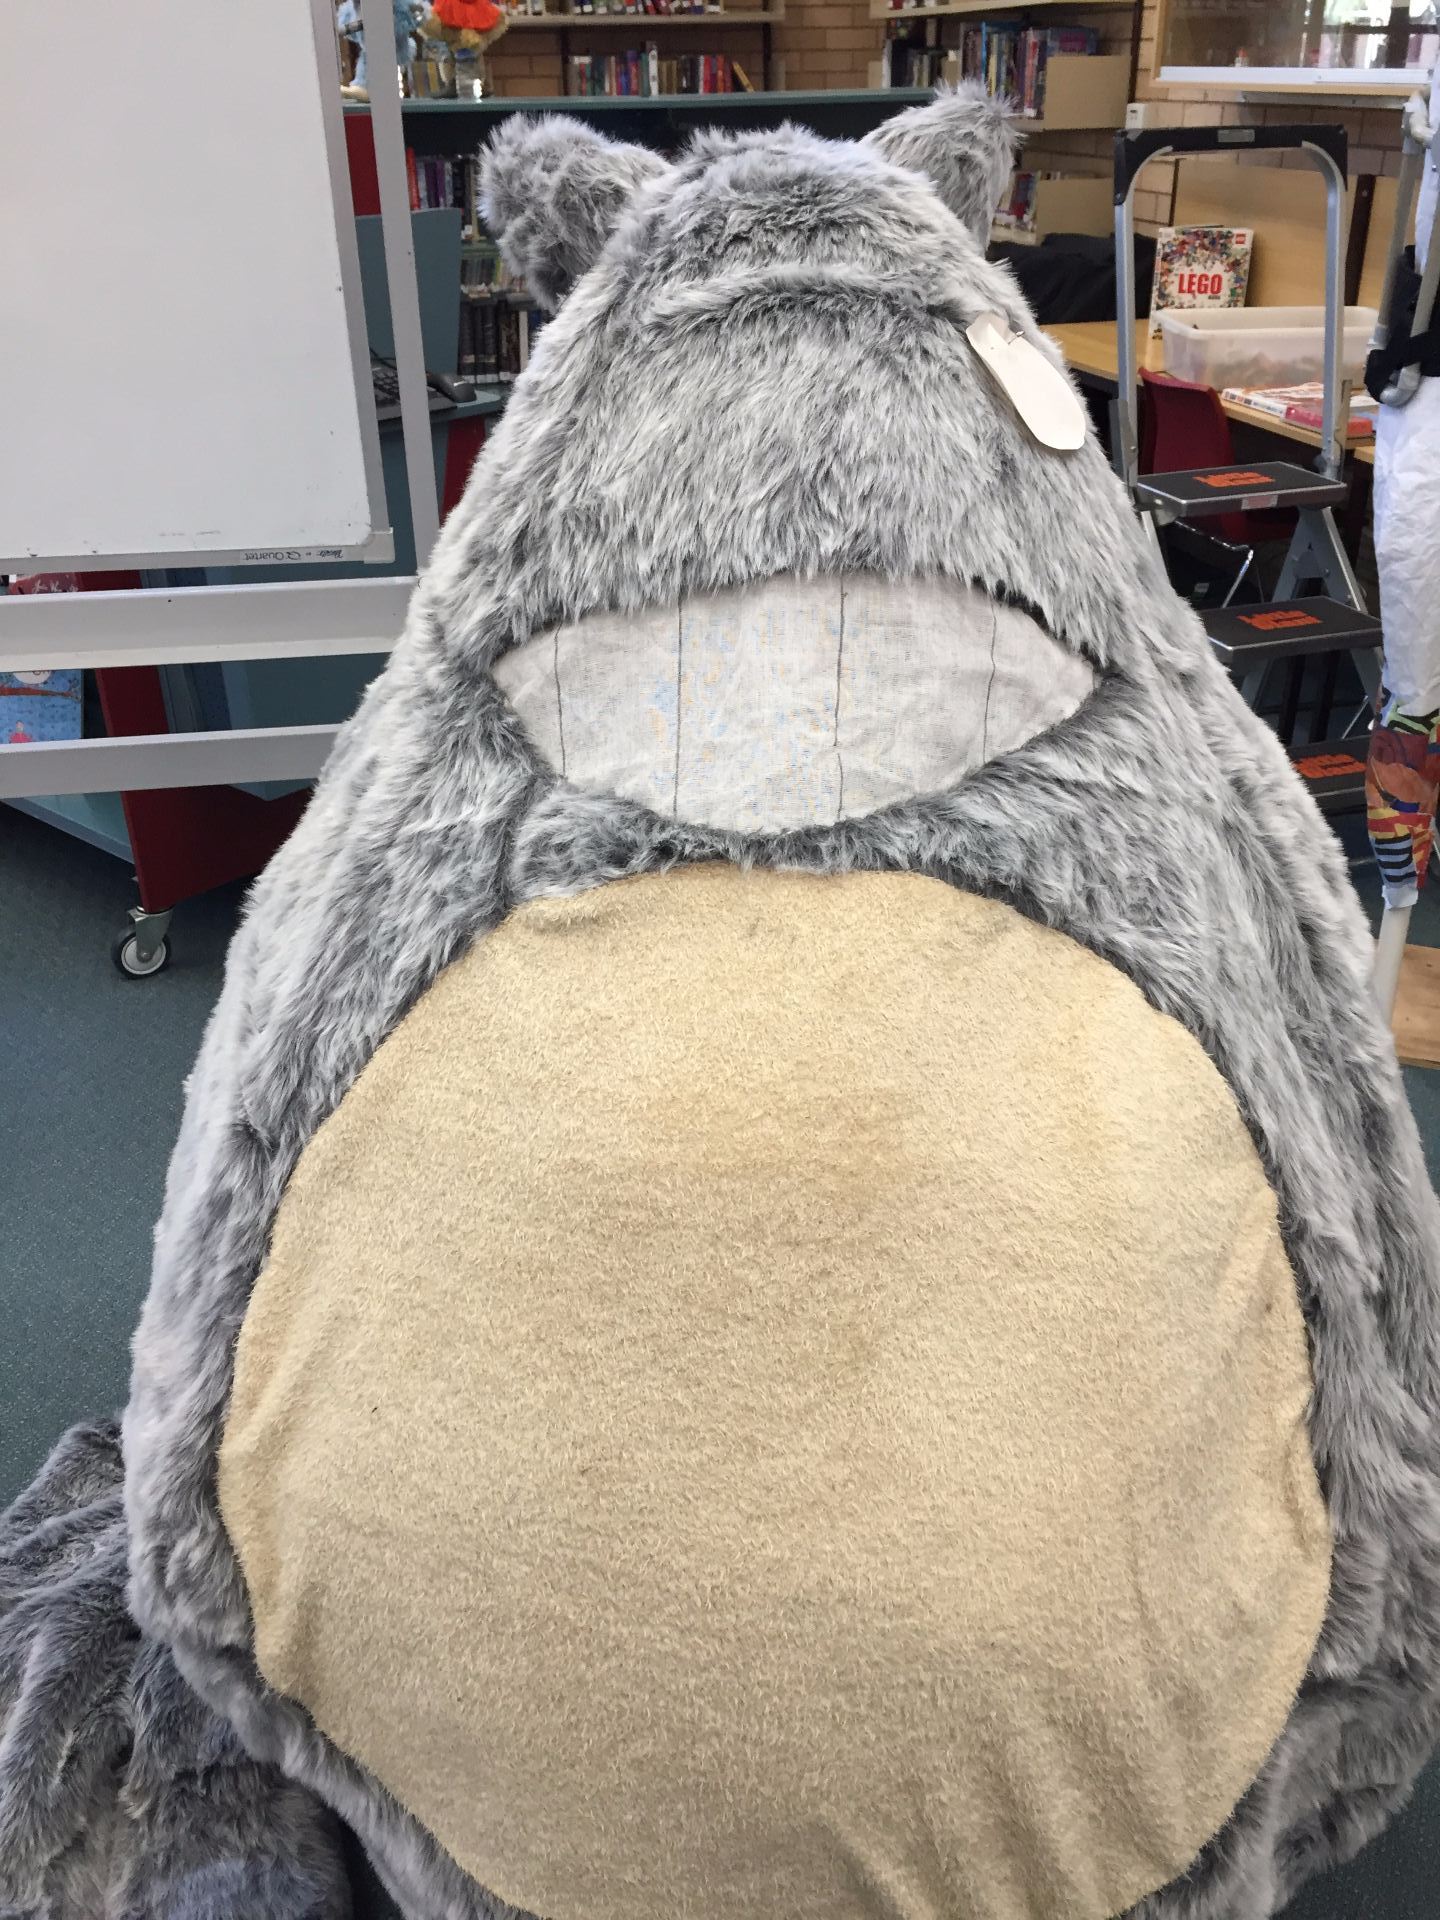
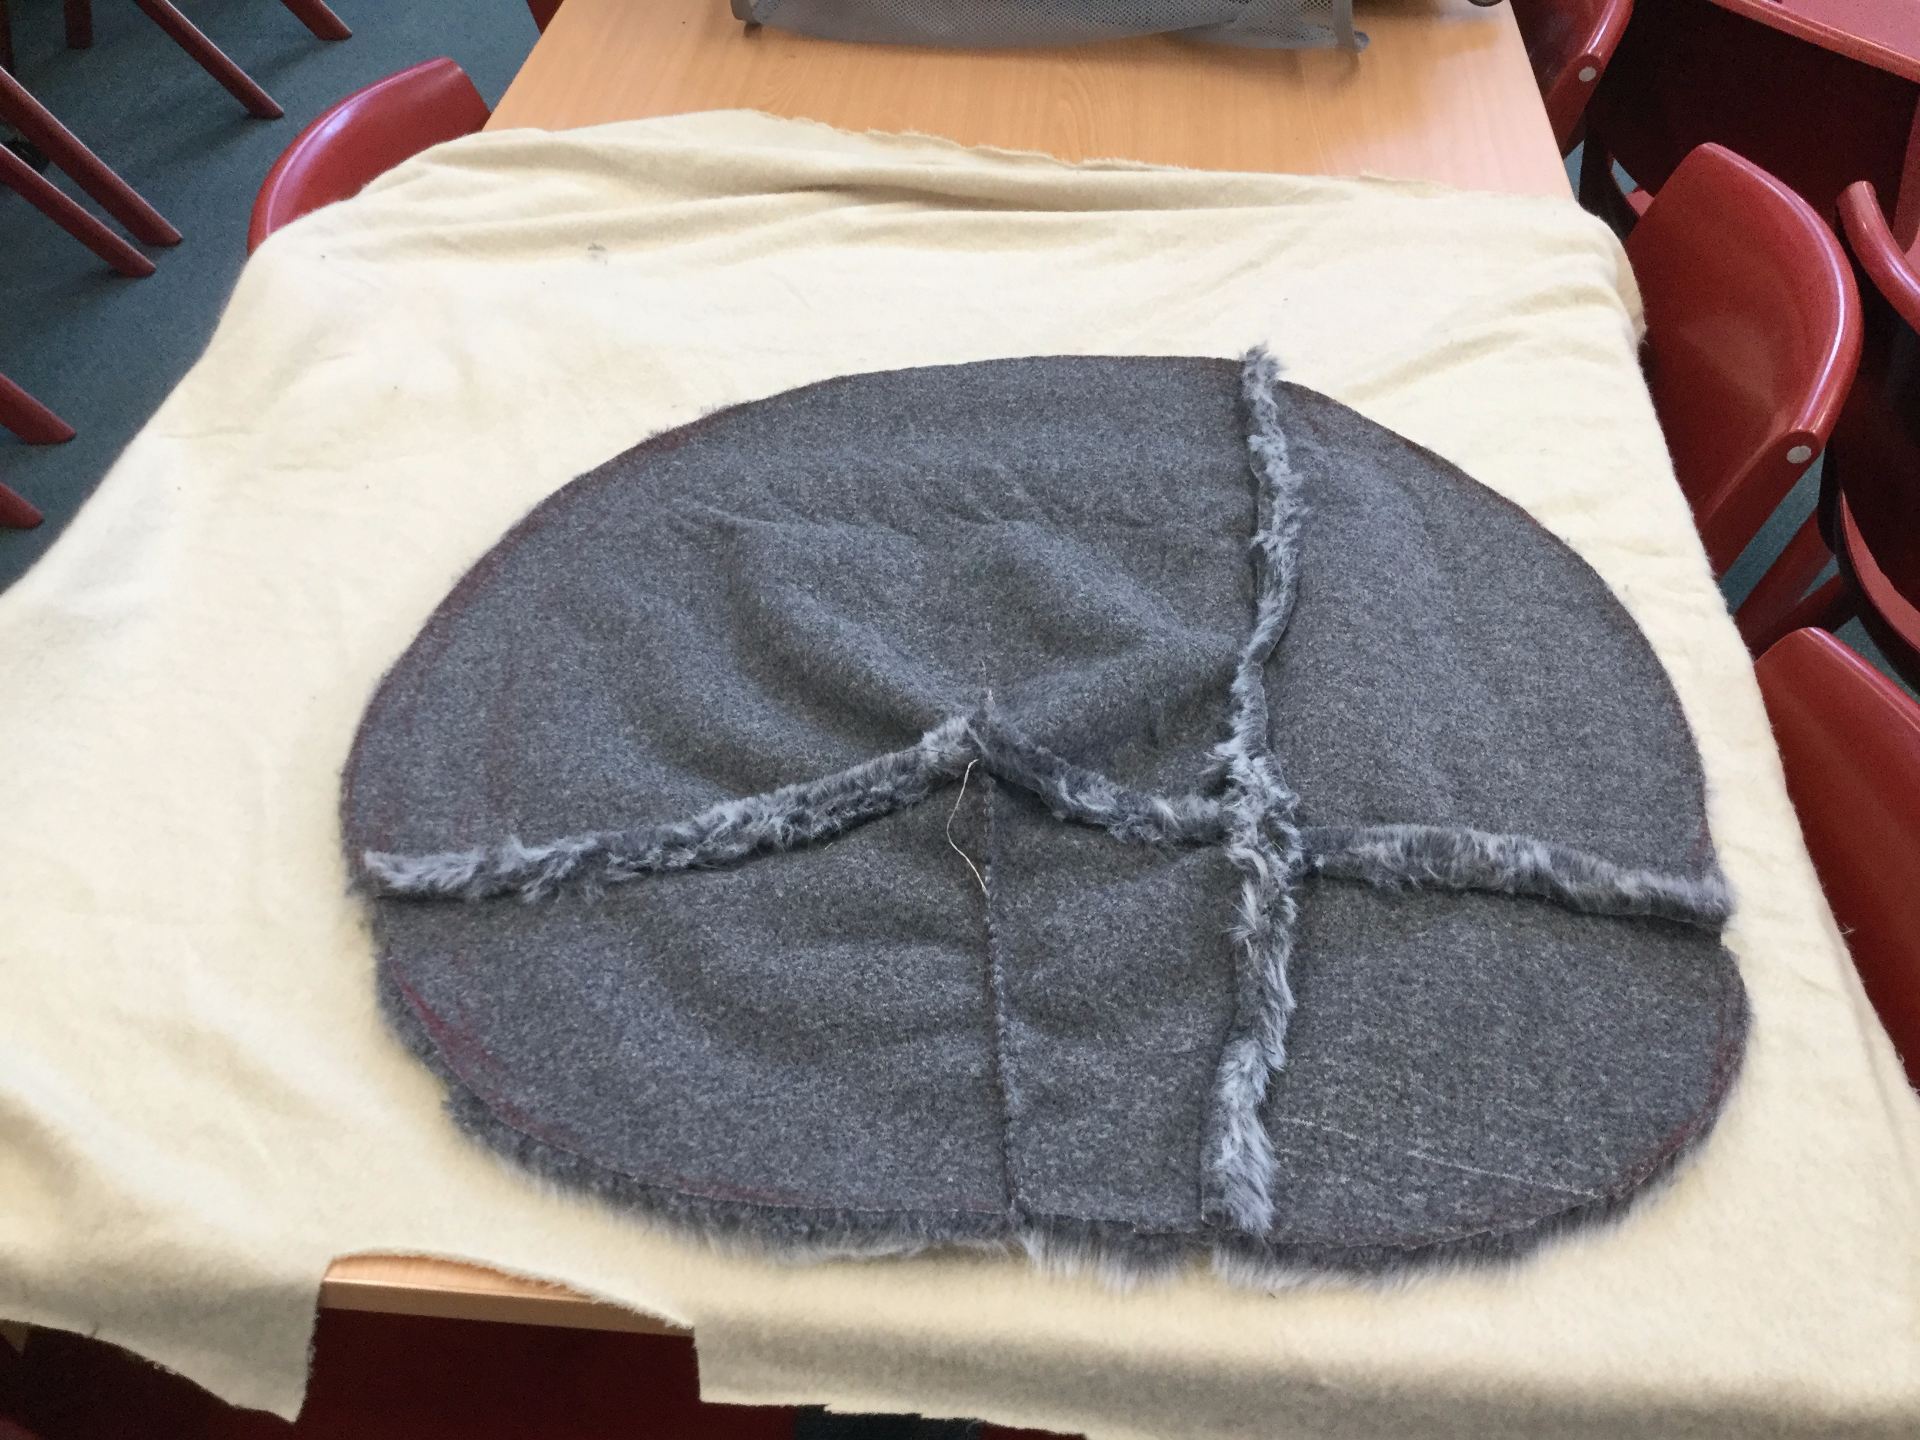
The attendee group was divided in two first thing in the morning. For the first time, the groups were divided by experience- a group of first time attendees, and I was placed in the multiple time attendee group. The first time attendees went across to the student union for their first performance lesson, and the experienced group went to puppet building first. The first step was to cut out the fur for the paws so that they could be sewn together by the sewing assistants. Once the paws were taken away, the next step was to cut the foam of the head. In building the foam head, there was a unusual twisting motion that had to happen to allow the muzzle to sit correctly to the head.

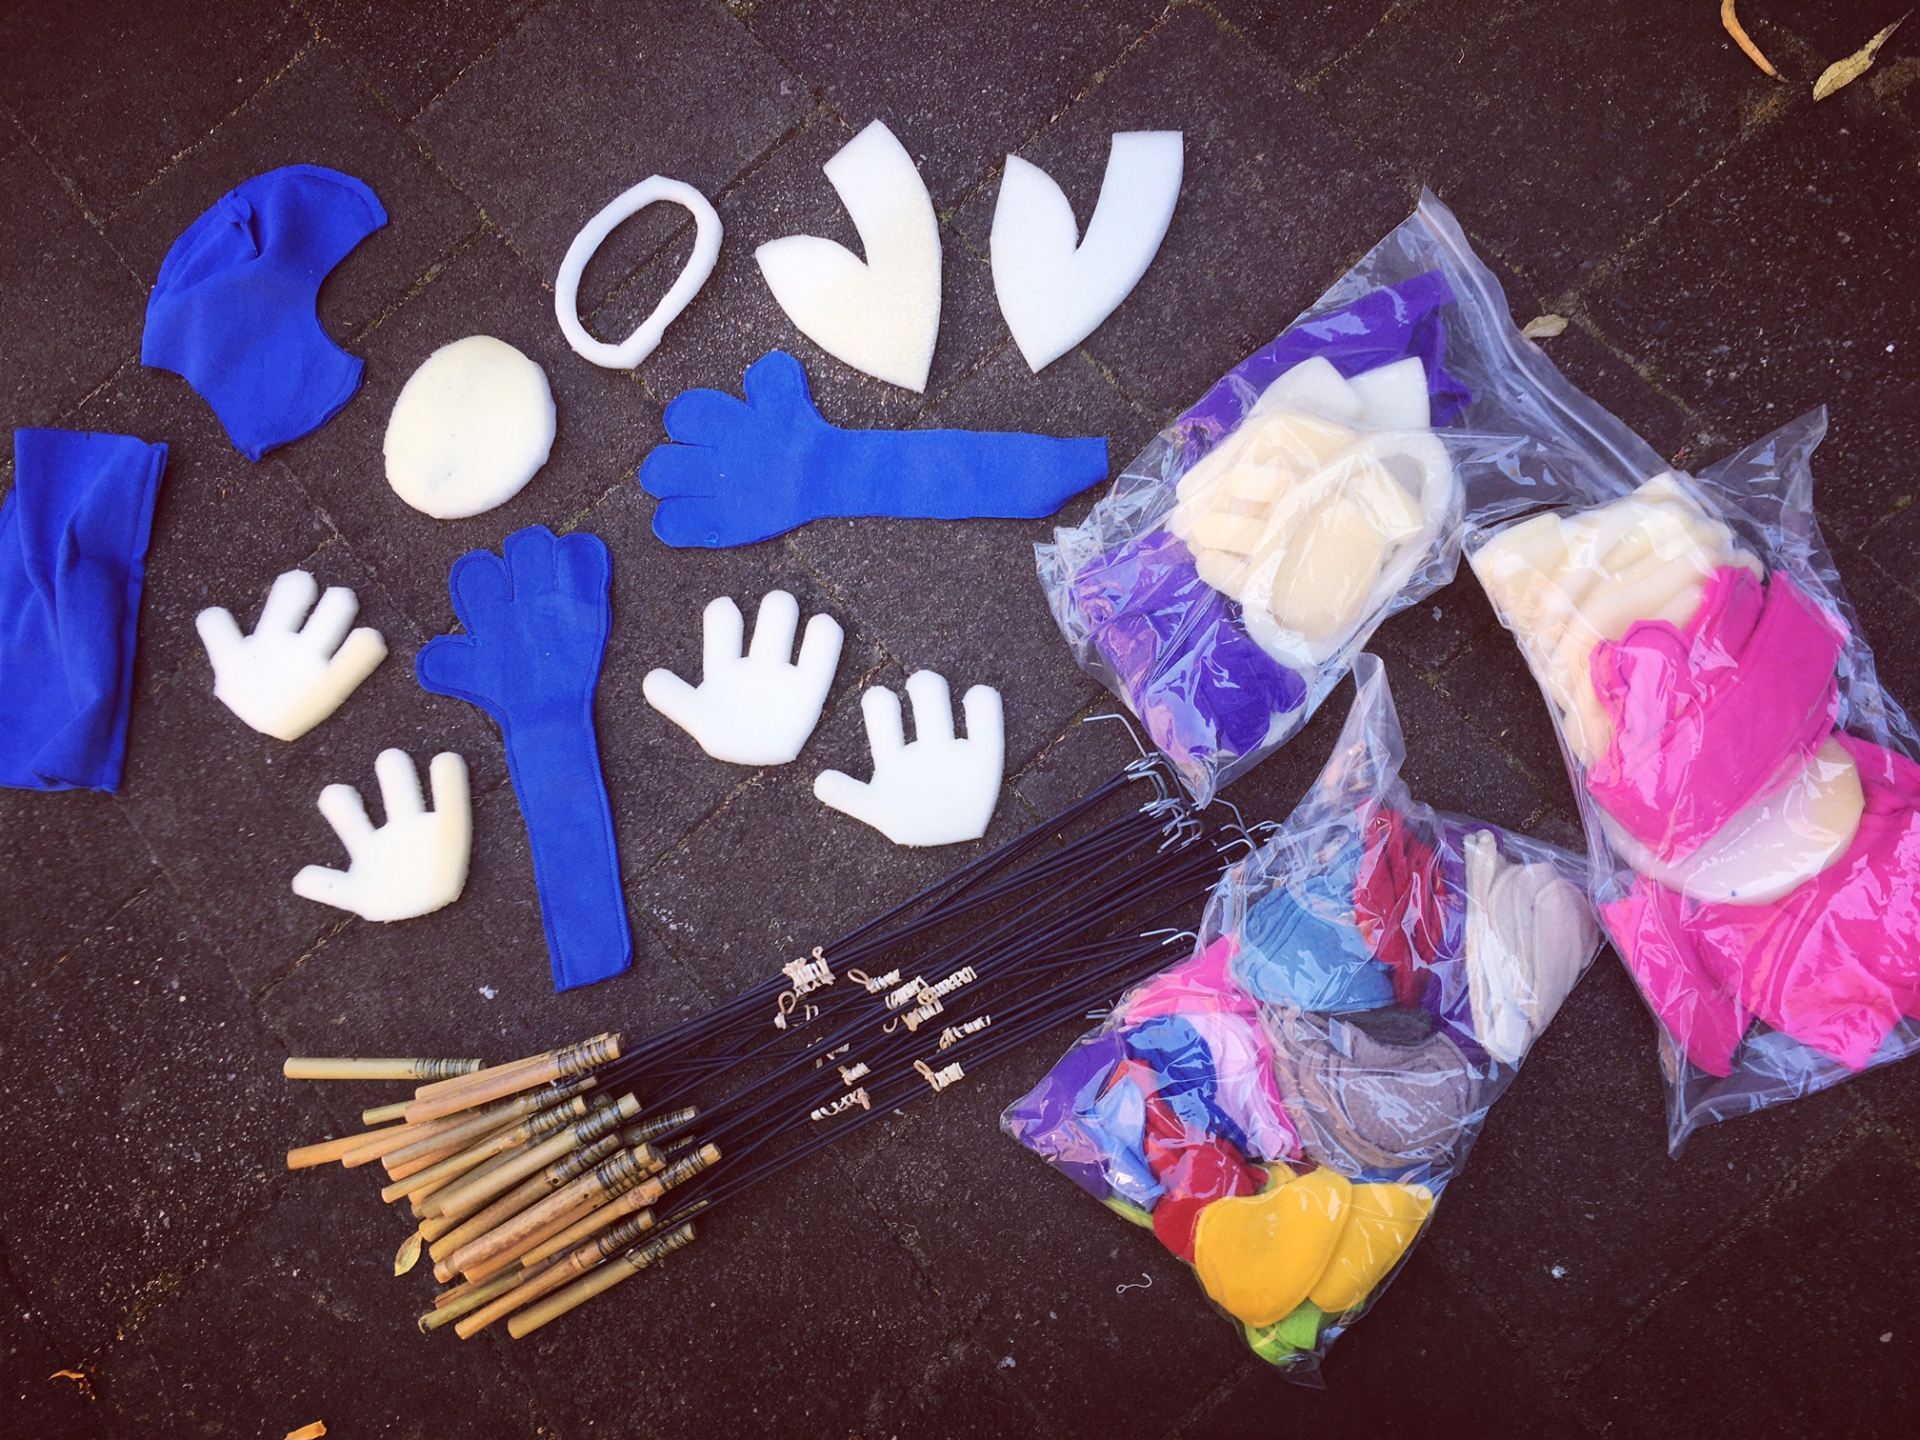
  • Ingredients to make a dog puppets.

After lunch, the two groups swapped locations. The advanced group went up to the student union for the first performance workshop. It was a wonderful experience for me, because after 3 previous attempts at Beyond the Sock, many of the elementary puppetry moves came back to me naturally! I was given the feedback that my skills were solid, especially walking onto camera, talking and walking off. I am still finding here/ there exercise tricky, but we were also given new exercises to start extending our skillset.

Day 6, Thursday June 6 2019

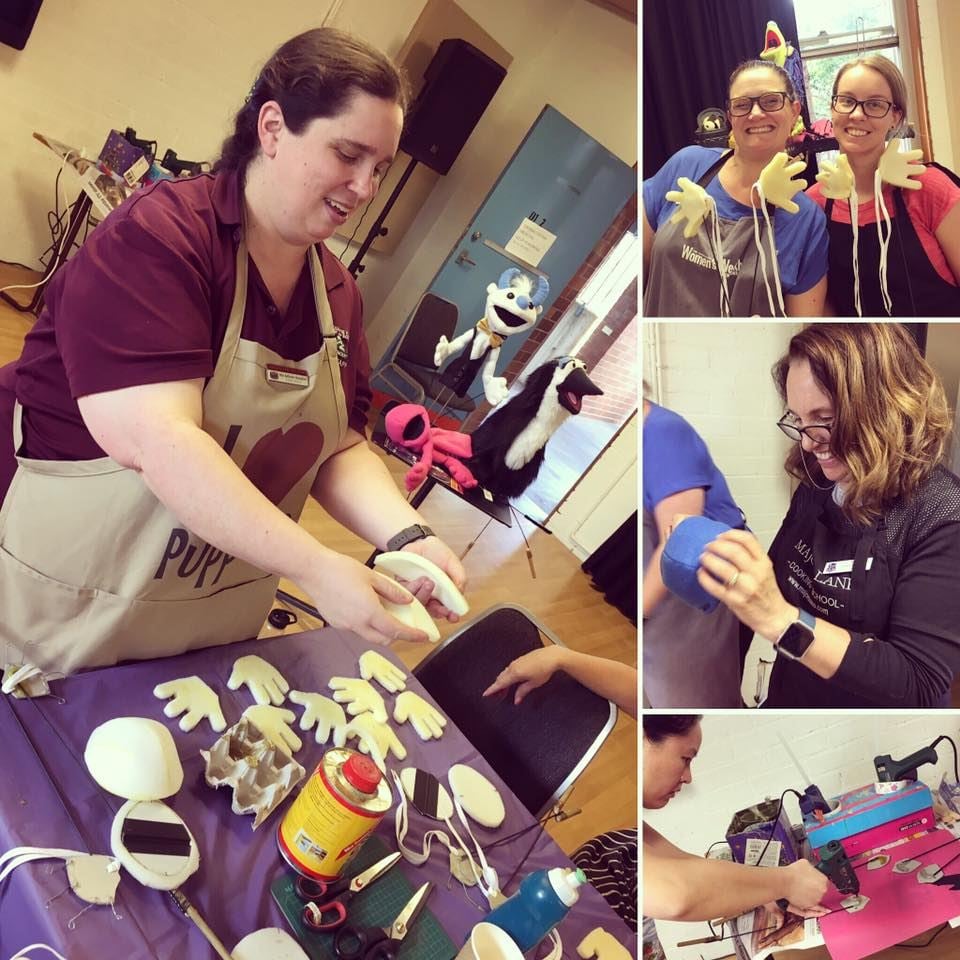
As soon as we arrived at the university, the advanced group went straight to the building room to start work on cutting out all the separate sections of fur. The head of my puppet was made up of 16 separate pieces. I spent most of the morning session sewing the pieces together. During the session, a reporter from the local paper came through the room with the director of the program. The reporter asked me questions about my experience over my four years at Beyond the Sock and how I have used the experience in my puppetry and teaching practice. The interview did slow my work down, and I had a particularly challenging build with the sheer number of fur pieces I had to put together, but I enjoyed talking about my work with the reporter.

  • 3D printed mouth plate grip designed by Project Puppet.

In the afternoon performing session, the advanced group had the opportunity to learn how to puppeteer live hand puppets, and the concept of performing a right hand for a main puppeteer. I had the good fortune to right hand for my teacher. The exercise involved passing a roll of tape between each of the three characters. It was very challenging because I could not see a monitor, and my teacher is significantly taller than me. Many of the people in the advanced group, including myself all pulled up sore in the upper arm after the right handing exercise.

We had a casual get together in the hotel that night after dinner. I spent the evening sewing more of the pieces of the head fur together so that I could catch up to the rest of the group with my work.


Going Beyond the Sock in 2019 Day 1-3

Well, once again the puppets and I are travelling to the USA to attend Beyond the Sock Puppetry workshop in Texas USA, but first, we are making a little stop in Atlanta, Georgia. We left Sydney on Friday, May 31 on an Airbus A380. I travelled in QANTAS Business Class, and the puppets had their own party down in the hold just like Kermit, Fozzie and Gonzo in the Great Muppet Caper movie.

Muppets in the hold of the plane back to USA in the Great Muppet Caper

Day 1- Saturday, June 1, 2019

I spent today at the Center for Puppetry Arts in Atlanta USA. Since the Center was between puppet shows in their theatres, the Center was holding a Jim Henson Fantasy Film weekend focusing on the Dark Crystal (1982), and Labyrinth (1986). My day started at the Make a Puppet table, where I got to make a Fizgig paper hand puppet, followed by a Dark Crystal Shard hunt around the Dark Crystal exhibition and atrium, a tour of the Jim Henson collection permanent exhibition, and assisting with a Labyrinth jigsaw puzzle.

  • Lucy and Miss Hannaford outside the Centre for Puppetry Arts

Puppet highlights included seeing Topthorn- the black horse puppet from Warhorse. It was the closest I have ever gotten to the horse puppets.

In the evening, I attended a workshop called Creature Features with Professor Mark from Cartoonyville. we learnt about different kinds of materials that can be used for puppet eyes, where interesting puppet teeth can be found.

Day 2- Sunday, June 2, 2019

Today I felt very tired with the jet lag, so I spent the morning resting. In the afternoon, I had the opportunity to visit one of my puppetry teachers BJ Guyer. I have been learning with him through his classes with the Stan Winston School of Character Arts since 2014. It was so special to sit with him and talk about puppets for a few hours.

Day 3- Monday, June 3, 2019

Very early start today- had to be at the airport for my flight to Texas at 6am, so it was necessary to get up at 3am. The best thing about where I stay in Atlanta Midtown is that it is only 2 blocks from the MARTA train to the airport. The flight left on time, and arrived early in Dallas Fort Worth! I met with my good friend Pam who is a building assistant and Beyond the Sock, and we chatted while we waited for another attendee to arrive, so we could travel to the hotel together.

Later in the day, I went with a group of attendees on a shopping expedition to the local craft stores, which are within 10 minutes walk of the hotel. I was even able to purchase a book I have been waiting a long time for- Adam Savage’s “Every tool’s a Hammer”. Tomorrow, Beyond the Sock begins…

Adventures in STEM- making robotic progress with Ardunio

Arduino is not only a fabulous circuit board, but it is also it’s own language with its own grammar and syntax rules. Using the Arduino basics course from Stan Winston School of Character Arts, I was able to program my Arduino Uno board to do some very simple functions.

Such as:

Programming a buzzer to make sound,

https://www.instagram.com/p/Bc2wpS1DkmI/

Programming a servo to move,

https://www.instagram.com/p/Bc2zdigDI8r/

Making my first code!

https://www.instagram.com/p/Bc5f4qmjA_9/

Which has all lead towards me assembling my first actual robot!

https://www.facebook.com/katherine.hannaford.9/videos/817606211744671/

I am calling my robot Rosie after the robot in the Jetsons. There are not enough female robots in popular culture and my long term goal is to eventually have Rosie talking like Rosie from the Jetsons! My Rosie is a 2 wheel drive platform from Jaycar, with an ultra-sonic sensor on the front so that she avoids obstacles. Assembling just the platform was tricky as the instructions were hard to find and not linked in the assembly instructions for the whole robot!

The first modification I want to make to the robot is to add a switch so I can turn her on or off. At the moment, I can only turn her off my removing a battery from the battery holder. I also want to experiment with the robot on different surfaces. I was noticing during the first drive that, the wheels got stuck on the thick nylon carpet in my house. I want to compare how Rosie runs on low pile carpet, tiles, and concrete.

What I haven’t been able to achieve yet is to take the Uno board and several other components and write custom code for it yet. So far, I am relying on code that is available in the Arduino Library or on project sheets. My next experiment for Rosie is to add a line trace module to Rosie’s base chassis and see if she can follow a line. My next experiment in coding is to see if I can combine a button press input to a potentiometer and make a joystick work.

Miss H


Adventures in STEM- Learning to play with Arduino

In 2018, I will be teaching stand alone STEM classes instead of puppetry. First thing I want to say is I don’t like the acronym STEM which stands for Science Technology Engineering and Mathematics. I prefer STEAM with the A standing for the Arts. Creativity is a very important component when solving real world problems, and in STEAM, creativity is included under A for Arts. For the purposes of this blog, I will refer to the new course as STEAM. So, if you prefer to leave the A out, that’s fine, but I will be all inclusive and call it STEAM.

I have never taught STEAM as a subject before. I have taught many students and colleagues a great deal about using technology to solve problems in teaching and learning but not within the framework of STEAM. I have also used a great many principals of STEAM within my puppet building, through project based learning, iterations and 3D printing. I will be teaching stage 4, which so far, has no program or resources that I am aware of, that can guide my preparation over summer. My school does have access to the amazing iSTEM Syllabus and online resources but the course I am teaching cannot overlap that sensational course.

So what am I doing to prepare myself for an unknown course?

  • I am creating a STEAM pinterest board of activities and classroom organisation which might help me in the year ahead.
  • I bought an Arduino starter kit from Jaycar Electronics to start learning how to code my own robots. The best part is I can apply this learning to my puppetry to make my first animatronics move using coding!!!!!!


Plastic box containing multiple small electronic components
My Arduino Learning kit with everything to create my first robots!

I am using the Stan Winston School of Character Arts course on Arduino Programming Basics to help me understand the potential that is within this kit.

I have completed my first little project of making an on-board LED light turn on and off by pressing a button! Here are the instructions from Arduino’s website!

https://www.instagram.com/p/Bc1QyqTjTgg/

Onto my next project!

Miss H

Learning about video production

Learning about video production

Over the last ten weeks, I have been teaching green screen filming to a wide range of faculties at my school. We have had multiple classes in English, Sport, Commerce, and Geography come through and use the green screen. Originally, this started when faculties kept borrowing my green fleece fabric for puppet making to use as a green screen with limited success. Fortunately, I found in a resource catalogue a proper green screen kit with 4 soft box lights which I purchased for my school.

I also purchased a new camera kit for the filming that we are doing at the school for the various projects the school is involved in regarding Teacher Professional development and student teacher experiences. The camera kit contains a XA35 Canon professional camera, a boom microphone, a camera mounted microphone and lapel microphone. Combining the two kits, also gives students an opportunity to use professional equipment, and for me, the opportunity to use professional grade equipment to continue practising my monitor Puppetry skills.

When all the equipment arrived, and I started setting it up, the first thing I needed to learn was how to light the green screen properly. I found a wonderful Lynda.com course that helped me understand how to light the screen properly.

Given the number of students who wanted to film using wide shots, it became necessary to purchase a matching additional green screen from Fotogenic to use as a green floor mat.

I was very surprised that the green screen kit bags did not have built in storage space for the actual screen. I feel that it is very important to keep both of the green screens clean and store it tidly with its frame. I ended up purchasing a Gurli cushion cover from Ikea. It is a perfect size for storing both of the screens folded neatly. It’s also bright green, making it very easy to spot in the storeroom.

20171212-052248.jpg

The scariest thing about the green screen setup is how easily the lights can fall over and the globes inside smash. When the globe smashed, I was worried that the large 125W globe would be very expensive to replace. I was pleasantly surprised when the replacement globes from Fotogenic were less than $40. To prevent the light stands falling over in the future, I will be purchasing the appropriate sandbags for the lights so they are less likely to tip over when knocked.

The next amazing thing I learnt while creating the green screen filming kit was how using a teleprompter really helped improve student focus and performance while on camera. The idea for adding a teleprompter came from observing the performance of a year 8 student who is a public speaker and debater. His group was creating a mock- news report, and this student was the news anchor. He delivered all of his lines off the cuff, with enormous confidence, almost directly into the camera. If we had a teleprompter, his performance would have shifted his eye focus directly into the camera, making it professional.

Given in this day and age of ask google and learn from YouTube, I found a number of tutorials online that allowed us to use a school iPad as the prompter display, an old picture frame, 2 science retort stands, a paper box with lids and some black fabric.

20171212-053506.jpg

The teleprompter apps we have been using is called Teleprompt+3 which is a paid app that works with Apple Watch. This app is great because it links directly to Dropbox and Google Drive, so students could share their script with me and I could bring it up on the iPad with very little delay. The other app we have been using is Parrot Teleprompter which is a free app. Parrot works very well, and I copy the scripts using email or the google drive app and paste the contents into the app. Both apps are easy to use, the speed of the prompter can be changed for the student, as well as the colour and size of the text. In class, we used both an iPad Air2 and a IPad Pro. The most challenging part of the teleprompter setup we were using, was that we could not change the height of the prompter easily. The deputy principal was really excited at how I had created my own prompter, that he wants me to purchase a professional prompter for the school filming kit on an adjustable stand!

Here are some examples of the fun I have had filming with the students at my school:
https://www.facebook.com/MacquarieFieldsHS/posts/1951851818203471
https://www.facebook.com/MacquarieFieldsHS/posts/1915277931860860

Teaching Puppet Making to Drama Teachers

Teaching Puppet Making to Drama Teachers

Over 2 days, I had the opportunity to co-lead a Puppetry workshop for Drama Teachers at the Arts Unit NSW. The aim of the workshop was to give Drama Teachers from Primary, Seconday and Special Education settings the opportunity to make a mouth puppet (aka “Muppet” Style) and experience different strategies of teaching puppet performance in the classroom. The Arts Unit is part of the New South Wales Department of Education, and they promote and support all of the Creative and Performing Arts in NSW Public Schools. For me, this was an opportunity to show leadership skills, share how I use Puppetry daily in my school library, as well as showcase my school’s Puppetry class.

There were 15 participants in the workshop from a wide range of primary schools, high schools and special education settings. My role in the workshop was to teach the puppet building part of the workshop, and share the learning I have been doing in monitor puppetry over the last 3 years at Beyond the Sock. One really interesting thing I noticed about how 21st Century Teachers take notes. I cannpot recall any of the teachers taking written notes. Most of the teachers wanted to film my explanations on their phone or tablet. I had to remember to allow a few moments for the teachers to get into a good position to film the explanation.

What went well:

  • All the participants had fun! We could not get them to go home at the end of the first day, and the participants arrived at the workshop early on day 2. All the puppets were unique and special!
  • Having all the kits pre-cut and pre-sewn did save a lot of time and hassle. However, some teachers indicated on their feedback forms that they wanted to see the whole process from the beginning including cutting out the foam and fabric using the patterns. Perhaps I can accommodate that part with a video showing how to cut out the foam and fabric.
  • Using the dome eyes from Out of the Box Puppets worked really well over the traditional Spoon eyes. It does mean that in potential future workshops, I don’t need to take my whole folding crate of eyes.
  • Everyone used my 3D printed nose forms, as well as my plastic easter eggs. A few people also used the small dome eyes as nose forms. The participants also enjoyed using my box of precious Antron Fleece scraps to make the eyelids and noses for their puppet.
  • During the performance side of the workshop, doing a conga line to practise sharing the frame was a great deal of fun. It meant that the participants did not have to worry about their puppet standing straight and maintaining eye focus into the camera. The participants could just have fun with the frame.

What could be improved next time:

  • Give the participants 2 pieces of wire each and use florist wire instead of galvanised wire. Florist wire is easier for inexperienced puppet builders to bend, but the fingers of the puppet will not be as strong.
  • Need to have at least one pair of pliers per person as it was too difficult to have just 5 pairs of pliers for 15 people. Many participants had to wait a long time between steps because there were not enough pliers.
  • Have just the instruction portion only of the pattern from Project Puppet on the Smart TV/ or as printouts for participants to follow
    • if they are running behind the rest of the workshop,
    • didn’t listen to the verbal instructions or missed the demonstration.
    • It would also be helpful for people who have a gift for building to move ahead of the group.
  • The puppets to only have one arm rod. The other hand could be safety pinned/ stitched to the body of the puppet. It would make manipulation easier for beginner puppeteers
  • The neck and body join could be pre-sewn. It would save time during the workshop. It would mean that the only sewing for participants would be the mouth felt and the hand slits.
  • Drama Teachers hand sewing parts of their puppet's "Skin".
    Drama Teachers hand sewing parts of their puppet's "Skin".

Making my First Full Body Puppet: Part 10

Today is Celebration Day! All the work over the last 2 months on Totoro came together today!

The day started by putting on the legs of Totoro. I then had an hour to wait until the opening ceremony of Celebration Day so I read my favourite book- Jim Henson The Works. My colleagues took a photo of me reading because they know that one of my favourite Muppet pictures is of Richard Hunt reading the newspaper while wearing the legs of Sweetums.

Getting ready to be Totoro- reading my favourite book.

I had entered my Totoro puppet in the Costume Parade. We had to wait 30 minutes in the school hall for the parade to start. While waiting, and shortly before the parade was to start, I was showing the students how the whole costume comes together. As soon as the backpack took the full weight of the puppet- a section in the middle broke- one of the struts had come out of the t-joint, and the puppet fell onto me. I could not fix the backpack in the hall, so I had to leave it behind and hold up the whole costume with my left arm during the costume parade.

Walking out of the hall during the costume parade was an amazing experience. As soon as Totoro appeared, the whole school roared and cheered for him! Because the hall door and back part of the stage was in shadow, it was quite easy to see where I was going. As soon as the sunlight hit the mouth, I could barely see where I was going. Fortunately, I did not run into any of the obstacles on stage, or run into the students who were at the front of the stage as part of the parade. A colleague of mine, standing next to me, was dressed as an inflatable Jabba the Hutt. We made a very funny pair.

https://www.facebook.com/MacquarieFieldsHS/photos/a.1758297900892198.1073741829.1135970976458230/1831953590193295/?type=3&theater

After the costume parade was over- I walked back into the hall and took Totoro’s top half off. I had been holding him up for 15 minutes. After the Opening ceremony was over, I put Totoro back on for 10 minutes so that the students could get selfies and hugs from Totoro, and so I could take him over to the Photo Booth to take a few silly pictures. Afterwards, I completely changed out of Totoro so I could run the puppet table during the day. All up, I was in Totoro for 2 hours. It gave me a new understanding and appreciation for what my puppetry teachers go through when they perform costume characters.

Builiding Totoro has been an amaxing experience. I have learnt a great deal about making big puppets, but I still have a lot to learn about joing PVC conduit. Thanks go to my amazing Library assistants who helped with many sections of the build, and thanks are also due to Adam Savage for sharing his build methodology in the original inspirational video. I could not have done it without that original video.

  • Totoro comes out to a roar from the whole school.


Making my First Full Body Puppet: Part 9

It’s one day left until Celebration day! Today I was able to finish the feet and legs, attach the arms and try on the top half of the character to see how easy/ difficult it was to see and move inside the puppet.

To finish the legs, I made tubes of fur, sewed the bottom to the fur covering the feet and sewed the top of the tube to the top of a pair of leggings. I discovered one benefit of attaching the legs to just the fur of the feet, it gave me room to be able to get the real shoe inside the foot onto my foot more easily! I did cut the fur tubes 10cm too short because when I tried the whole puppet out, the top of the leggings could be seen, so I stitched on extra pieces of fur.

Legs and feet of Totoro

The arms were made the same way as in Adam Savage’s Totoro video. I used my own arm as a template with a mitten for the hand. All of the claws on my Totoro are made from box cardboard covered in black spandex. The claws were attached by cutting a slit through the fur, then fixed in place using hot glue.

Totoro has arms!

I tried on the top half of the costume with the backpack frame. The mast on the frame was still loose so I could make adjustments, but it rotated too far and the puppet was not being supported properly. It has turned into an overnight or first thing in the morning fix for me.

  • Adjusting the legs of Totoro

While I was in the costume, a student teacher saw me and wanted a selfie with Totoro! He already has fans! Tomorrow is going to be interesting!

Totoro’s first selfie!

Making my First Full Body Puppet: Part 8

Making the facial features of Totoro.

To make Totoro’s ears/ horns, I modeled the ears using 3 modelling and printing. Due to the scale of the piece, I had to try to cut the horn into 3 pieces. I had a great deal of difficulty in splitting the shape in that I am still not familiar with breaking a model up in Creo Parametric 3.0. I was able to make the bottom two pieces quite easily, but making the top pointed part fit proved to be very difficult to make the right size. I ended up achieving a satisfactory result after lots of failed attempts. I definitely need to learn an alternative approach to making a 3D model that breaks up into interlocking pieces.

To cover the ear with fur, I put the ear into a freezer bag, and covered the bag with small pieces of tape. I then used a small pair of embroidery scissors to cut the tape and plastic off and cut lots of small darts to create a flat shape. The flat shape then became the pattern for cutting the fur. I did add a 3mm seam allowance while cutting the fur so I could hand sew the fur together and turn it over the 3D printed form. The ears/ horns were then sewn around the base onto the fur.

Fur covered, 3D printed ear forms with pattern.

I used more butcher’s paper to create the shapes of the eyes, nose and mouth so that I could experiment with sizes and placement.

Planning the facial features of Totoro

To make the nose, I used the butcher’s paper template as a guide to the overall size of the nose and built plasticine up on it. I then used four layers of my own hand made paper to cover the nose form.

Sculpting the nose form from Plasticine.

I created the eye forms by modeling them on the computer and printing them out using the 3D printer. I then used black acrylic paint to create the pupils.

3D printed eyes ready for painting with the painted papier mache nose
Inside of the papier mache nose with the 3D printed eyes.

The mouth of Totoro is how I see out of the puppet. I originally used three layers of curtain netting, but it was too hard to see out of, so I removed one layer.

Totoro’s teeth were drawn onto the mesh using a black Sharpie.

Mouth opening covered with white mesh curtain fabric.

To make Totoro’s whiskers, I used long, black zip ties. To attach them to the face, I cut a small slit into the fur using embroidery scissors. Then, I inserted the square end of the zip tie and glued it in place using hot glue.

Making my First Full Body Puppet: Part 7

Now that the body is starting to come together, my next challenge was to make the feet. I have never made mascot sized feet before, so I went looking for tutorials to help me.

I found a pair of shoes at Kmart for $3, a floor mat from Clark Rubber to make the soles of the feet, and I ended up recycling bits of block foam I had in storage, leftover from previous puppet carving projects.

Using blocks of foam and carving techniques to make Totoro’s feet.

I wore the in-progress feet at school while walking around the school library so I could test how well the glue was holding as well as how it felt to walk in oversized shoes. During the test, the school’s Community Liaison Officer filmed my test for the school’s Facebook page!

Once the feet were finished, I had time to make the tummy of Totoro. I turned the fur covering of the body inside out, drew a circle shape for the tummy, cut it out and used the circle I had cut as the template for cutting the cream tummy fur.

Cutting out the tummy fur of Totoro

https://www.facebook.com/MacquarieFieldsHS/videos/1789369294451725/


Skip to toolbar